Amigurumi Camomile Girl Free Crochet Pattern
Welcome to our delightful world of crochet creativity! If you’re a fan of amigurumi and all things cute, you’re in for a treat. Our “Amigurumi Camomile Girl” is a free crochet pattern that will make your heart bloom just like the prettiest of camomile flowers. With a few skeins of yarn and your trusty crochet hook, you can craft your very own camomile-inspired amigurumi doll. This enchanting pattern is perfect for both beginners and experienced crocheters, and it promises hours of crafting joy. So, grab your yarn, hook, and a cup of your favorite tea, and let’s get started on this charming project.
For knitting you will need:
For the body Pekhorka “Openwork” (100% mercerized cotton, 280 m / 50 g) – a little flesh-colored No. 068, a little white, yellow and green for clothes, a hook of 1.25 mm.
For Kamtex hair, Karakul Stretch (44% wool, 44% acrylic, 10% cotton, 2% lycra, 145 m / 100 g) is slightly white.
For the Vita cotton “Coco” flower (100% mercerized cotton, 240 m / 50 g) – 10 g of white color and a little green, hook 1.5 mm. For the middle “Kuzya Klubochkin” from Color City or any other similar thread, for example, Alize “Softy”, Lanoso “Puf”, etc., hook 6 mm. For stability, you need some kind of weighting agent, something flat and rather heavy, with a diameter of not more than 4 cm, I used coins that I put between two circles cut out of thick plastic. The doll is attached to the flower with the help of a gum thread (spandex), you need just a little bit.
Filler (holofiber).
Copper wire with a cross section of 1 mm for the frame of the pupa (65 cm) and wire for beadwork with a diameter of 0.3 mm for the frame of the flower petals.
Eyes 5 mm, cilia, a little white felt.
If desired, a dry pastel for tinting, you can tint in any other way familiar to you.
When using these materials, the pupa is 14 cm tall

Abbreviations
sc – single crochet
dec – decrease (2 sc knit together)
inc – increase (knit 2 sc from one)
sl-st -slip stich
ch – chain
hdc – half crochet
İnc-hdc – increase from hdc (tie 2 hdc out of one)
Dec-hdc – decrease from hdc (2 hdc knit together)
dc – double crochet
The toy is knitted in a spiral, without connecting posts and lifting loops.
The description of the knitting of this toy is based on the fact that the beginning of the row throughout the knitting of the whole part does not shift and passes in a straight line, but since we knit in a spiral, without lifting loops and a connecting column, the beginning of the row will shift right, so every 4- 5 rows need to be knitted at the end of the row an additional column of displacement, so that the beginning of the row was again in the same place. These additional columns in the description of the series are not taken into account.
Thanks to this way of presenting the description, you will always know where exactly you should get the increase or decrease, and the elbow / knee will always be exactly where they should be. The offset of the beginning of the row when knitting in a spiral can be different for different yarns and for different density of knitting, therefore aligning the marker makes the description universal – from any yarn, in any hands you get exactly such a detail as it should be.
PATTERN

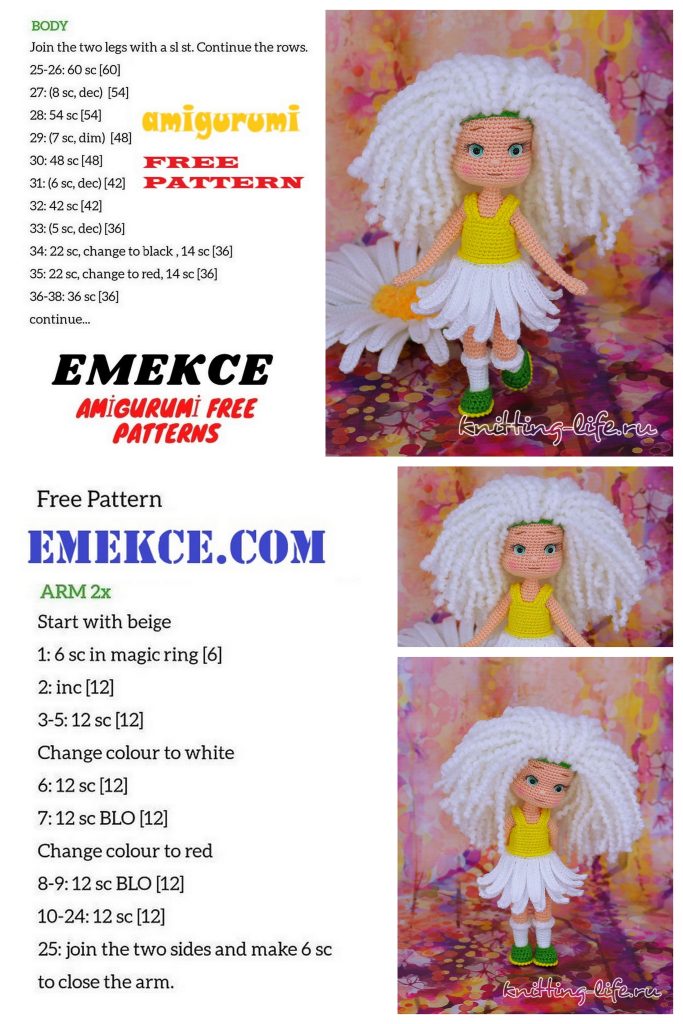
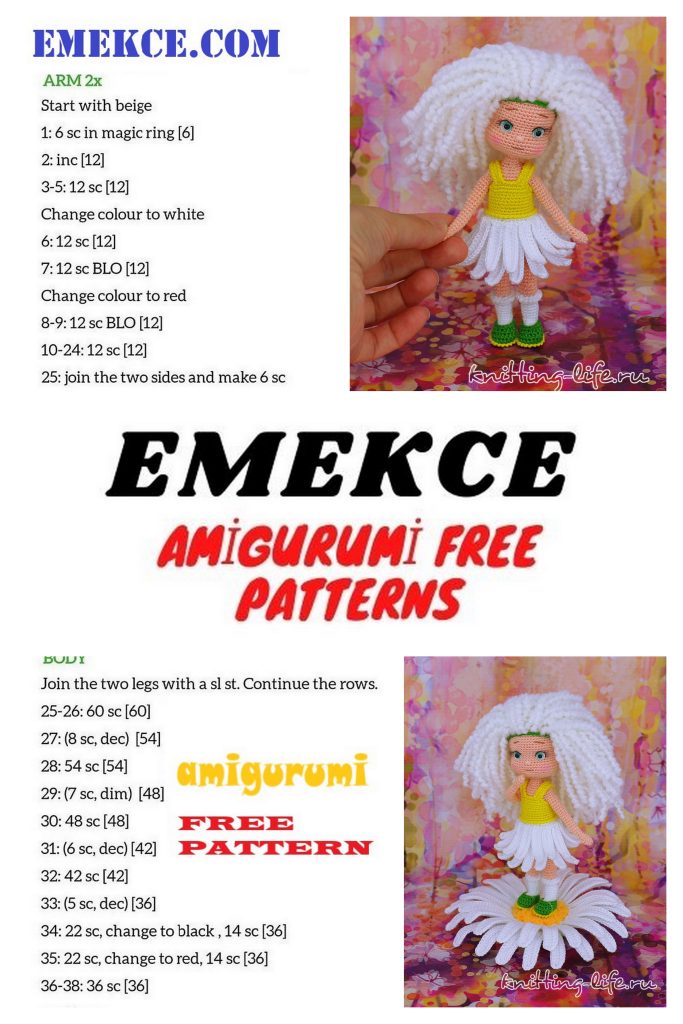
Crochet handles
The beginning marker of the row runs in the middle of the outside of the hand.
1 row: 6 sc in amigurumi ring (6)
2 row: (inc, sc) x 3 (9)
3 row: 9 sc (9)
Start knitting in the middle of the outside of the hand
4th row: dc, 8 sc (9) – when knitting the first sc after dc, the double-crocheted column folds in half, forming a bump – thumb.
5 row: (sc, dec) x 3 (6)
6 row: 6 sc (6)
7 row: (2 sc, inc) x 2 (8)
8-15 rows (8 rows): 8 sc (8)
16 row: 3 sc, inc x 2, 3 sc (10)
17-22 rows (6 rows): 10 sc (10)
For the left handle we knit another 1 sc, for the right – 6 sc. We fix the thread, cut it off.
We measure out 12 cm of wire with a cross section of 1 mm, bend one end, wrap it with adhesive plaster. We insert into the pen. We fill the handle with filler in the upper part.
We measure the wire 12 cm; We fill the knitted handles with a filler, for example, holofiber
Crochet legs
The beginning marker of the row runs in the middle of the inside of the leg.
Middle marker
We start knitting with a white thread.
1 row: 4 ch, from the 2nd loop from the hook: inc, sc, 4 sc to the last loop, on the other side of the chain: sc, inc (10)
2 row: inc, 3 sc, inc x 2, 3 sc, inc (14)
3-4 rows (2 rows): 14 sc (14)
5 row: (dec, 5 sc) x 2 (12)
6 row: 12 sc (12)
RIGHT PUPPET FOOT
Knitted right leg also with marker
7 row: sc, 4 ch, 4 sc skip, 7 sc (12)
8 row (we knit the heel): dec x 6 (first sc in the foot, then 4 sc in the chain and 7 sc in the foot)
We fix the thread, cut it, tighten the remaining hole.
We attach the thread to the column between the heel and the foot on the side of the marker and knit the LEG:
1 row: sc in the interval between the heel and foot, 4 sc in the foot, sc in the interval between the foot and heel, 4 sc in the chain of the 7th row (10)
2-3 rows (2 rows): 10 sc (10)
4 row: 7 sc, inc x 2, sc (12)
We measure 20 cm of wire with a cross section of 1 mm, bend one end in the shape of a foot, wrap it with adhesive plaster. We insert into the leg. We stuff the leg with filler.
We bend the wire in the shape of a knitted foot; Wrap the wire with adhesive plaster; We hammer the knitted leg with amigurumi filler
5-9 rows (5 rows): 12 sc (12)
10 row: 2 sc, dec, 4 sc, dec, 2 sc (10)
Change the thread to solid, until the white thread is cut.
11 row (behind the back wall of the loop): 2 sc, inc x 2, 6 sc (12)
Change yarn to flesh
12 row: 9 sc, inc x 2, sc (14)
13 row: 14 sc (14)
Turn the knitting leg From ourselves and left a white thread we tie a golfik for the front half loops of the 10th row:
1 row: (sc, inc) x 5 (15)
2 row: (ch, sl-st) x 15
We fix the thread, cut it, hide the tip. Bend the lapel down. We stuff the leg with filler. We continue to knit a leg:
14 row: 2 sc, dec x 2, 2 sc, inc, 4 sc, inc (14)
We stuff the leg with filler
15-21 rows (7 rows): 14 sc (14)>
We fix the thread, cut it off. We stuff the leg with filler.
LEFT PUPPET LEG
7 row: 7 sc, 4 ch, 4 sc skip, sc (12)
8 row (we knit the heel): dec x 6 (7 sc in the foot, then 4 sc in the chain and sc in the foot)
We fix the thread, cut it, tighten the remaining hole.
We attach the thread to the 4th air loop of the 7th row chain and knit the LEG:
Knit amigurumi leg
1 row: 4 sc in the chain of the 7th row, sc in the interval between the heel and foot, 4 sc in the foot, sc in the interval between the foot and heel (10)
2-3 rows (2 rows): 10 sc (10)
4 row: sc, inc x 2, 7 sc (12)
We measure 20 cm of wire with a cross section of 1 mm, bend one end in the shape of a foot, wrap it with adhesive plaster. We insert into the leg. We stuff the leg with filler.
5-9 rows (5 rows): 12 sc (12)
10 row: 2 sc, dec, 4 sc, dec, 2 sc (10)
Change the thread to solid, until the white thread is cut.
11 row (behind the back wall of the loop): 6 sc, inc x 2, 2 sc (12)
12 row: sc, inc x 2, 9 sc (14)
13 row: 14 sc (14)
We turn the knitting with a leg away from ourselves and left the white thread we tie the golfiki for the front half loops of the 10th row:
1 row: (sc, inc) x 5 (15)
2 row: (ch, sl-st) x 15
We fix the thread, cut it, hide the tip. Bend the lapel down. We stuff the leg with filler. We continue to knit a leg:
14 row: inc, 4 sc, inc, 2 sc, dec x 2, 2 sc (14)
15-21 rows (7 rows): 14 sc (14)
Two amigurumi legs with filler Amigurumi legs. Side view: Connect both legs of amigurumi
We stuff the leg with filler. Do not cut the thread, continue knitting, connecting the legs in the BODY:
22 row: 2 ch, 14 sc along the right leg, sc along the chain, put the marker at the beginning of the row here, now the beginning of the row will be here (middle of the back), in the knitting process we align the marker.
23 row: sc in the chain, (13 sc, inc) on the left leg, 2 sc in the chain, inc, 12 sc, inc, sc (35)
We connect together the wires from the legs, wrap with adhesive tape.
24 row: sc, inc, 12 sc, inc, 4 sc, inc, 15 sc (38)
25-32 rows (8 rows): 38 sc (38)
33 row: 15 sc, dec, 4 sc, dec, 15 sc (36)
34-35 rows (2 rows): 36 sc (36)
36 row: 2 sc, dec, (4 sc, dec) x 5, 2 sc (30)
37-45 rows (9 rows): 30 sc (30)
We fill the body with filler.
46th row: 5 sc, 4 sc together with the left handle (count 4 sc from the last column of the handle and begin to knit from the 4th column), 12 sc, 4 sc together with the right handle (count 4 sc from the last column of the handle and begin to knit from the 4th column), 5 sc (30)
Stuff the body with amigurumi filler; Stuff the body of the toy. Next step: Finish Amigurumi body packing
47 row: 5 sc, 6 sc on the free loops of the left handle, 12 sc, 6 sc on the free loops of the right handle, 5 sc (34)
We connect the wires from the handles with the wires from the legs and wrap with adhesive tape. All 4 delays will go to the neck and further to the head.
Amigurumi headless body tied
48-49 rows (2 rows): 34 sc (34)
50 row: 22 sc, dec, 3 sc, dec, 5 sc (32)
51 row: 5 sc, dec, 3 sc, dec, (2 sc, dec) x 3, sc, dec, 2 sc, dec, sc (25)
52 row: sc, dec, 2 sc, dec, (sc, dec) x 2, 2 sc, dec, sc, 3 sc together, sc, dec, sc (17)
We fill the body with filler.
53 row: sc, dec, sc, 3 sc together, (2 sc, dec) x 2, 2 sc (12)
54 row: 2 sc, dec, 8 sc (11)
55 row: 11 sc (11)
We fix the thread, cut it, leaving a small end for sewing to the head.
We complete the fixation, fix the thread, leave a place for the amigurumi head
Knit the head of the doll
The marker of the beginning of the row runs in the middle of the nape.
1 row: 6 sc in amigurumi ring (6)
2 row: inc x 6 (12)
3 row: (inc, sc) x 6 (18)
4 row: sc, inc, (2 sc, inc) x 5, sc (24)
5 row: (3 sc, inc) x 6 (30)
6 row: 2 sc, inc, (4 sc, inc) x 5, 2 sc (36)
7 row: (5 sc, inc) x 6 (42)
8 row: 3 sc, inc, (6 sc, inc) x 5, 3 sc (48)
9-15 rows (7 rows): 48 sc (48)
16 row: 15 sc, dec, 2 sc, dec, 6 sc, dec, 2 sc, dec, 15 sc (44)
17-20 rows (4 rows): 44 sc (44)
21 row: 13 sc, (inc, sc) x 2, inc, 8 sc, inc, (sc, inc) x 2, 13 sc (50)
22-24 rows (3 rows): 50 sc (50)
Now we will attach the hair to the doll. The principle of hair attachment is shown on the head of another pupa.
We wind the yarn “Karakul stretch” from Kamtex onto a book, a notebook, a sheet of cardboard or any other suitable template and cut it (the length of the cut thread is at your discretion – what length of hair you want to get).
We fix the hair in the following way: we introduce the hook from the inside of the head to the beginning of knitting (amigurumi ring) and bring it out, pick up the “hair” folded in half in the middle and put the loop inside the head. We set aside the required gap and stick the hook into the next column, grab the “hair” again and bring it inside the head, drag it through the loop on the hook. Next, we act in the same way, picking up but high “hairs” and stretching them inside the head, a chain of loops is formed on the wrong side of the head. Each time we tighten the previous lock so that all the loops of the chain lay as tight as possible to the head.
Hair Attachment to Amigurumi Head
We fix the hair up to the 8th row inclusively, starting from the beginning of knitting, each time skipping one row and one column. Keep in mind that with this method of attaching hair, the hair turns out to be quite thick.
We mark the location of the hair with any contrasting thread, taking into account the fact that the marker of the beginning of the row passes in the middle of the nape.
Mark the location of the hair on the head of amigurumi. Right view. We mark the location of the hair on the head of amigurumi. Left view. We mark the location of the hair on the head of amigurumi. Front view
We continue to fix the hair inside this contour, skipping 2 columns and 3 rows. At the border of the contour, we fasten the hair through 1 column and through 1 row. At the end, we fix the last loop on the hook, sewing it with a sewing thread.
We continue to fix the hair inside the contour. Left view. Fasten the last loop inside the head of amigurumi.
We continue to knit the head.
25 row: 3 sc, dec, 8 sc, (dec, sc) x 2, dec, 8 sc, dec, (sc, dec) x 2, 8 sc, dec, 3 sc (42)
26 row: 42 sc (42)
27 row: (5 sc, dec) x 6 (36)
28 row: 2 sc, dec, (4 sc, dec) x 5, 2 sc (30)
29 row: (3 sc, dec) x 6 (24)
30 row: sc, dec, (2 sc, dec) x 5, sc (18)
We fill the head with filler.
31 row: (sc, dec) x 5, dec x 2 (grab the sc of the next row)
We fix the thread, cut it, leaving a small end for embroidering the spout.
Appearance of the head of amigurumi with fixed hair; We fix the thread, cut it, leave the tip
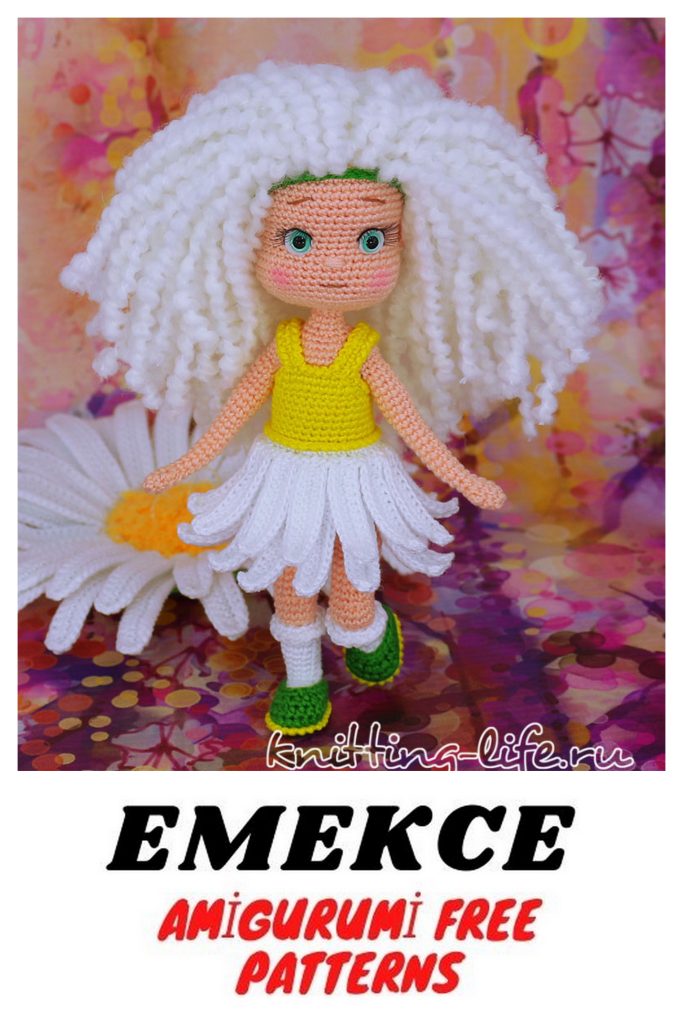
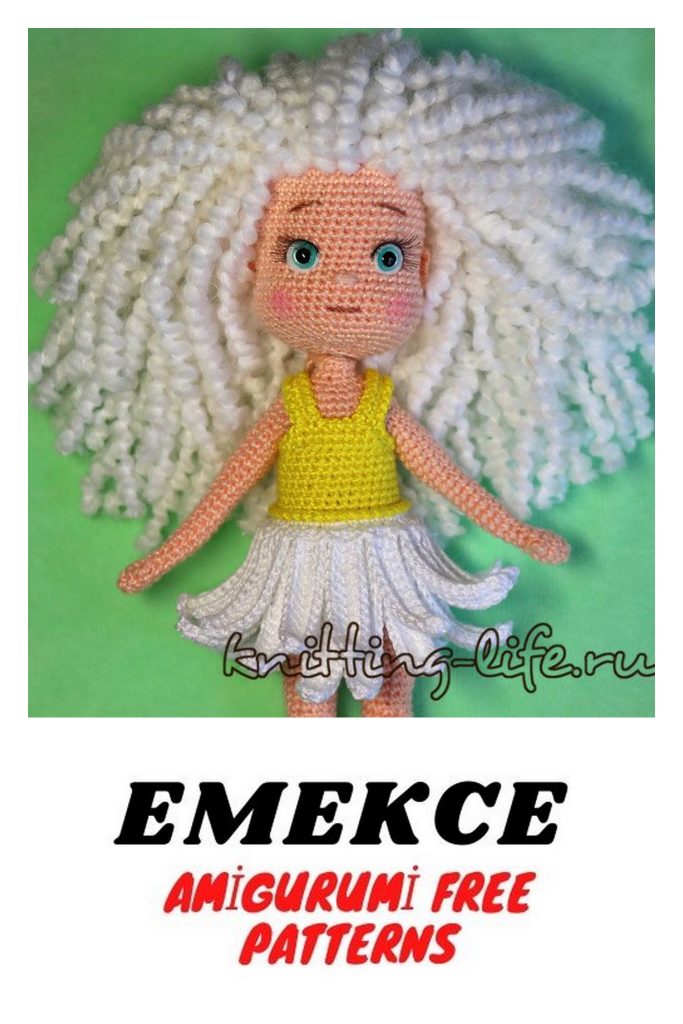
Decoration of the face of the chrysalis
My face design is just one of the options; you can arrange this doll in your own way.
We embroider the contour of the eye with a tambour seam with a flesh-colored thread. Without tearing the thread, we knit a row of sc along the contour 1, for the right eye we begin to knit from below, for the left – from above.
Amigurumi crocheted eye
Left after knitting the head with thread, embroider the nose. Visually define the middle of the face and display the thread between the 20th and 21st rows one column to the right of this middle. Step back to the left two columns and make a few stitches, forming a spout. The stitches go free, we don’t pull anything together.
Knit the nose of amigurumi
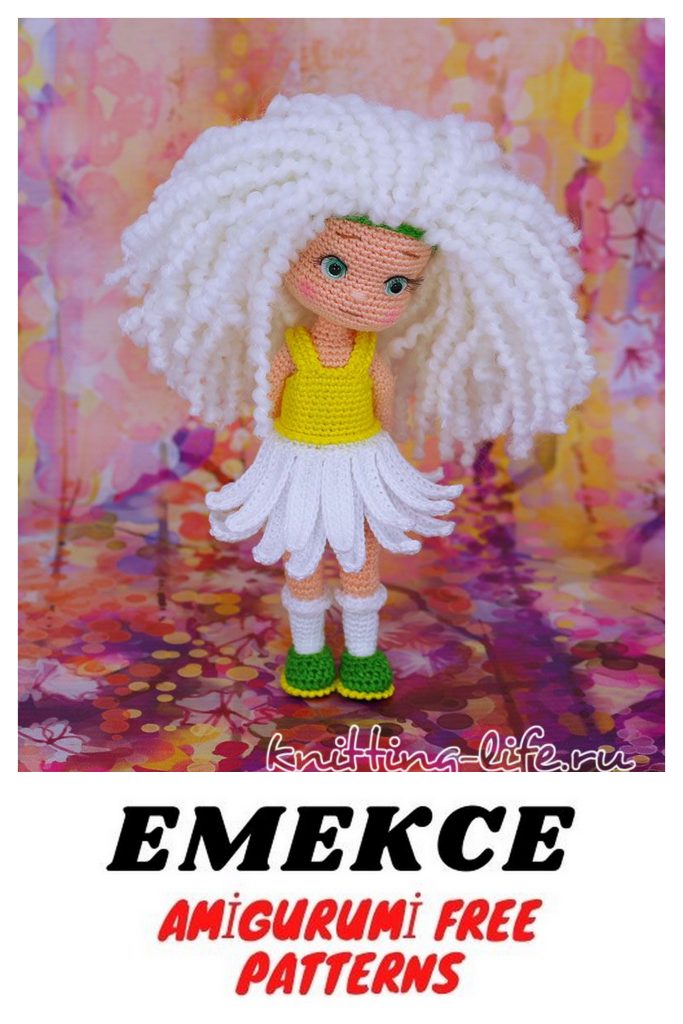
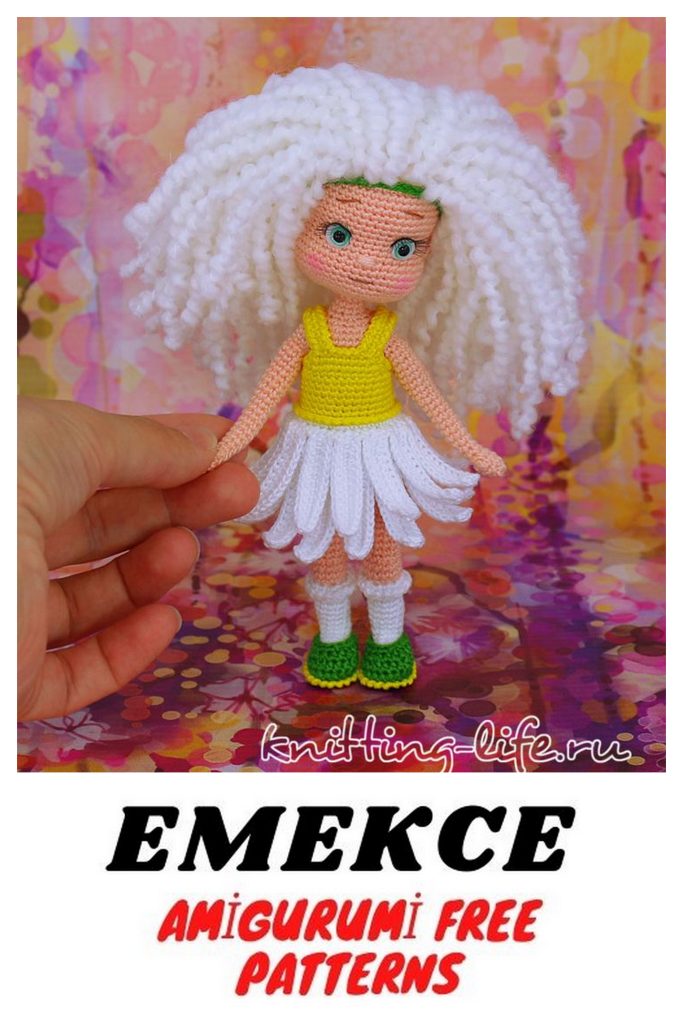
Cut out the felt squirrels in the form of circles, the diameter of a little more than the eye used. Glue pupae to the head (eyes are located between the 17th and 20th rows of the head). Glue cilia (I took the shortest cilia that I had, and even cut them a little). We embroider a mouth and eyebrows. You can lightly brown the cheeks with any tinting method that is familiar to you.
Amigurumi’s decorated face
We knit shoes for amigurumi
We knit with a thread of the same thickness that knitted the doll itself.
1 row: 5 ch, from the 2nd loop from the hook: inc, 2 sc, 4 sc to the last loop, on the other side of the chain: 2 sc, inc (12)
2 row: inc, 3 sc, İnc-hdc x 4, 3 sc, inc (18)
3 row: sc, inc, 5 sc, İnc-hdc x 4, 5 sc, inc, sc (24)
4 row (behind the back wall of the loop): 8 sc, 8 hdc, 8 sc (24)
5 row: 8 sc, 8 hdc, 8 sc (24)
6 row: 6 sc, dec, hdc, Dec-hdc, 2 hdc, Dec-hdc, hdc, dec, 4 sc, dec (19)
7 row: dec, 7 sc, dec, 8 sc (17)
We fix the thread, cut it off. We change the hook to a smaller one (I took 1 mm) and we use a thread of the finishing color to tie the shoe with one row of the step for the left half loop of the third row. We fix the thread, cut it, hide all the ends. We knit the second shoe in the same way.
Knitting shoes for amigurumi dolls
We knit a sarafan for amigurumi
We knit with a thread of the same thickness that knitted the doll itself. We start in yellow.
We type 32 ch, close in a circle with a connecting column.
1-8 rows (8 rows): 32 sc (32)
9 row (behind the front wall of the loop): (ch, sl-st) x 32
We attach the white thread to the first column of the 8th row and knit for the left half loops:
10 row: 2 sc, inc, (4 sc, inc) x 5, 3 sc, inc (39)
11 row (behind the front wall of the loop): sl-st, (14 ch, from the 2nd loop from the hook: 13 sc, further along the dress: 3 sl-st) x 12, 14 ch, from the 2nd loop from the hook : 13 sc, 2 sl-st
12 row (tie the petals): (sl-st skip, sl-st, sc, 9 hdc, 2 sc, 2 ch, 2 sc, 9 hdc, sc, sl-st, sl-st skip, sl-st) x thirteen
13 row (for the half loops left): (3 sl-st along the dress, 18 ch, from the 2nd loop from the hook: 17 sc) x 13
14 row (tie the petals): ((sl-st skip, sl-st) x 2, sc, 13 hdc, 2 sc, 2 ch, 2 sc, 13 hdc, sc, sl-st) x 13
We fix the thread, cut it off, leaving a small end for stitching the petals.
The petals on the skirt will spin up, so we need to flash them. Having retreated several loops from the top of the skirt, we successively grab the top and bottom petals, connecting them to each other.
Petals on a sarafan. One by one we pick up the petals in the process. We sew the petals.
We fix the thread by pulling the petals a little.
The reverse side of the skirt is the base skirt for amigurumi. View from above
We attach the yellow thread to the 11th loop of the chain of the first p dress poison and knit BEFORE:
1 row: dec, 8 sc, dec (10)
We cut the thread, reconnect to the 1st column of the 1st row of the front and knit the 2nd row:
2 row: dec, 6 sc, dec (8)
We fix the thread, cut it off.
We knit BAGS: we attach the thread to one edge of the front and draw a chain of 13 ch, connect the chain to the back of the sarafan with a connecting column, knit another 1 sl-st on the back and return to the beginning of the chain, knit 13 sc, sl-st we fasten the strap to the front of the dress . Similarly, we knit a second strap. We tie the neck and armhole of the sarafan as follows: (ch, sl-st) x in each column. We hide all the ends of the threads.
Ready-made dress for amigurumi
We dress a sarafan on a doll.
The ends of the wire protruding from the body are bent so that the resulting loop reaches at least the middle of the head, and preferably almost to the back of the head. If necessary, cut off the excess wire. Wrap the loop with adhesive tape. We hide all the strings inside the head and sew the head to the body.
We dress a sarafan on a doll amigurumi
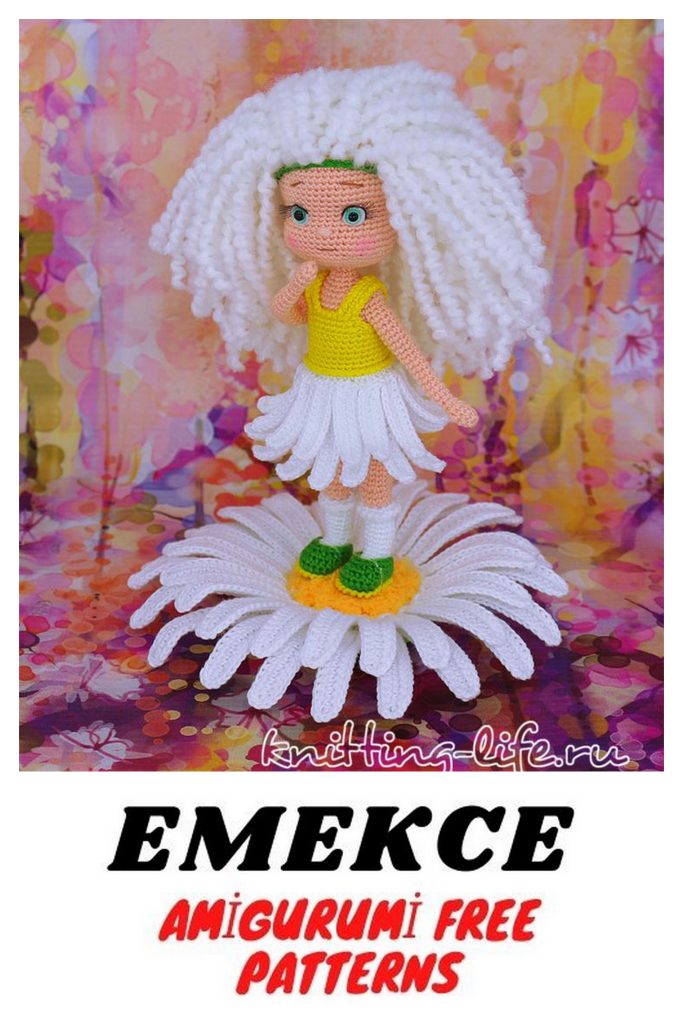
Amigurumi doll decoration
I knitted the middle of the chamomile from “Kuzya Klubochkin” from Color City, crocheting 6 mm:
1 row: 2 ch, in the first loop: 6 sc (6)
2 row: inc x 6 (12)
Change the thread to “Soso” Vita cotton, hook 1.5 mm
3 row: (5 sc in one column) x 12 (60)
In the next row, we begin to knit the upper tier of the petals, tying the bead wire. To do this, we knit the required number of air loops, apply a wire folded in half. We knit the first column, capturing only one wire (introducing a hook between two wires). The second and further all the columns to the end of the chain we knit, capturing both wires.
Stage 1 Stage 2 Stage 3 Stage 4
We don’t cut the wire, we knit directly from the coil, each time trying on the length of a segment folded in half along a chain of ch, at the end of the row we cut the wire. In the lower tier of the petals we knit a wire in the same way.
4 row (behind the front wall of the loop, we knit the wire): sl-st, (18 ch, from the 2nd loop from the hook: 17 sc, further down the middle: 3 sl-st) x 19, 18 ch, from the 2nd hook loops: 17 sc, 2 sl-st
5 row (we tie the petals): (sl-st skip, sl-st, sc, 13 hdc, 2 sc, 2 ch, 2 sc, 13 hdc, sc, sl-st, sl-st skip, sl-st) x 20
6 row (for the half loops left, we knit the wire): (3 sl-st in the middle, 22 ch, from the 2nd loop from the hook: 21 sc) x 20
7 row (we tie the petals): ((sl-st skip, sl-st) x 2, sc, 17 hdc, 2 sc, 2 ch, 2 sc, 17 hdc, sc, sl-st) x 20
We fix the thread, cut it off. The ends of the wire are wrapped with adhesive tape. In the middle we pass two pieces of spandex, securing them with knots on the wrong side. The resulting loops will keep our chrysalis on a flower.
We knit a chamomile for an amigurumi doll, we slip two pieces of spandex. Top view. Petels will hold amigurumi.
We knit the bottom of the flower in green.
1 row: 6 sc in amigurumi ring (6)
2 row: inc x 6 (12)
3 row: (inc, sc) x 6 (18)
4 row: sc, inc, (2 sc, inc) x 5, sc (24)
5 row: (3 sc, inc) x 6 (30)
6 row: 2 sc, inc, (4 sc, inc) x 5, 2 sc (36)
7 row: (5 sc, inc) x 6 (42)
8 row: 3 sc, inc, (6 sc, inc) x 5, 3 sc (48)
9 row: (7 sc, inc) x 6 (54)
10 row: 54 sc (54)
11 row: 4 sc, inc, (8 sc, inc) x 5, 4 sc (60)
12 row: 60 sc (60)
13 row (behind the front wall of the loop): (sc, (hdc, dc, hdc) x in one column, sc) x 20
We fix the thread, cut it off, leaving a small end for sewing on the flower. Sew to the camomile for the left half loops. Inside you need to put some weight. I couldn’t find anything suitable and I put the coins, wrapping them with adhesive plaster on two circles of dense plastic.
Finish knitting a camomileReady camomileDoll on a camomile
We put our girl on a camomile.
We welcome our amigurumi doll, place the doll on the camomile, and fix the amigurumi doll on the camomile
Our girl Camomile is ready. Successful creativity!