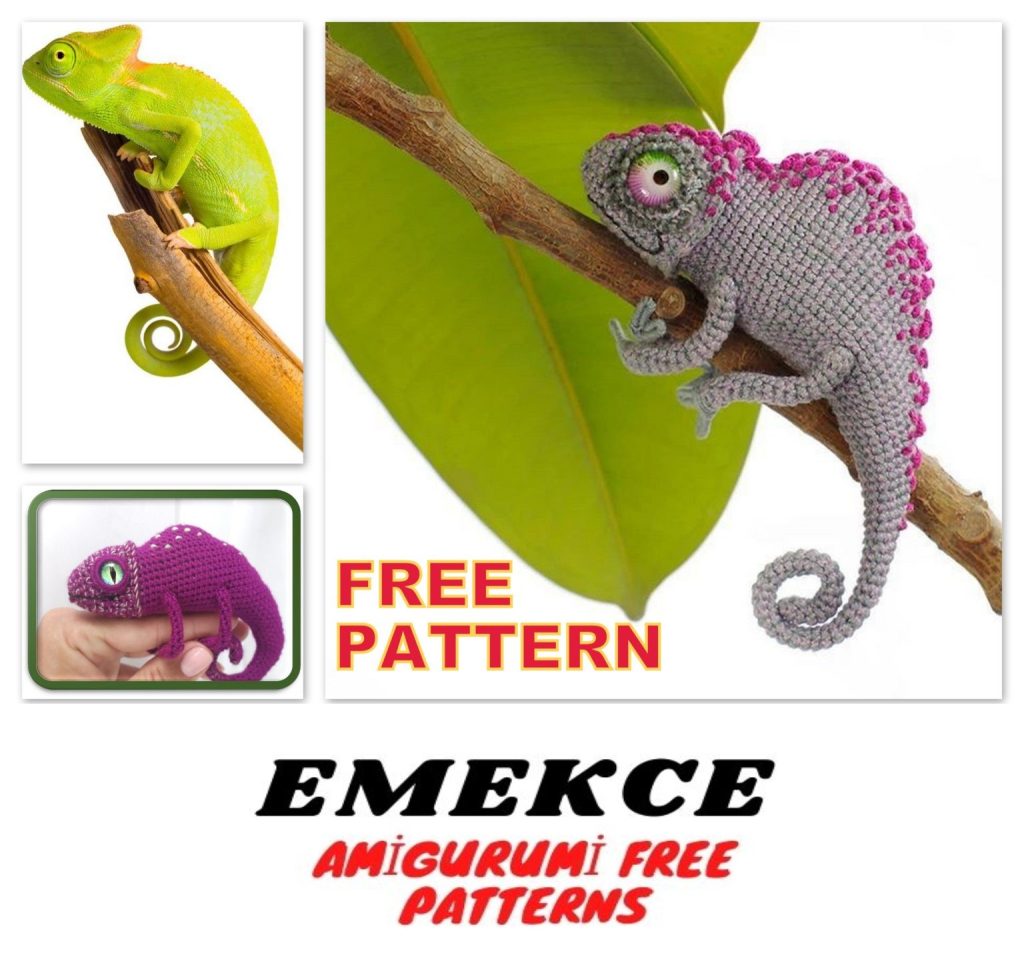
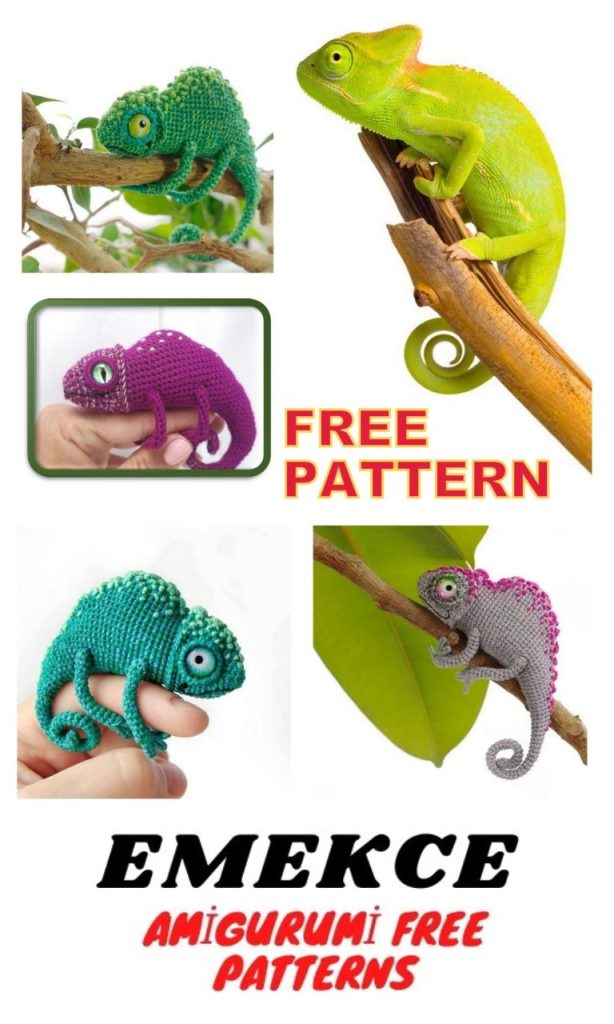
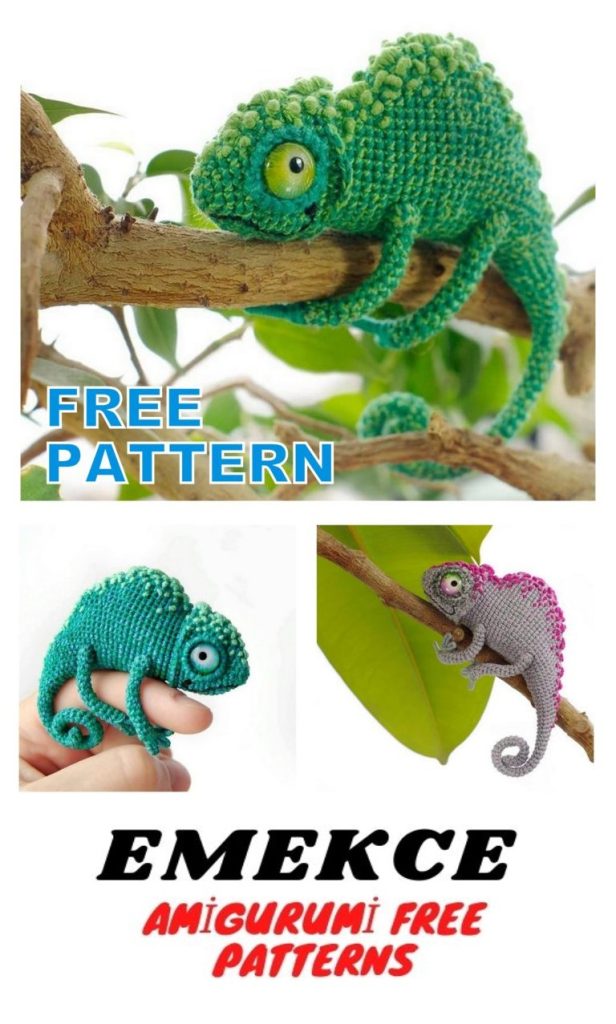
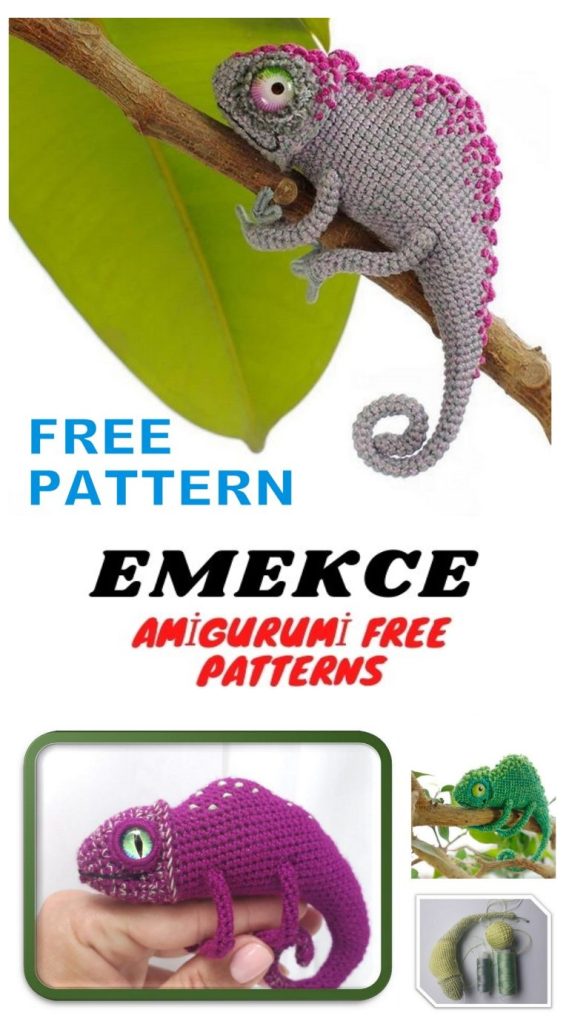
Adorable Amigurumi Chameleon Crochet Pattern: Free and Fun DIY Craft!
Welcome to the whimsical world of crochet, where creativity knows no bounds! If you’re a crochet enthusiast seeking your next charming project, look no further. Our free Amigurumi Chameleon Crochet Pattern is here to add a touch of playful magic to your crafting journey. Whether you’re a seasoned pro or a crochet newbie, this project promises joy, color, and a dose of reptilian cuteness.
Crafting your very own amigurumi chameleon is not only a delightful experience but also a fantastic way to personalize your creations. Dive into the world of vibrant yarns, crochet hooks, and endless possibilities. This pattern is designed with both beginners and advanced crocheters in mind, ensuring a seamless and enjoyable crafting process.
Materials:
– yarn “iris” or “alize forever”. (or any other
yarn you like;
– sewing threads to give the chameleon the desired shades;
– hook No. 1,1 or suitable for your chosen yarn;
– filler for toys;
– thin wire;
– glue;
– a long needle for tightening;
– glass eyes 8-10mm;
Abbreviations:
SC – single crochet;
DEC – decrease (2 sc knit together);
İNC – increase (2 sc in one loop of the previous row);
CH– chain;
SL-ST – slip-stitch;
PATTERN
Head-Body-Tail
Knit in three threads (one “iris”, and two sewing)
1-6 sc into magic ring
2-6 inc = 12 sc
3-12 sc = 12sc
4- 1 sc, 1 inc = 18 sc
5-18 sc = 18 sc
6-2 sc, 1 inc = 24 sc
7-24 sc = 24 sc
8- 3 sc, 1 inc = 30 sc
9-30 sc = 30 sc
10-30 sc = 30 sc
11-30 sc = 30 sc
12-30 sc = 30 sc
13- For the back half-loop 30 sc = 30 sc
14- For the front half loop 7 sc, 1 dec, 3 sc, 1 dec, 2 sc, 1 dec, 3 sc, 1 dec, 7 sc = 26 sc
15-26 sc = 26 sc
Here you can remove the sewing threads and then knit only with “iris” yarn.
16-12 sc, 2 inc, 12 sc = 28 sc
17-13 sc, 2 inc, 13 sc = 30 sc
18-14 sc, 2 inc, 13 sc = 31 sc
19-15 sc, 1 inc, 15 sc = 32 sc
20-15 sc, 1 inc, 16 sc = 33 sc
21-16 sc, 1 inc, 16 sc = 34 sc
22-16 sc, 1 inc, 17 sc = 35 sc
23-17 sc, 1 inc, 17 sc = 36 sc
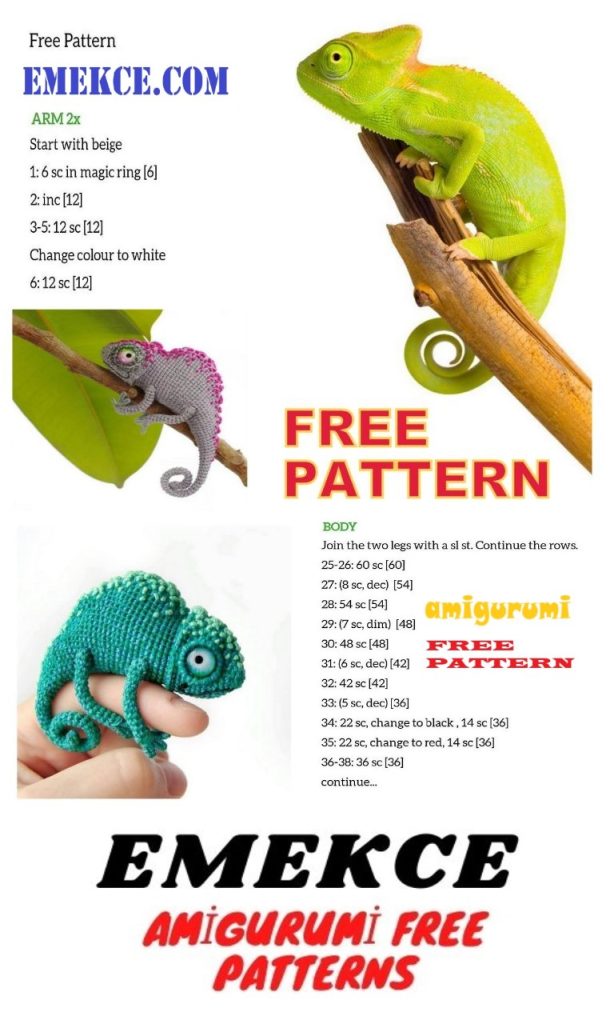
24- 36 sc = 36 sc
25-36 sc = 36 sc
26-36 sc = 36 sc
27- 36 sc = 36 sc
28-17 sc, 1 dec, 17 sc = 35 sc
29-17 sc, 1 dec, 16 sc = 34 sc
30-16 sc, 1 dec, 16 sc = 33 sc
31-16 sc, 1 dec, 15 sc = 32 sc
32-15 sc, 1 dec, 15 sc = 31 sc
33-15 sc, 1 dec, 14 sc = 30 sc
34-14 sc, 1 dec, 14 sc = 29 sc
35-14 sc, 1 dec, 13 sc = 28 sc
36–13 sc, 1 dec, 13 sc = 27 sc
37-13 sc, 1 dec, 12 sc = 26 sc
38-11 sc, 2 dec, 10 sc, 1 inc = 25 sc
39-10 sc, 2 dec, 10 sc, 1 inc = 24 sc
Here you can add sewing threads. Stuff in the knitting process, pretty
tight.
40-10 sc, 2 dec, 9 sc, 1 inc = 23 sc
41 – 9 sc, 2 dec, 9 sc, 1 inc = 22 sc
42-9 sc, 2 dec, 8 sc, 1 inc = 21 sc
43-8 sc, 2 dec, 8 sc, 1 inc = 20 sc
44-8 sc, 2 dec, 7sc, 1 inc = 19 sc
45-7 sc, 2 dec, 7 sc, 1 inc = 18 sc
46-7 sc, 2 dec, 6 sc, 1 inc = 17 sc
47-6 sc, 2 dec, 6 sc, 1 inc = 16 sc
48-6 sc, 2 dec, 5 sc, 1 inc = 15 sc
49-5 sc, 2 dec, 5 sc, 1 inc = 14 sc
50-5 sc, 2 dec, 4 sc, 1 inc = 13 sc
At this stage, take a wire about 20 cm long and, having previously done
hole in the filler with a knitting needle, insert it as deep as possible. This will be the tail frame
our chameleon. Then we knit around the wire.
51-4 sc, 2 dec, 4 sc, 1 inc = 12 sc
52-4 sc, 2 dec, 3 sc, 1 inc = 11 sc
53-3 sc, 2 dec, 3 sc, 1 inc = 10 sc
54-3 sc, 2 dec, 2 sc, 1 inc = 9 sc
55 – 2 sc, 2 dec, 2 sc, 1 inc = 8 sc
56 – 2 sc, 2 dec, 2 sc = 6 sc
57- In a circle, around the wire we knit 100 sc.
58- Dec before closing.
Next, we do eye tightening. (See photo.)
We glue the eyes, on the back we embroider the “bumps” with sewing thread (in my
6 threads were inserted at once), embroider a smile)).
The design of the eyelids.
25 sc into magic ring, do not tighten much, trying on eyes. Sew eyelids.
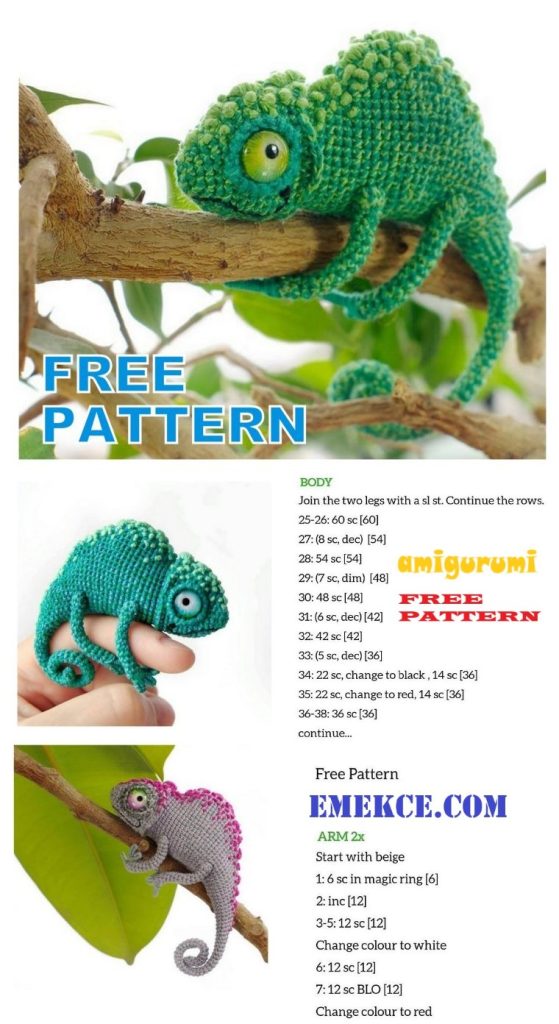
Paws
1- 4sc into magic ring = 4 sc
2-4 sc = 4 sc
3-4 sc = 4 sc
4-4 sc = 4 sc
5- 4 ch we turn the knitting and starting from
second hook loop: 1 sl-st, 2 sc, 1 sl-st in
start loop = 4 sc + finger
6- Next in a circle 52 sc
7- At this stage, take a long wire
about 10cm -2 pcs and, having previously done
hole in the filler with a knitting needle, insert it.
This will be the foot frame (See photo.) Then
put on our knitted, legs on the frame of
wire and sew. To wire
well entered the paws, previously
insert the needle into it