Amigurumi Velvet Rainbow Unicorn Free Crochet Pattern
Welcome to our website where you can find the most beautiful and highest quality samples of Amigurumi patterns. All the amigurumi patterns you can’t find are available on our website. Every day we continue to share new amigurumi patterns for you. Stay tuned to reach these amigurumi patterns before anyone else
The size of the toy depends on the hook with which you knit. İnc and provided
crochet number 4 toy turns 28-30 cm. Consumption inc yazhi
the main color is a little more than a skein. (I, for example, knit quite tightly.
If you have free knitting, or a hook with a large number, then I advise
have 2 full hanks in stock).
The workshop does not include the basics of knitting, it inc is intended for people who already
know how to wield a hook and can read the diagram.
The main materials for the toy:
– plush inc yazha (I used the “Himalayas” “Dolphin Baby”) a little more
hank of the main color, and a little extra color: dark brown on the legs,
white or milky on wings. Choose any colors you like.
– inc yazha “Vita” “Coco” or analogues
– for inc stitching of ears, wings and knitting horns and peephole;
-inc of a yaz “Kuzya Klubochkin” or any fluffy inc yaz of a mane and tail;
– hook (I use 4mm for a toy and 1.25 mm for a horn and eyes);
– hollofiber or sintepuh (or any filler that you usually use);
– needle, marker, scissors.
INFORMATION ON HOW TO CARRY A MARKER FOR IT TO GO
EXACTLY:
This toy is knitted in a spiral, based on this marker (any thread)
constantly shifting to the side. To prevent this from happening, we make loops
displacement, incimer after 3-5 rows, it depends on what density and
which hook number do you knit, from inc yaz, etc. Marker must inc go around
do not move anywhere in a straight line, so any part is always
will be what you intended it to be, and how inc is described in the description.
Abbreviations:
SC – single crochet
İNC – increase
DEC – decrease
CH – chain


Well, let’s start =) Easy to knit!
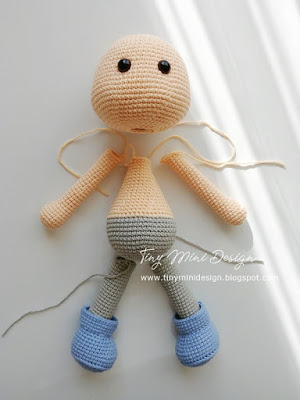
Legs (4 pcs.):
(do not follow the marker)
We begin to knit hooves in color:
1) 6 sc into magic ring
2) 6 inc (12)
3) (1 sc, inc) * 6 (18)
4) -6) 18 sc (3 rows)
7) (1 sc, dec) * 6 (12), change the thread to
main color. We fill only this part
legs, then no further filling is necessary.
8) -24) 12 sc (17 rows)
Next, we knit another 2 sc, and sew the leg for
both walls are 6sc. We knit three more of the same
the details.
Head-body (one piece), legs get involved
Dial a chain of 6 CH, from the second
we knit loops:
1) inc, 3 sc, 4 sc to the extreme loop,
go to the other side: 3 sc, inc
(14)
2) 2 inc, 3 sc, 4 inc, 3 sc, 2 inc (22)
3) Next, we knit 17 sc and transfer the marker
to this place (see photo): yellow marker –
this is where we started the row earlier,
now we do not need him; orange marker –
this is the place from which now and further will be
beginning of the series, and now ATTENTION! FOLLOWING
FOR THE MARKER! HE SHOULD GO EXACTLY
IN THE MIDDLE OF THE WHOLE BODY BOTTOM
FOR THIS WE MAKE LOOPS
OFFSETS EVERY 3-4 SERIES (all
information given above on a yellow background).
4) -6) 22 sc (3 rows)
7) 4 sc, inc, 1 sc, inc, 2 sc, 4 inc, 2 sc, inc, 1
sc, inc, 4 sc (30)
8) 4 sc, inc, 1 sc, inc, 1 sc, inc, 2 sc, inc,
2sc, 2 inc, 2 sc, inc, 2 sc, inc, 1 sc, inc,
1sc, inc, 4 sc (40)
9) 8 sc, inc, 8 sc, inc, 4 sc, inc, 8 sc, inc, 8
sc (44)
10) 19 sc, inc, 4 sc, inc, 19 sc (46)
11) 21 sc, inc, 2 sc, inc, 21 sc (48)
12) 21 sc, inc, 4 sc, inc, 21 sc (50)
13) -18) 50 sc (6 rows)
19) 11 sc, dec, 2 sc, dec, 2 sc, dec, 2 sc, 2 dec,
2 sc, dec, 2 sc, dec, 2 sc, dec, 11 sc (42)
20) 11 sc, dec, 2 sc, dec, 2 sc, 2 dec, 2 sc, dec, 2
sc, dec, 11 sc (36)
21) (4 sc, dec) * 6 (30)
22) (3 sc, dec) * 6 (24)
23) (2 sc, dec) * 6 (18) We fill the head. Further,
without breaking the thread, we knit the body:
24) (2 sc, inc) * 6 (24)
25) (3 sc, inc) * 6 (30)
26) 30 sc
27) We knit the front legs (see photo):
2 sc, 6 sc knit leg, 14 sc, 6 sc
knit leg, 2 sc (30)
28) (4 sc, inc) * 6 (36)
29) – 31) 36 sc (3 rows)
32) 10 sc, (inc, 2 sc) * 5, inc, 10 sc (42)
33) 42 sc
34) 12 sc, inc, 3 sc, inc, 3 sc, 2 inc, 3 sc, inc, 3
sc, inc, 12 sc (48)
35) -39) 48 sc (5 rows)
40) 12 sc, dec, 3 sc, dec, 3 sc, 2 dec, 3 sc, dec, 3
sc, dec, 12 sc (42)
41) knit the hind legs:
4 sc, 6 sc knit leg, 22 sc,
6 sc knit leg, 4 sc (42)
42) (5 sc, dec) * 6 (36)
43) (4 sc, dec) * 6 (30)
44) (3 sc, dec) * 6 (24)
45) (2 sc, dec) * 6 (18), fill
body
46) (1 sc, dec) * 6 (12)
47) 6 dec, cut the thread,
fasten, tighten
hole.
EARS:
1) 3 sc into magic ring
2) 3 inc (6)
3) (1 sc, inc) * 3 (9)
4) (2 sc, inc) * 3 (12)
5) (3 sc, inc) * 3 (15)
6) 15 sc
7) (4 sc, inc) * 3 (18)
8) 18 sc
Wings:
We knit in rotary rows.
We collect a chain of 9 CH, from the second chain we knit:
8 sc, CH lift, turn;
decrease, 6 sc to the end of the row (total 7 sc), 3 CH rise, turn;
we knit from the second loop of the chain we have drawn from 3 CH and then in a row: 9 sc
to the end of the row, CH lift, turn;
decrease, 7 sc to the end of the row (total 8 sc), 3 CH rise, turn,
and so, by analogy with the above, we knit until we have 13 sc in
the last row (see diagram and video).
Next, we do the strapping (see that it is symmetrical). On one wing
we begin to do the strapping from one edge, on the second wing – from the other.
Horn
1) 6 sc into magic ring
2) 6 sc
3) (1 sc, inc) * 3 (9)
4) 9 sc
5) (2 sc, inc) * 3 (12)
6) 12 sc
7) (3 sc, inc) * 3 (15)
8) 15 sc
9) (4 sc, inc) * 3 (18)
10) 18 sc
11) (5 sc, inc) * 3 (21)
12) 21 sc
13) (6 sc, inc) * 3 (24)
14) 24 sc
Cut the thread, fix it, leave the tip of the thread for inc stitching.
Eyes:
We start the black inc of “Vita” Coco “:
1) 6 sc into magic ring
2) 6 inc (12), change the thread to blue:
3) 1 sc, inc, 1 sc, inc, 1 sc, inc, 1 sc, change the thread
onto the white and transfer the loop, pulling it by
eye up, and pull it out, stepping back from
extreme loop blue 2 loops
, and then we knit with a white thread: 4sc, inc, 2 sc, inc, 2
sc, inc, 2 sc.
We cut the thread, leaving the tip for inc stitching.
Next, we knit black inc
eye (I got 13 sc)
We embroider glare with a white thread.
Muzzle tightening.
We insert the needle into the 11th row in the region of the marker, going from the center of the chin down to the neck, and
we put the needle on top inc uniformly between the 6th and 7th rows (to the place where we did 4 inc allowances,
stepping back one loop from them). Next, insert the needle into inc on the opposite side at
the same place where we have inc allowances by stepping one loop up (do not forget inc
pull the thread and see what happens), then we introduce the needle in the opposite direction, but
slightly higher, and so on, by analogy with the above (see photo and video). Shaping
muzzle and forehead of a unicorn, inc we sew with a needle and thread and slightly weaken until
until you are satisfied with the result. At the end of the tightening, we bring the needle to the place where we
started. We tie, tighten, cut and inc threads into the toys.
Collect the toy
İnc sew eyes or embroider sleeping.
We embroider cilia, eyebrows, mouth and nostrils.
İnc we sew a horn, inc and this is not
forget to fill it!
İnc we sew ears in the form of an arc (at
me it turned out that they
located between rows 13 and 17
11 miles apart
loops).
İnc we sew the wings.
Make the mane and tail.
For this, I took inc yazh three colors (I have inc yazh
“Kuzya Klubochkin”). Cut the fragments of threads
30-35 cm long.
Next, we hook the loop
pull all 3 strings at the same time, tie
both edges together on a knot, and so do along
whole head and neck down.
In terms of splendor, it’s a matter of taste (I like magnificent).
By analogy, we make a tail.
Optionally, you can make hooves on the hooves, like
me made by sleeping unicorn.