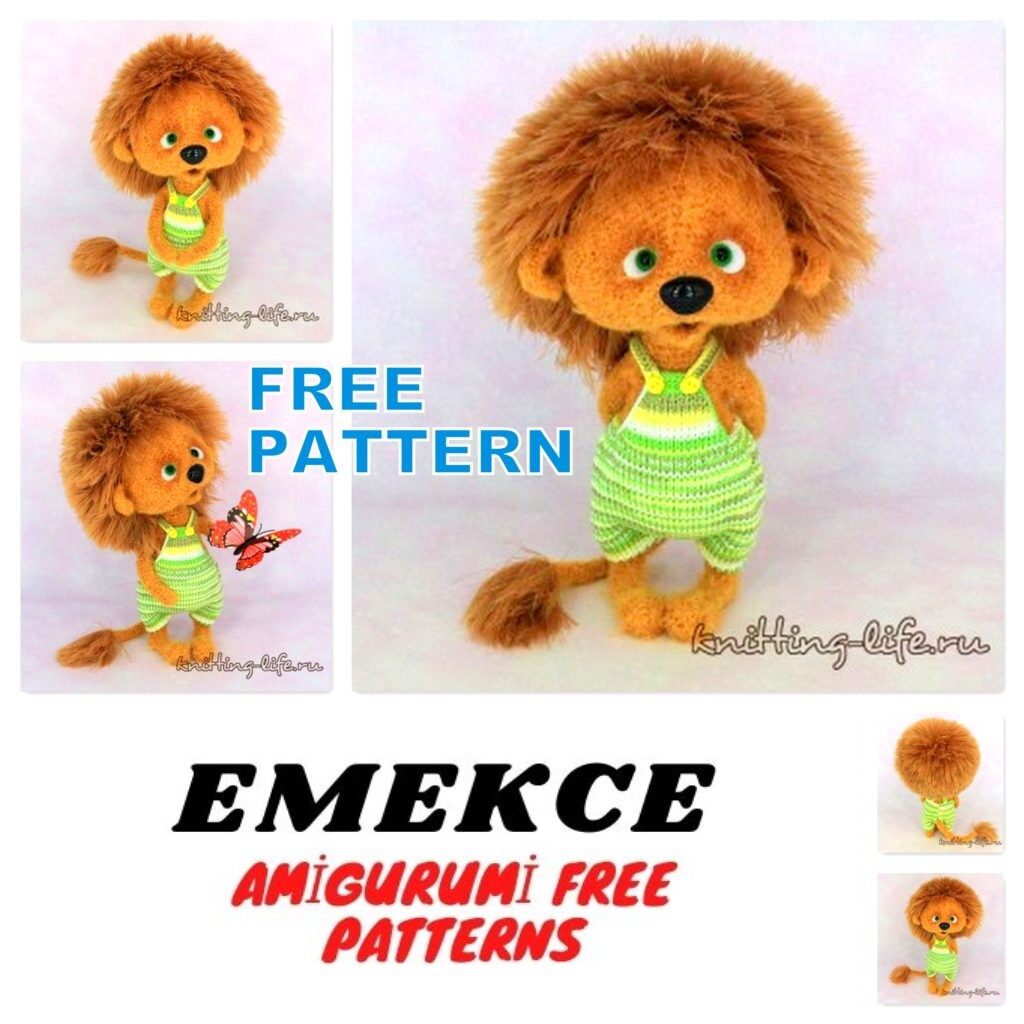
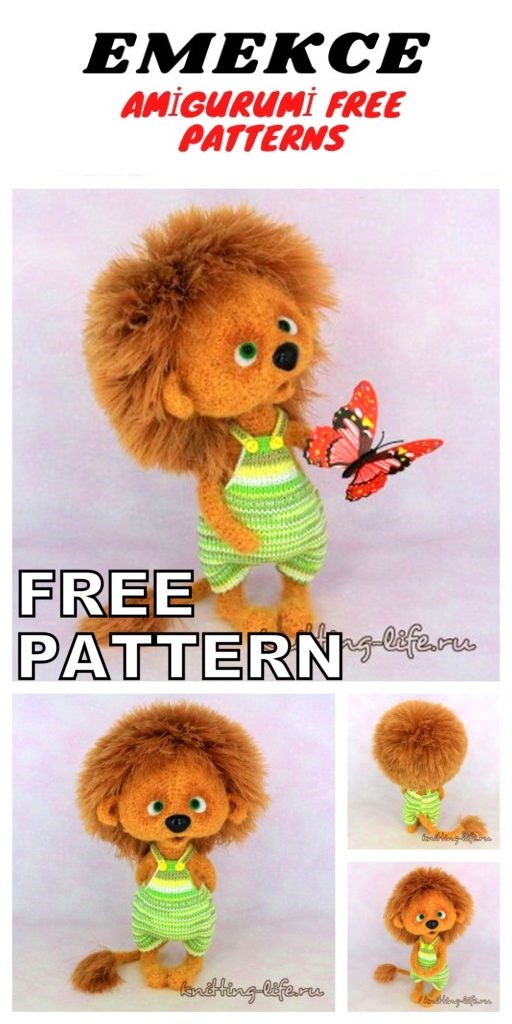
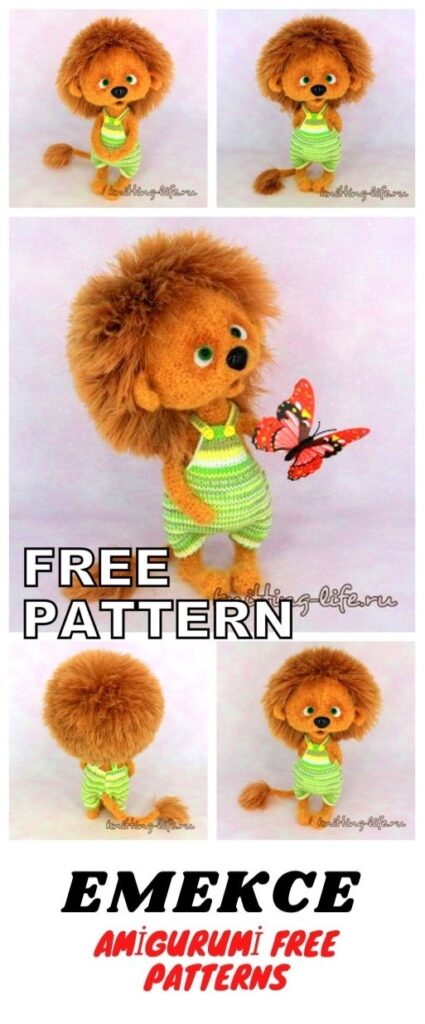
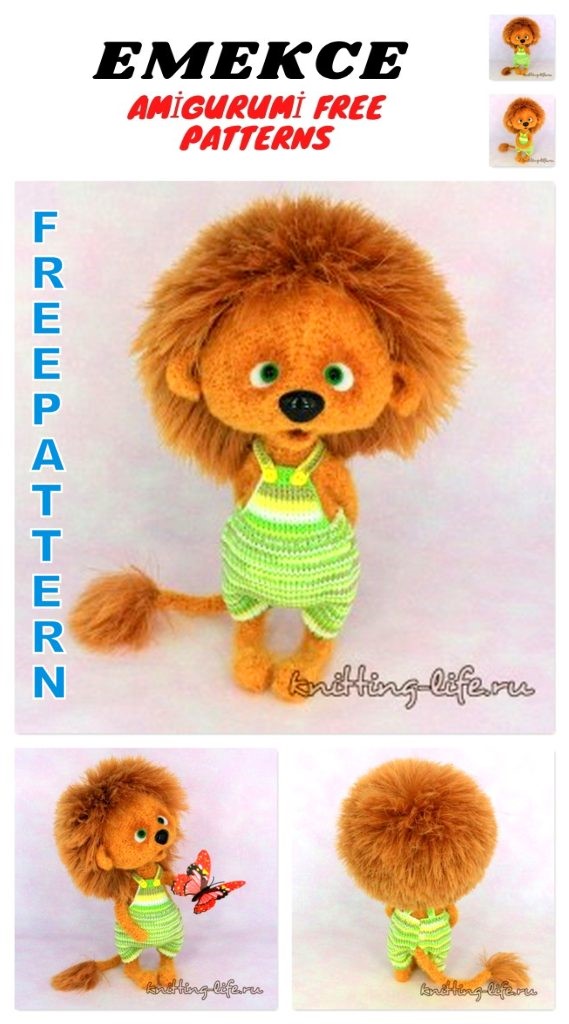
Little Lion Amigurumi Free Crochet Pattern
To knit a little lion you will need:
Adelia “Valeri” (50% acrylic, 50% wool, 146 m / 50 g) color No. 05, one hank (50 g) is enough.
For the Nazar-Rus mane “Fluffy” (100% polyester, 90 m / 100 g) color No. 2019, approximately 50 g.
For Coco Print panties Vita cotton (100% mercerized cotton, 240 m / 50g), there are very few threads left.
Hook No. 2.25 and No. 1.25 (for straps on panties), knitting needles No. 1.5.
2 small buttons for panties and 15 cm elastic thread – spandex.
Filler (holofiber).
1.5 mm cross-sectional copper wire for the frame.
A small piece of white felt for eye proteins.
Choose the nose and eyes, size, color and shape at your discretion – this will determine the nature of your toy.
If desired, a dry pastel for tinting, you can tint in any other way familiar to you.
When using these materials, the lion’s will be 20 cm tall.
You can ask any questions on the description on our forum.
Abbreviations:
sc – single crochet
dec – decrease (2 sc knit together)
inc – increase (knit 2 sc from one)
sl-st – slip stitch
ch – chain
hdc – half double crochet
PATTERN
The toy is knitted in a spiral, without connecting posts and lifting loops.
The description of the knitting of this toy is based on the fact that the beginning of the row throughout the knitting of the whole part does not shift and passes in a straight line, but since we knit in a spiral, without lifting loops and a connecting column, the beginning of the row will shift to the right, so every 4- 5 rows need to be knitted at the end of the row an additional column of displacement, so that the beginning of the row was again in the same place. These additional columns in the description of the series are not taken into account.
Knit ponytail
We begin to knit with a thread Nazar-Rus “Fluffy”, hook No. 2.25. The beginning row marker in this part can not be aligned. We don’t twist the tip of the tail, knit inside out, all the fluffiness remains outside, we try to capture only the warp thread, without lint, when knitting.
Crochet Ponytail Pattern for Athos
1 row: 2 ch, 6 sc in the first loop (6)
2 row: (inc, sc) x 3 (9)
3 row: 9 sc (9)
4 row: (sc, dec) x 3 (6)
We fix the thread, cut it, hide the tip. We attach the Adelia “Valeri” thread from the outside, so as to knit on the front side, and knit 30 rows without increases and decreases (6 sc). We fix the thread, cut it off. You can trim the tip of the tail a little, giving it the shape of a brush.
Cut the wire with a cross section of 1.5 mm, a length equal to the length of the tail + 5 cm. Insert it into the tail.
We knit the upper legs
Crocheted legs for amigurumi Afonya
The beginning row marker in this part can not be aligned.
1 row: 2 ch, 6 sc in the first loop (6)
2 row: (inc, sc) x 3 (9)
3-22 rows (20 rows): 9 sc (9)
We fix the thread, cut it off. We knit the second foot in the same way. The filler can not be stuffed.
We knit the lower legs
We begin to knit a foot from the foot. The marker of the beginning of the row runs in the middle of the top of the foot.
1 row: 2 ch, 6 sc in the first loop (6)
2 row: inc x 6 (12)
3 row: (3 sc, inc) x 3 (15)
4-6 rows (3 rows): 15 sc (15)
7 row: dec, 11 sc, dec (13)
8 row: 13 sc (13)
9 row: dec, 11 sc (12)
10 row: 12 sc (12)
11 row: (dec, 2 sc) x 3 (9)
12-14 rows (3 rows): 9 sc (9)
15 row: 7 sc, 5 ch, 4 sc skip, move here the marker of the beginning of the row
16 row: 5 sc on the heel, 5 sc on the chain of ch (10)
17 row: dec x 5 (5)
We cut the thread, tighten the remaining hole.
We attach the thread to the first missing column of the 15th row and knit the leg:
1 row: 4 sc, 5 sc along the chain of ch (9)
We stuff the tip of the foot with the filler. We take a piece of wire with a cross section of 1.5 mm, a length of about 30 cm, bend the loop at the end, wrap it with adhesive tape, insert it into the foot. We stuff the heel.
2-10 rows (9 rows): 9 sc (9)
We fix the thread, cut it off. We knit the second foot in the same way. The leg itself can not be filled with filler. On the second foot (it will be left), the thread is not cut, continue knitting.
Making a marker on the second knitted foot
Knit body
1 row: 4 sc on the left foot, 7 ch, 9 sc on the right foot (starting from the 1st loop of the last row), 7 sc on the chain, 5 sc on the left foot (32)
We continue to knit the legs up and go to the body
2 row: 3 sc, inc, (sc, inc) x 4, 11 sc, inc, 8 sc (38)
3rd row: 20 sc, inc, 8 sc, move the marker here, now the beginning of the row will be here (middle of the back). In the process of knitting the body, align the marker at the beginning of the row.
4 row: 8 sc, inc, 4 sc, inc, 3 sc, inc, 2 sc, inc, 3 sc, inc, 14 sc (44)
We connect together the wires from the legs, wrap with adhesive tape.
we connect the wires from the legs inside the crocheted body
5 row: 2 sc, inc, 38 sc, inc, 2 sc (46)
6 row: 46 sc (46)
7 row: 45 sc, sc with tail (46)
8 row: sc with tail, 44 sc, 2 sc in tail (47)
9 row: 2 sc tail, 44 sc, dec (47)
10 row: dec, 45 sc (46)
We connect the wire from the tail with the wire from the legs and wrap it with adhesive tape.
Wrap the wire with adhesive tape inside the crocheted body
11-15 rows (5 rows): 46 sc (46)
16 row: 12 sc, dec, 5 sc, dec, 4 sc, dec, 5 sc, dec, 12 sc (42)
17-18 rows (2 rows): 42 sc (42)
19 row: 10 sc, dec, 5 sc, dec, 4 sc, dec, 5 sc, dec, 10 sc (38)
20-21 rows (2 rows): 38 sc (38)
22 row: 10 sc, dec, 4 sc, dec, 2 sc, dec, 4 sc, dec, 10 sc (34)
23-24 rows (2 rows): 34 sc (34)
25 row: 9 sc, dec, 3 sc, dec, 2 sc, dec, 3 sc, dec, 9 sc (30)
26-27 rows (2 rows): 30 sc (30)
We fill the body with filler.
28 row: 5 sc, 4 sc together with the left foot, 12 sc, 4 sc together with the right foot, 5 sc (30)
29 row: 5 sc, 5 sc on the left foot, 12 sc, 5 sc on the right foot, 5 sc (32)
Cut the wire with a length equal to the length of two legs + body width + 2 cm. We bend the ends of the wire, insert it into the handles, placing it between the wires going from the legs. Wrap with adhesive tape.
Bend the ends of the wire inside the knitted body
30 row: 9 sc, dec, 10 sc, dec, 9 sc (30)
31 rows: 4 sc, dec, 3 sc, dec, 8 sc, dec, 3 sc, dec, 4 sc (26)
32 row: 5 sc, dec, 12 sc, dec, 5 sc (24)
We stuff with a filler.
33 row: 5 sc, dec, 10 sc, dec, 5 sc (22)
34 row: 5 sc, dec, 8 sc, dec, 5 sc (20)
35-36 rows (2 rows): 20 sc (20)
We fix the thread, cut it off, leaving a small tip for sewing the body to the head. We fill the body with filler to the end.
Cutting the thread, we leave the tip for sewing the crocheted body of the little Afon the crocheted body to the head, we stuff the body of the little Afon the filler to the very edge and proceed to crocheting the head of the Afon
Knit head
The marker of the beginning of the row passes at the nose bridge and further in the middle of the forehead.
1 row: 2 ch, 6 sc in the first loop (6)
2 row: sc, 3 sc in one, 2 inc, 3 sc in one, sc (12)
3 row: sc, inc x 4, 2 sc, inc x 4, sc (20)
4 row: 3 sc, inc x 4, 6 sc, inc x 4, 3 sc (28)
5 row: 5 sc, inc x 4, 10 sc, inc x 4, 5 sc (36)
6 row: 36 sc (36)
7 row: 7 sc, inc x 4, 14 sc, inc x 4, 5 sc, inc, sc (45)
8 row: sc, inc, 7 sc, inc x 4, 18 sc, inc x 4, 8 sc, inc, sc (55)
9 row: sc, inc, 51 sc, inc, sc (57)
10 row: sc, inc, 11 sc, inc x 3, 24 sc, inc x 3, 12 sc, inc, sc (65)
11 row: sc, inc, 12 sc, inc x 3, 30 sc, inc x 3, 13 sc, inc, sc (73)
12 row: sc, inc, 69 sc, inc, sc (75)
13 row: sc, inc, 73 sc (76)
14-19 rows (6 rows): 76 sc (76)
20 row: 37 sc, 2 ch, 2 sc skip (hole for the frame), 37 sc (76)
21 row: 76 sc (76)
We knit sl-st, cut the thread. We attach the Nazar-Rus thread “Fluffy” on the opposite side and continue to knit, but with the wrong side out, we try to capture only the warp thread, without lint, when knitting. The marker at the beginning of the row does not need to be further aligned.
22-23 rows (2 rows): 76 sc (76)
24 row: (17 sc, dec) x 4 (72)
25 row: 72 sc (72)
26 row: 5 sc, dec, (10 sc, dec) x 5, 5 sc (66)
27-28 rows (2 rows): 66 sc (66)
29 row: (9 sc, dec) x 6 (60)
30-31 rows (2 rows): 60 sc (60)
32 row: 4 sc, dec, (8 sc, dec) x 5, 4 sc (54)
33-34 rows (2 rows): 54 sc (54)
35 row: (7 sc, dec) x 6 (48)
36 row: 3 sc, dec, (6 sc, dec) x 5, 3 sc (42)
37 row: (5 sc, dec) x 6 (36)
38 row: 2 sc, dec, (4 sc, dec) x 5, 2 sc (30)
We fill the head with filler.
39 row: (3 sc, dec) x 6 (24)
40 row: sc, dec, (2 sc, dec) x 5, sc (18)
41 row: (sc, dec) x 6 (12)
We fill up to the end.
42 row: dec x 6 (6)
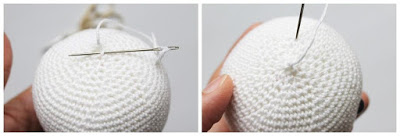
We fix the thread, cut it off.
Yarn Nazar-Rus on the head of Afoni Thread is fastened and trimmedFixed thread on the crocheted head of Afoni
Knit the lower lip
Crochet the lower lip of a lion cub
1 row: 2 ch, 6 sc in the first loop (6)
2 row: ch, turn, (inc, sc) x 3 (9)
3 row: ch, turn, (inc, 2 sc) x 3 (12)
4-6 rows (3 rows): ch, turn, 12 sc (12)
We fix the thread, cut it, leaving a small tip for sewing.
Knit ears
Crochet the ears of a lion cub Athos
1 row: 2 ch, 6 sc in the first loop (6)
2 row: inc x 6 (12)
3 row: inc, 11 sc (13)
4 row: (hdc, sc, hdc) in one column, 12 sc (15)
5 row: sc, (hdc, sc, hdc) in one column, 13 sc (17)
We knit sl-st, cut the thread, leaving a small tip for sewing. We knit the second eye in the same way. Do not twist the ears on the front side (it remains inside the ear).
We make a little lion
On the head, we outline three points of tightening: point 1 – the mouth, located approximately between the 10-11th rows, opposite the marker; points 2 and 3 – eyes, approximately between the 8th and 9th rows, 5-6 loops from the marker left and right. However, I still recommend that these points be drawn in the eye, and not in the indicated rows, because with a different density of knitting, a completely different result can be obtained.
Three ducks on Afoni’s knitted head, around a mane of a lion from yarn
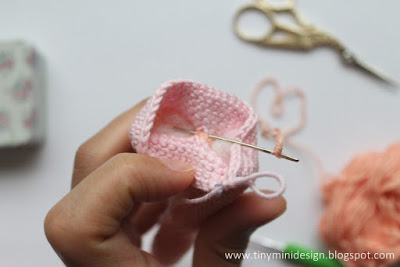
We introduce a needle with a strong thread at point 1 and output at point 2. We retreat one column to the side, insert the needle and withdraw at point 1, pull the thread. Again, we retreat the column to the side, insert the needle and withdraw at point 2. Repeat the same several times, pulling the thread. Similarly, we tighten the right eye. We fix the thread and hide all the ends inside the head.
Insert the needle with the thread into the knitted head of Athoni. View of the knitted head from the left side.
Sew on the lower lip, curving it a bit (the beginning of knitting the lips is located in the region of the lower point of the hooks).
Sew the lower lip to the knitted head. Type of knitted head with sewn knitted lip.
Sew the ears with the elongated tip to the head. You can arrange them anywhere at your discretion.
You can tint the sewing places for the eye, mouth, and the inside of the ears.
From white felt we cut out the whites of the eyes – the shape and size is at your discretion. You can first cut out the whites of the eyes from the paper and determine the size and shape, immediately trying on the eyes. Glue the whites of the eyes, sew or glue the eyes, fasten the nose.
Decorated crocheted head of a lion cub Athos
In principle, you can stop at this, or you can tie very cute pants to our little girl.
Knit panties with needles:
“Coco Print” Vita cotton, knitting needles No. 1,5
Designations:
p. – loop
chrome. – edge loop
knit – front loop
purl – purl loop
elastic band 1×1 – 1 knit, 1 purl
the front surface – the front row we knit p., purl – purl
We pick on the needles 30 p.
1-3 row (3 rows): chrome., 28 p. Rubber band 1×1, chrome. (thirty)
4 row: chrome., Yarn, 28 knit, yarn, chrome. (32)
5 row: chrome., 30 purl, chrome. (32)
6 row: chrome., Yarn, 30 knit, yarn, chrome. (34)
7 row: chrome., 32 purl, chrome. (34)
We cut the thread without removing the loop from the knitting needle, we also knit the second leg on it in the same way.
Having knitted the 7th row, we add 3 loops, we do it as follows: we introduce a hook between the last and penultimate loops, grab the working thread and stretch the loop, hang it on the knitting needle – one loop was added. Again, we introduce the hook between the last (new) loop and the penultimate one, stretch the loop, throw it on the knitting needle. Thus we add 3 loops. We knit the next row, connecting the two legs.
8 row: chrome., 36 knit, add 6 loops, knit further along the first leg: 34 knit, add 3 loops (80)
9 row: chrome., 78 purl, chrome. (80)
10-43 rows (34 rows): front surface (80)
44-47 rows (4 rows): chrome., 29 p. 1×1 elastic band (starting with the wrong side), 20 p. Knit smooth surface, 29 p. 1×1 elastic band (starting with the wrong side), chrome. (80)
48 row: close 30 p. (One loop remained on the spoke), 19 knit, close the remaining 29 p. (20)
We fix and cut the thread, reconnect to the 19th front loop of the 48th row and knit the middle of the pants.
49 row: chrome., 18 purl, chrome. (20)
50 row: 2 p. Together, 16 knit, 2 p. Together (18)
51-53 rows (3 rows): front surface (18)
54 row: 2 p. Together, 14 knit, 2 p. Together (16)
55-57 rows (3 rows): front surface (16)
58 row: 2 p. Together, 12 knit, 2 p. Together (14)
59-61 rows (3 rows): front surface (14)
62 row: 2 p. Together, 10 knit, 2 p. Together (12)
63-65 rows (3 rows): front surface (12)
66 row: 2 p. Together, 8 knit, 2 p. Together (10)
67-69 rows (3 rows): front surface (10)
We close all the loops, fasten the thread, cut it off.
Appearance of knitting overalls for toys
You can walk through the edge of the middle of the pants with connecting columns through, so the edge will be more accurate.
We sew the leg seams and the back leg seam, leaving a hole for the tail (place and size are determined by fitting). In the last row of panties elastic with a needle with a blunt end, we thread the spandex, do not touch the front surface of the middle of the panties, one end of the spandex remains to the left of the middle, the second to the right. We put on panties on a cub, tighten the spandex to the desired girth and tie it on a knot, separately on each side.
We hook the hooks 1.25, knit the straps, you can adjust the length according to your cub, I have it like this:
37 ch, from the 3rd loop from the hook: 35 sc (we start knitting by attaching the thread to the back of the panties, not far from the seam – slightly to the right for one strap and slightly to the left for the other), sl-st into the loop on the panties (next to that , which began knitting straps).
Sew the straps to the middle of the pants, decorate with buttons.
Knitted jumpsuit with loops for a toy Afoni
Dress up our little lovushka.