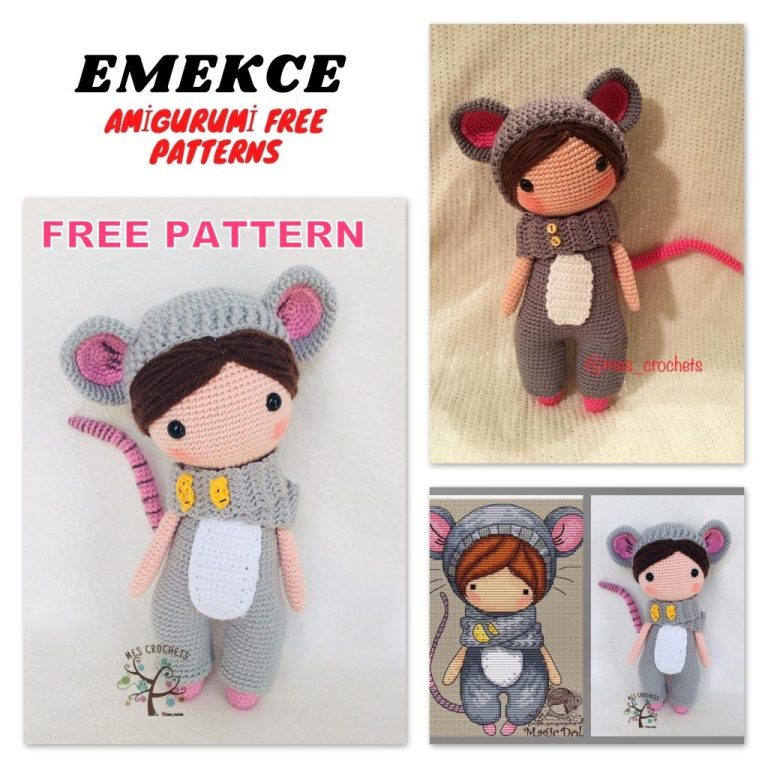
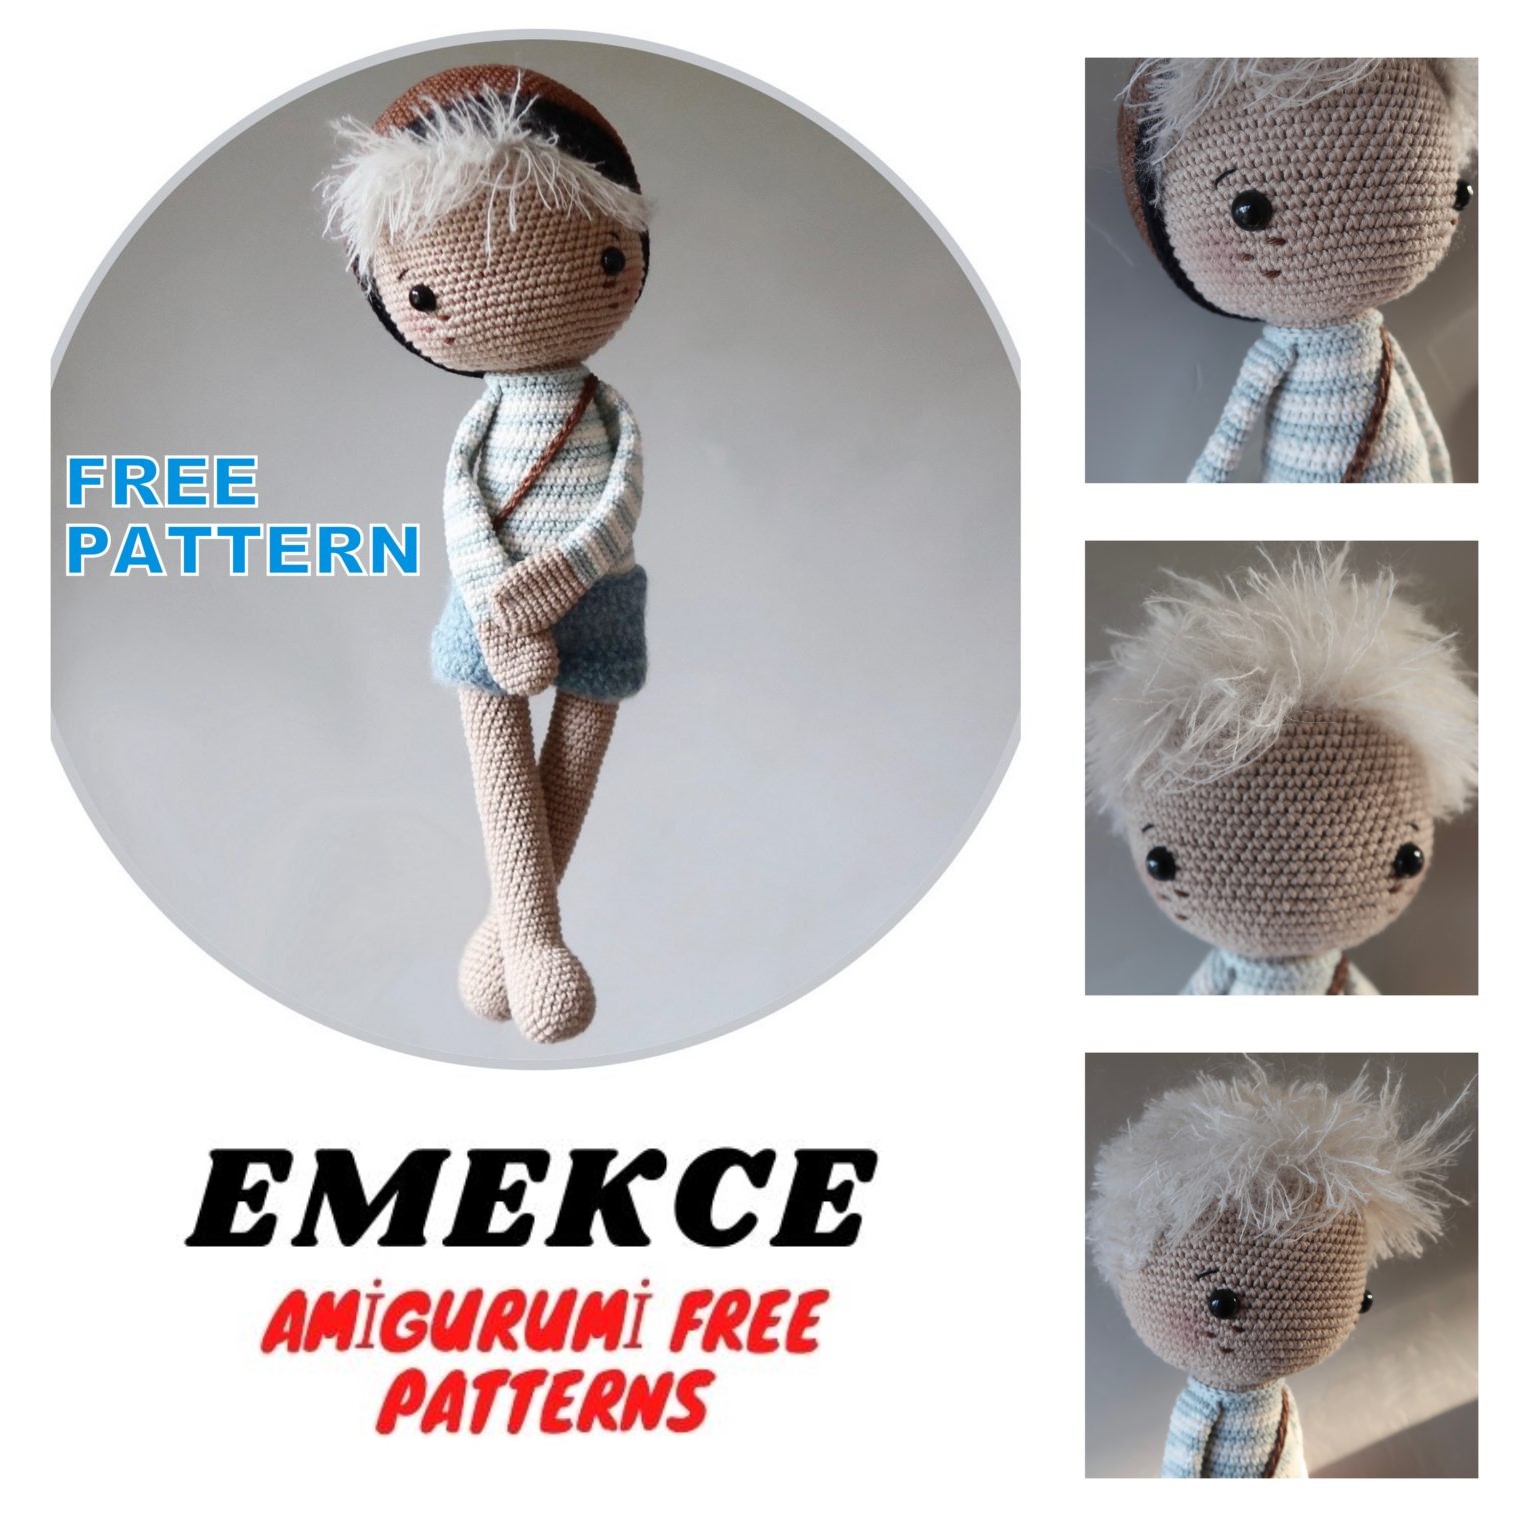
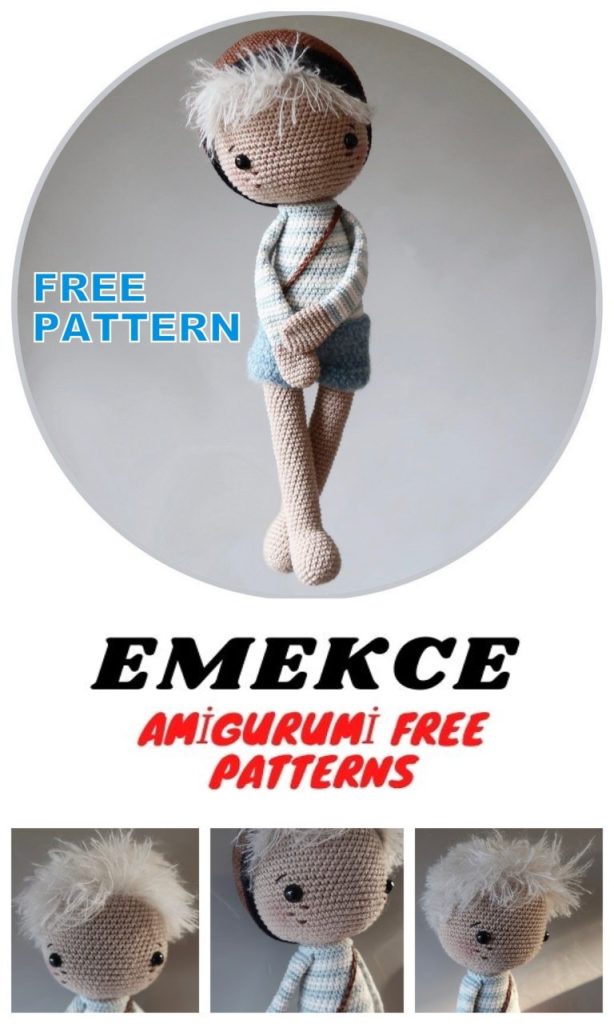
Crafting Joy: Free Amigurumi Blonde Boy Crochet Pattern for Your Handmade Delight!
Step into the world of crochet with our Free Amigurumi Blonde Boy Pattern! Meet the charming little boy, a heartwarming creation designed to bring joy and personality to your handmade wonders. This project isn’t just a pattern; it’s an opportunity to craft a lovable character that reflects the sweetness of childhood.
Crafters of all skill levels, get ready to embark on a delightful journey. Picture creating your very own blonde boy, complete with adorable details and endless possibilities for personalization. Whether you’re an experienced crochet artist or a beginner eager to explore the world of amigurumi, this blonde boy is here to add a touch of handmade happiness to your collection.
YOU MUST USE:
• Cotton yarn, brushed alpaca silk, mohair (see which under yarn used)
• Needle: 2.5 mm and 3.5 mm
• Yarn needle
• Scissors
• Fill (fiber fill or teddy bear)
• Safety / teddy eyes 10 mm
TECHNIQUE: • Crochet in rows.
• Crochet the shade of the cap back and forth
YARN USED:
Doll:
• 50 gr drops of saffron (100% cotton; 50g ≈ 160 loop) in unicolor 21 beige
• 30 gr drops of saffron (100% cotton; 50g ≈ 160 loop) in unicolor 50 light ice blue
• 30 gr drops of saffron (100% cotton; 50g ≈ 160 loops) in unicolor 18 nature
Cap:
• 30 gr Scheepies Catona (100% mercerized cotton; 50g ≈ 125 loop) in 157 root beer
• 10 gr drops of saffron (100% cotton; 50g ≈ 160 loop) in unicolor 16 black
Pants:
• 10 g drops of saffron (100% cotton; 50g ≈ 160 loop) in unicolor 06 jeans blue
• 10g drops brushed alpaca silk (77% alpaca and 23% silk; 25g ≈ 140 loop) in 15 light sea green
Hair:
• 25g drops of kid silk (75% mohair and 25% silk; 25g ≈ 200 loop) in 1unicolor 01 nature
GOAL:
Ca. 38×11 cm. NOTE: If you use a different yarn or needle than the one prescribed, both size and expression can be used
the doll change
Abbreviations:
CH – chain
SC – single crochet;
İNC – increase
DEC – decrease
DC – double crochet;
• * – * – Repeat what is in between the ** lap out
• after the end of the lap, the (loop) indicates how many stitches you must wear on the lap
* * * * * * HEAD * * * * * *
Use your beige yarn and needle 2.5. Fill continuously after mounting eyes, it should be
firmly filled.
1. 6 sc into magic ring (6)
2. * inc. * (12)
3. * 1 sc, inc. * (18)
4. * 2 sc, inc. * (24)
5. * 3 sc, inc. * (30)
6. * 4 sc, inc * (36)
7. * 5 sc, inc. * (42)
8. * 6 sc, inc. * (48)
9. * 7 sc, inc. * (54)
10. * 8 sc, inc. * (60)
11. * 9 sc, inc. * (66)
12. -23. (12 rows.) 1 sc in each loop (66)
24. * 21 sc, inc. * (69)
25. 1 sc in each loop (69)
26. 11 sc, inc., (22 sc, inc.) X 2, 11 sc (72)
27- 32. (6 rows.) 1 sc in each loop (72)
Place eyes between rounds 25-26. with 17 loops in between on the round. 24
33. * 6 sc, Dec * (63)
34. * 5 sc, Dec * (54)
35. * 4 sc, Dec * (45)
36. * 3 sc, Dec * (36)
37. * 2 sc, dec. * (27)
38. * 1 sc, dec. * (18)
39. * Dec. * (9)
Break the yarn and sew the end.
thereof, may not be reproduced, published, resold, translated, transmitted, modified, shared or posted (for sale or free)
over the internet or ofine. You may sell a limited portion of the finished products as long as you credit me
as a designer with the text: design and recipe of FUZZ pOppi.
* * * * * BONE & BODY * * * * *
Start with your beige cotton yarn and needle 2.5. You start by crocheting leg 1 and breaking
the yarn. Then you make leg 2 the same way, but DO NOT break the yarn. Now you’re going to
Crochet the legs together and continue on the body. Fill legs and body along the way, they should
be firmly filled.
Ben 1:
1. 6 sc into magic ring (6)
2. * inc. * (12)
3. * 1 sc, inc. * (18)
4. * 5 sc, inc * (21)
5th-9th (5 rows.) 1 sc in each loop (21)
Now you have to make the heel itself on the foot, it’s basically a small square you crochet
back and forth on your work, after which you continue to work around
spiral at your work.
10. 4 sc, 1 ch turn, 4 sc, 1 ch turn, 4 sc, 1 ch turn, 4 sc, 1 ch turn, 4 sc., Continue
along the side of your square with 2 sc, 17 sc (23)
11. 2 sc along side of your square, 23 sc (25)
12. 1 sc, dec., 2 sc, dec., 1 sc, dec., 3 sc, dec., 3 sc, dec., 3 sc, dec. (19)
13. 11 sc, dec., 6 sc (18)
14th-50th (37 rows.) 1 sc in each loop (18)
Break the yarn.
Now make leg 2 the same way, DO NOT break the yarn
body:
51. Make approx. 13 sc on leg 2 (this makes the feet point slightly inward. Everything
depending on your yarn and crochet firmness you may only need 12 sc or
maybe you should have 14, the point is that you place the crochet then the toe tips
pointing in and may well require a few stitches adjusting to the recipe for you to get
same result), make 3 ch, densify with 18 sc around leg 1, now make 3 sc along it
one side of the ch chain, make 5 sc on leg 2 (42)
52. 11 sc, inc., 3 sc on 2nd side of ch chain, inc., 26 sc (44)
53. * 10 sc, inc * (48)
54. 1 sc in each loop (48)
Switch to ice blue, change between ice blue and white on every 2nd lap until lap. 85th
55th-60th (6 rows.) 1 sc in each loop (48)
61. 7 sc, dec., (14 sc, dec.) X 2, 7 sc (45)
62nd-65th (4 rows.) 1 sc in each loop (45)
66. * 13 sc, Dec * (42)
67th-69th (3 rows.) 1 sc in each loop (42)
70. 6 sc, dec., (12 sc, dec.) X 2, 6 sc (39)
71.-72 thereof. (2 rows.) 1 sc in each loop (39)
73. * 11 sc, Dec * (36)
74. 1 sc in each loop (36)
75. 5 sc, dec, (10 sc, dec.) X 2, 5 sc (33)
76th-84th (9 rows.) 1 sc in each loop (33)
Change color to beige and work on the next step in the back mask.
85. * 9 sc in blue, dec. in blue * (30)
86. 1 sc in each loop (30)
Break the yarn and leave to mount the head.
Collar:
Use your ice blue yarn and needle 2.5
Insert needle from bottom up on round 85, make 1 hdc in each flo, gather with 1 ch in 1.
maybe. Break yarn and staple ends.
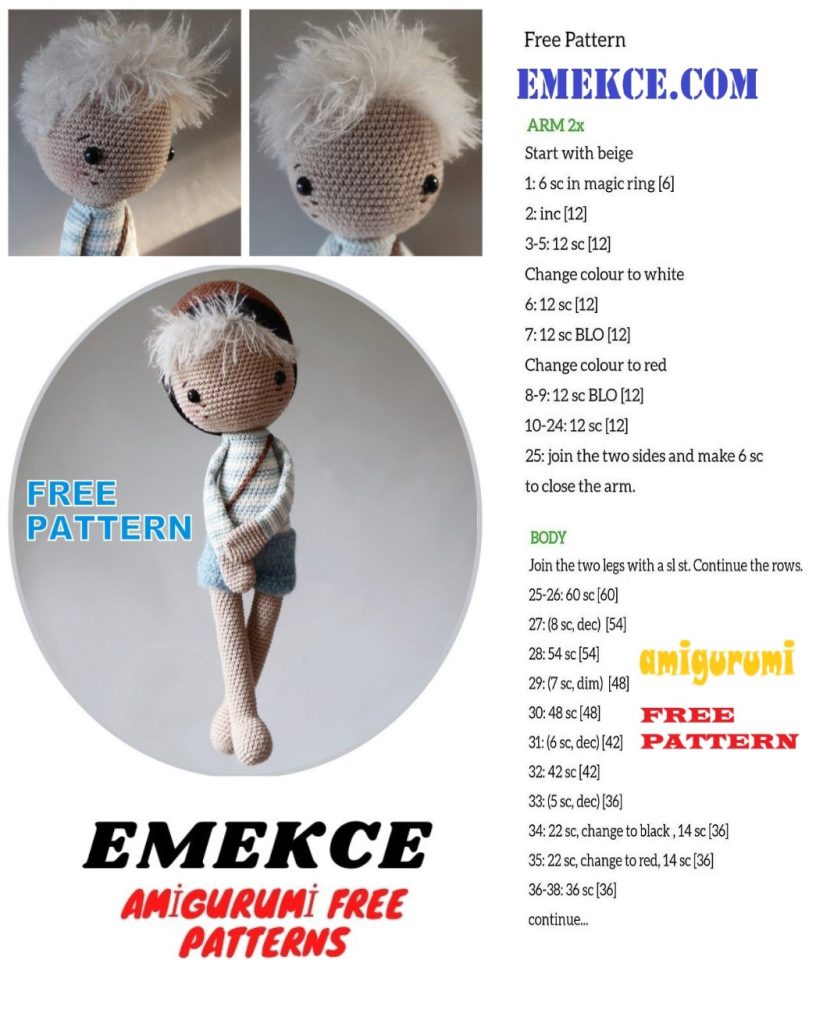
* * * * * * ARMS * * * * * *
Start with your beige cotton yarn and needle 2.5. Do not fill your arms.
1. 6 sc into magic ring (6)
2. * inc. * (12)
3. * 2 sc, inc. * (16)
thereof, may not be reproduced, published, resold, translated, transmitted, modified, shared or posted (for sale or free)
over the internet or ofine. You may sell a limited portion of the finished products as long as you credit me
as a designer with the text: design and recipe of FUZZ pOppi.
4th – 9th (6 rows.) 1 sc in each loop (16)
10 dec., 12 sc, dec. (14)
11. 1 sc in each loop (14)
Change color to ice blue, change between ice blue and white on every 2nd lap until lap. 41st
12-41. (30 rows.) 1 sc in each loop (14)
Now fold the arm flat (remember not to fill it) and close the arm with a row of sc.
Break the yarn and let it hang for mounting.
* * * * * * * BASKET * * * * * *
Start with your brown schjeppes catona yarn and needle 2.5.
1. 6 sc into magic ring (6)
2. * inc * (12)
3. * 1 sc, inc. * (18)
4. * 2 sc, inc. * (24)
5. * 3 sc, inc. * (30)
6. * 4 sc, inc * (36)
7. * 5 sc, inc. * (42)
8. * 6 sc, inc. * (48)
9. * 7 sc, inc. * (54)
10. * 8 sc, inc. * (60)
11. * 9 sc, inc. * (66)
12. * 10 sc, inc. * (72)
13. * 11 sc, inc. * (78)
14. * 12 sc inc. * (84)
15th – 29th (15 rows.) 1 sc each loop (84)
Switch to your black yarn.
30. * 12 sc, Dec * (78)
31. 1 sc in each loop (78)
Break the yarn and staple end.
thereof, may not be reproduced, published, resold, translated, transmitted, modified, shared or posted (for sale or free)
over the internet or ofine. You may sell a limited portion of the finished products as long as you credit me
as a designer with the text: design and recipe of FUZZ pOppi.
Shade:
Here you work back and forth.
Add the yarn to the front with a standing sc
1. Make 23 sc along the edge of the cap, 1 ch, turn
2. (Skip 1 loop at each end to take in), 1 sc in each loop (21)
3. (Skip 1 loop at each end to take in), 1 sc in each loop (19)
4. (Skip 1 loop at each end to take in), 1 sc in each loop (17)
Break the yarn and staple ends.
Repeat the yarn at the beginning of the shade and make an edge of sc all the way around
shade.
* * * * * * * Pants * * * * * *
Use your denim blue cotton yarn with your sea green brushed alpaca silk and needle
3.5 mm.
You start by crocheting the 1st leg and breaking the yarn. Then do the 2nd leg of your pants
in the same way, but DO NOT break the yarn. Now crochet the legs together and
continue on the piece that goes around life.
1. Pants legs
Look up 25 loops, gather for a ring
Make 4 rows. with 1 sc in each loop (25)
Break the yarn and staple ends.
2. Make trouser legs the same way, DO NOT break the yarn.
Now crochet the legs together:
1. 1 sc in each loop (50)
2. (Take 1 loop on each side of the pants) 1 sc in each loop (48)
3. 1 sc in each loop (48)
4. (Take 1 loop on each side of the pants) 1 sc in each loop (46)
5. 1 sc in each loop (46)
thereof, may not be reproduced, published, resold, translated, transmitted, modified, shared or posted (for sale or free)
over the internet or ofine. You may sell a limited portion of the finished products as long as you credit me
as a designer with the text: design and recipe of FUZZ pOppi.
6. (Take 1 loop on each side of the pants) 1 sc in each loop (44)
7. 1 sc in each loop (44)
8. (Take 1 loop on each side of the pants) 1 sc in each loop (42)
9. 1 sc in each loop (42)
Break the yarn and staple ends.
Take a piece of brown yarn to make the sash for the pants. Lay the yarn double and use
needle 3.5. Make a chain of ch, make it as long as it can fit over your shoulder
on the doll.
* * * * * MOUNTING * * * * *
1. Sew body upside down.
2. Sew arms to the body just below the collar of the shirt.
3. Embroider eyebrows over eyes with black yarn and
freckles under the eyes with brown yarn.
4. Hair mounting. This process takes some time.
If you are too impatient, you may want to. use one
thicker yarn, so that the beauty of hair comes faster
to look like something. You can also just make do
bang his head and cover the rest of his head
with the cap and possibly sew the cap to
the head. I like that the hair has a “finer” look and that the cap can be removed
thereof, may not be reproduced, published, resold, translated, transmitted, modified, shared or posted (for sale or free)
over the internet or ofine. You may sell a limited portion of the finished products as long as you credit me
as a designer with the text: design and recipe of FUZZ pOppi.
and on. You make the hair by pulling a single piece
mohair thread (approx. 10 cm) through the stitches in
the scalp.
– Pull a loop of mohair through
scalp masks (don’t pull it completely
through).
– Now take the two ends of the thread and pull them
through the loop and tighten. You do this until
you have as much hair on your head as you want.
– Stud your hair for the hairstyle you want on him.
5. Give him his pants and cap.
6. Give him cheeky red. You can use some plain makeup to pop on.