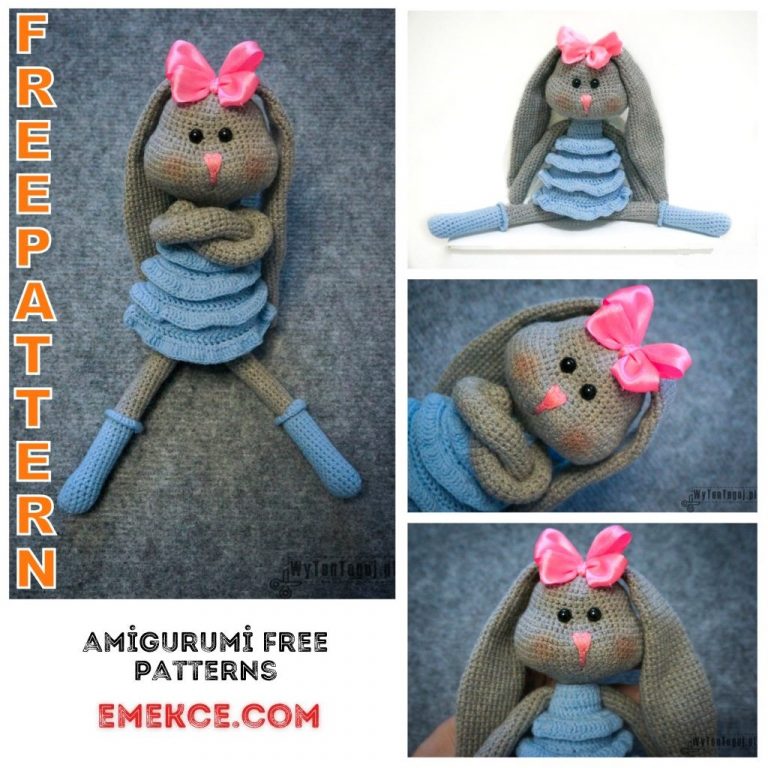
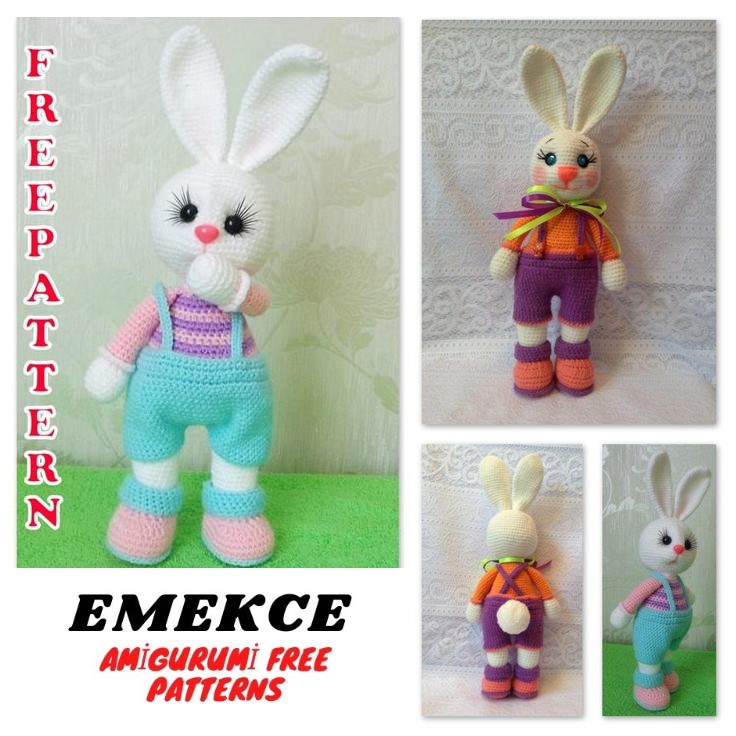
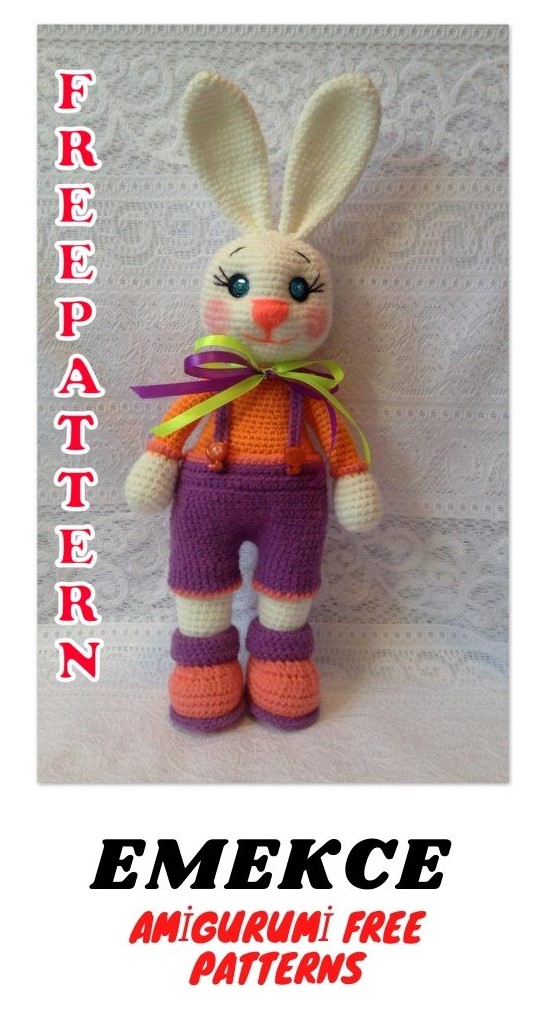
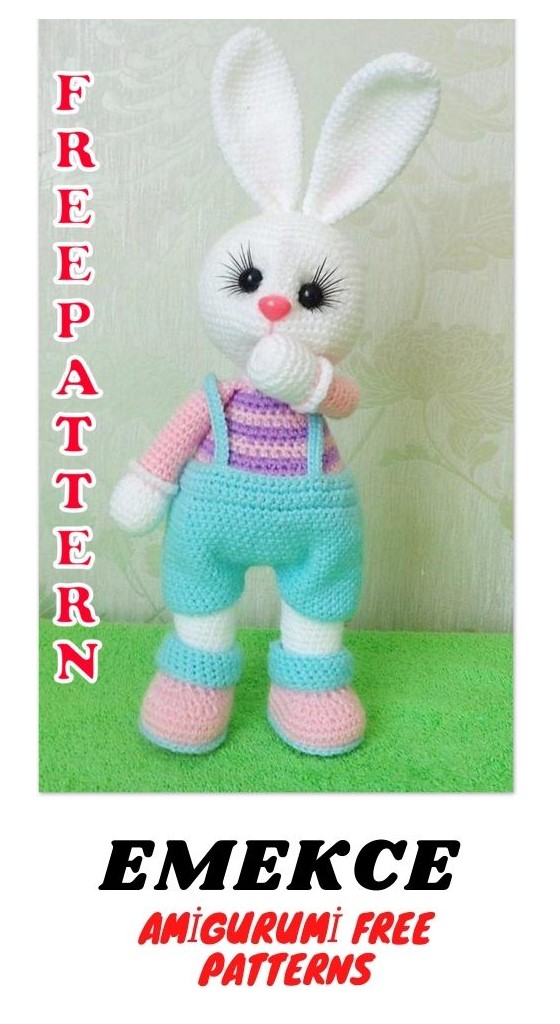
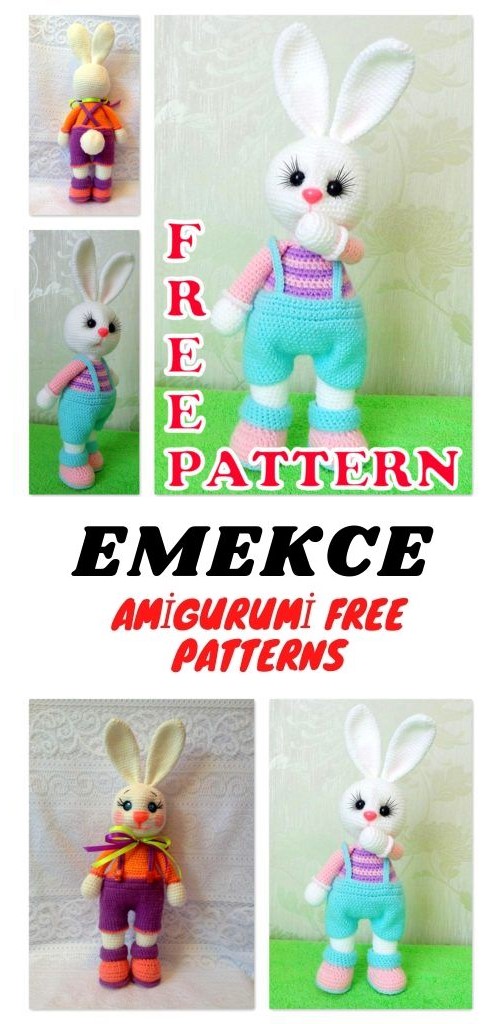
Hop into Spring with Our Amigurumi Easter Bunny: Free Crochet Pattern
Are you ready to welcome the blooming beauty of spring and celebrate Easter in the most adorable way possible? Our Amigurumi Easter Bunny Free Crochet Pattern is here to help you hop into the season with an enchanting crochet project.
Easter is a time of renewal and joy, and what better way to embrace the spirit of the season than by crafting your very own Easter bunny? With our free crochet pattern, you can create a charming and cuddly amigurumi bunny that will be the centerpiece of your Easter decorations.
This pattern is perfect for crocheters of all skill levels, whether you’re a seasoned pro or just starting on your crochet journey. The step-by-step instructions are easy to follow, ensuring that your Easter bunny turns out picture-perfect.
Imagine the delight on the faces of children and adults alike as they encounter your handmade Easter bunny. It’s a wonderful gift idea, an eye-catching addition to your Easter table, and a delightful way to usher in the season of rebirth.
With its cute floppy ears, fluffy tail, and sweet expression, this amigurumi Easter bunny captures the essence of springtime. Crocheting this adorable creature can be a relaxing and rewarding experience, allowing you to infuse your love and creativity into every stitch.
So, dust off your crochet hooks, gather your pastel-colored yarn, and get ready to embark on a crochet adventure that celebrates the joys of Easter and the beauty of spring. Download our Amigurumi Easter Bunny Free Crochet Pattern today, and bring a touch of handmade magic to your Easter celebrations.
Craft your own Easter bunny, share the spirit of the season with your loved ones, and create cherished memories that will last a lifetime. It’s time to make this Easter unforgettable with the art of crochet.
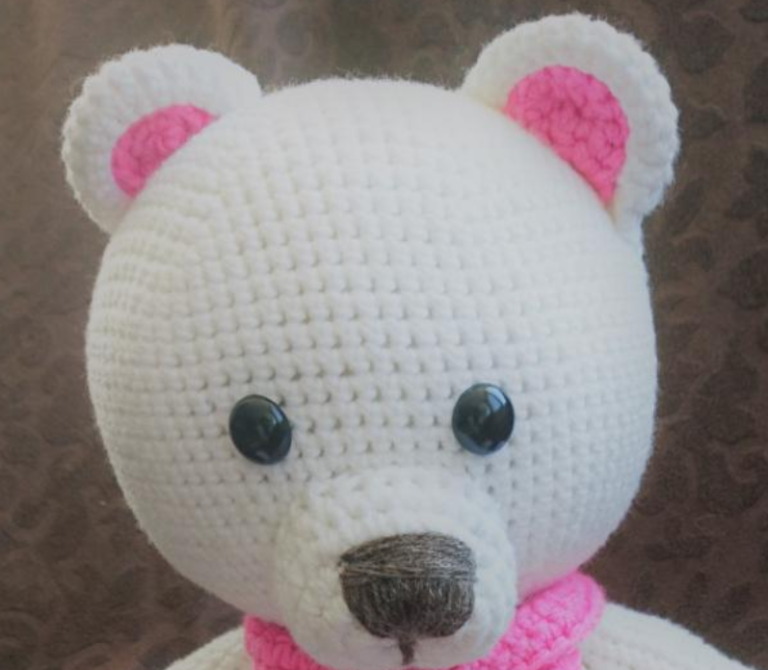
Easter Bunny
Author – Irina Bezelyanskaya
Necessary materials
1. Yarn Children’s Novelty Pekhorka (girls, I knitted from what I had. You can
choose what yarn you want, but, of course, the size of the toy will change)
2. Eyes are half beads or finished eyes, or just black buttons like mine
diameter 10 mm
3. Filler
4. False eyelashes
5. crochet hooks
6. Ready-made plastic pink nose (you can embroider a floss)
7. 2 buttons for panties
Abbreviations:
ch – chain
sc – single crochet
Dc – double crochet
Dec from dc-decrease, which is performed with single crochet
Dec Decrease (2 sc knitted together)
İnc-increase (2 sc are tied from one loop of the previous row)
half loop
Boots
We start knitting with pink yarn. We stuff quite tightly in the course of knitting, but not
overdo it so that the filler does not shine through, especially pay attention to the sock, where
fits dc.
1-we collect a chain of 7cp, into the 2nd loop from the hook approx., 4 sc, 4 sc into the last loop
chains, on the other side 4 sc, inc (16)
2-sc, inc, 4sc, 4 inc, 4 sc, inc, sc (22)
3-2sc, inc, 4sc, (sc, inc) x4, 4sc, inc, 2sc (28)
4-3 sc, inc, 4sc, (2sc, inc) x4, 4sc, inc, 3 sc (34)
5-2 inc, 15 sc, 2inc, 15 sc (38)
6-38 sc for the rear p / p
7-8-38 sc
9-12 sc, (dc, dec from dc) x6.8 sc (32)
10-12 sc, 6dec of dc, 8 sc (26)
Change thread to white
11- (2 sc, dec) x6, 2sc for the rear p / p (20)
12- (2 sc, dec, 14 sc, dec (18)
13-16) 18 sc
17- (5 sc, inc) x3 (21)
18-30) 21 sc. Finish, cut the thread.
Bootleg
We attach the turquoise thread on the back of the heel (where you can see the transition, change of thread with pink
on white) and knit in a circle.
1-ch, 26 sc, sl-st
2-5- ch, 26 sc, sl-st
6-ch, 26 sc, sl-st we knit this row for the front p / p
7-10) ch, 26 sc, sl-st. Finish, bend the top.
We knit the second leg, do not cut the thread. We will connect with the first leg
Connect the thread to the 6th row where it is connected behind the rear p / p and tie sl-st in a circle. To korets
a number of
Legs with a white thread, knit the bootleg turquoise
Paws
We start knitting with white yarn
1-6 sc into magic ring
2- 6 İNC (12)
3- (1 sc, inc) x6 (18)
4-7) – 18 sc
8- (4 sc, dec) x3 (15)
Change thread to pink
9- (3 sc, dec) x3 (12)
10-12 sc s back half-loop
11-26) – 12 sc.
Fold in half knit 5 sc.
Attach the thread to the 10th row and tie in a circle:
1-12 inc (24).
Finish, cut the thread, or hide it, so that later it can be tied into the body, or
leave enough end for sewing.
Torso
31- we knit 3 sc from the marker and type 3 ch, attach to the first leg and knit along
circle
21 sc, 3 sc in the rear air chain, 21 sc
32-3 sc in the front air chain, 45 sc (48)
33- (7 sc, inc) x6 (54)
34-38) 54 sc
39-knit to the middle of the back and change the thread to pink. Now the beginning of the series is here (54).
Bind pink a full circle
40-54 sc
Change to light pink
41-42) 54 sc
Change to dark pink
43- Next, so that the stomach is in the middle, align the marker on the back. He must be
between the legs
18 sc, (1 sc, dec) x6, 18 sc (48)
44-48 sc
Light pink
45- 48 sc
46-17 sc, (sc, dec) x6, 13 sc (42)
Dark pink
47-48) 42 sc
Light pink
49- (5 sc, dec) x6 (36)
50- 36 sc
Dark pink
51-36 sc
52- (4 sc, dec) x6 (30)
Light pink
53-54) 30 sc
Dark pink
55- (3 sc, dec) x6 (24)
56-24 sc
Change to white
57-24 sc for the rear p / p
58-24 sc. Finish, trim, leaving enough end for sewing.
Attach the white thread to the 57th row, where they knitted for the back p / p and tie in a circle sl-st.
Next, you can knit a head, starting from the 5th row of knitting a head or tie a head separately
Head
1-6 sc into magic ring
2-6 inc (12)
3- (sc, inc) x6 (18)
4- (2 sc, inc) x6 (24)
5- (3 sc, inc) x6 (30)
6- (4 sc, inc) x6 (36)
7- (5 sc, inc) x6 (42)
8- (6 sc, inc) x6 (48)
9- (7 sc, inc) x6 (54)
10- (8 sc, inc) x6 (60)
11-20) 60sc
21- (8 sc, dec) x6 (54)
22- (7 sc, dec) x6 (48)
23- (6 sc, dec) x6 (42)
24- (5 sc, dec) x6 (36)
25- (4 sc, dec) x6 (30)
26- (3 sc, dec) x6 (24)
27- (2 sc, dec) x6 (18)
28- (sc, dec) x6 (12)
29-6 dec. To finish. cut the thread, hide the tip.
Sew your head if you knitted it separately from the body
Ducks
So, we outline the eyes in the middle of the head. The distance between the eyes is approximately 7-8 sc.
We introduce the needle at point 1, output at point 2, leave a sufficient end for retraction.
Enter the needle at point 3, output at point 4. Tighten. We again insert the needle at point 1, output to
point 2. Well tighten to form fossa-sockets.
Make a tightening for the mouth.
We introduce the needle in volume 3, output in volume 5. We introduce in t.6, deduce in t.4. Pull well, pulling up your mouth
up.
We fix the thread, hide the ends and hide them.
Ears.
1-6 sc into magic ring
2-6 inc (12)
3-12 sc
4- (sc, inc) x6 (18)
5-18 sc
6- (2 sc, inc) x6 (24)
7-16) 24 sc
17- (6 sc, dec) x3 (21)
18-19) 21 sc
20- (5 sc, dec) x3 (18)
21-22) 18 sc
23- (4 sc, dec) x3 (15)
24-26) 15 sc. Fold in half, knit 6 sc parts for both halves, finish, trim,
leaving an end for sewing. we make out a face to a hare
Sew ears on top of the head, glue the nose. On the eyes we glue the cilia and put the eyes in
eye sockets.
Pants
We knit constantly for one p / p
1-dial a chain of 61 ch, sc into the 2nd loop from the hook, then 59 sc along the chain (60)
2-4) ch, 60 sc, turn
5- (9 sc, inc) x6 (66)
6- join in a circle using sl-st and then in a circle 66 sc
7- (21 sc, inc) x3 (69)
8-17) 69 sc. To finish.
Sew in the middle, leaving 27-30 sc per leg. Tie the legs in 2 rows with columns
single crochet. Unscrew the pants. Tie the straps, dial the air chain and knit sc over
the entire length of the chain. Legs can be tied with a “crustacean step”, sew buttons.