Amigurumi Harry Potter Glasses Holder Free Pattern
The pattern will be at the end of this post for the head and other pieces that I used, but here’s a chance to be super creative and make up other parts and make other fun characters.
Some suggestions would be different hair, hats, noses, animals, celebrities (real or fictional), whatever!
Then show us your stuff! Please share the pattern for any new add-ons so that we can try it out if we want to.
P.S. this pattern only takes a couple of hours, start to finish. 


Now, the pattern:
I used a G hook with worsted weight yarn
Head
1. ch 2, 6 sc in 2nd ch from hook
2. 2 sc in each sc around
3. sc in next sc, 2 sc in next sc around
4. sc in next 2 sc, 2 sc in next sc around
5. sc in next 3 sc, 2 sc in next sc around
6. sc in next 4 sc, 2 sc in next sc around
7. sc in next 5 sc, 2 sc in next sc around
8. sc in next 6 sc, 2 sc in next sc around
9. sc in next 7 sc, 2 sc in next sc around
10. sc in next 8 sc, 2 sc in next sc around
11-23. sc in each sc around
24. sc in next 8 sc, dec over 2 sc around
25. sc in next 7 sc, dec over 2 sc around
26. in back loops only, sc in next 6 sc, dec over 2 sc around
27. in both loops again, sc in next 5 sc, dec over 2 sc around
28. sc in next 4 sc, dec over 2 sc around
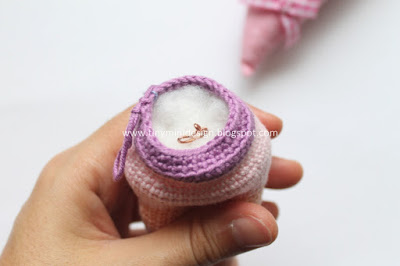
29. sc in next 3 sc, dec over 2 sc around. start stuffing here.
30. sc in next 2 sc, dec over 2 sc around
31. sc in next sc, dec over 2 sc around
32. dec over 2 sc around, sl st in next st, finish off, leaving a long tail for sewing.
whipstitch through remaining sc and pull tight to close hole. Secure well and push needle through bottom center to top center. Secure at top without making the head dented, then push the needle to the bottom again and trim.
Triangle Nose
1. ch 2, 6 sc in 2nd ch from hook
2. 2 sc in each sc around
3. sc in next 3 sc, 2 sc in next sc, sc in next 4 sc, 2 sc in next sc, sc in next 3 sc
4. sc in next 4 sc, 2 sc in next sc, sc in next 5 sc, 2 sc in next sc, sc in next 3 sc, sl st in next sc, finish off, leaving a long tail for sewing.
stuff, pin to face, shaping it as needed while you sew.
Round Nose
1. ch 2, 6 sc in 2nd ch from hook
2. 2 sc in each sc around
3. sc in next sc, 2 sc in next sc around
4-5. sc in each sc around
6. sc in next sc, dec over 2 sc around, sl st in next st, finish off, leaving a long tail for sewing.
stuff, pin to face and sew on.
Ears
crochet to round 5 of nose, sl st in next st, finish off, leaving a long tail for sewing.
press ear in half and make it curve slightly. Pin to head level with the nose (try the glasses on here to make sure it fits well) and sew them on.
Oval Eyes
1. ch 2, 6 sc in 2nd ch from hook
2. 2 sc in each sc around
3. sc in next 2 sc, hdc in next sc, 2 dc in next sc, hdc in next sc, sc in next 3 sc, hdc in next sc, 2 dc in next sc, sc in next 2 sc, sl st in next sc, finish off, leaving a long tail for sewing.
add a safety eye or a button to center, then pin to face and sew on.
Ernie’s hair
Using one strand black worsted weight yarn and one strand black fun fur, crochet to round 4 or 5 of head, sl st in next st and finsh off, leaving a long tail for sewing.
place on top of head with the wrong side up (beacuse it will be furrier) and sew to head with the worsted strand of yarn only. Weave in ends.
Have fun! I can’t wait to see what everyone comes up with!