How to Fix a Leaky Faucet Step by Step
A leaky faucet might seem like a minor annoyance, but over time, those small drips can waste a surprising amount of water and increase your utility bill. Fixing a leaky faucet is often simpler than you might expect and can be accomplished with some basic tools and a bit of patience. This guide will walk you through the process step by step, ensuring you understand each part of the repair.
Why Do Faucets Leak?
Before diving into repairs, it’s helpful to understand why faucets leak. The most common reasons include:
- Worn-out washers or O-rings
- Damaged valve seats
- Corroded or damaged parts inside the faucet
- Loose parts or fittings
By addressing these issues, you can restore your faucet to proper working order and prevent future leaks.
What You’ll Need to Fix a Leaky Faucet
Before starting, gather the following tools and materials:
- Adjustable wrench
- Screwdrivers (flathead and Phillips)
- Replacement washers and O-rings
- Faucet grease or plumber’s grease
- Cleaning cloth or rag
- Penetrating oil (optional)
- Bucket or bowl
Having these items ready will make the process smooth and efficient.
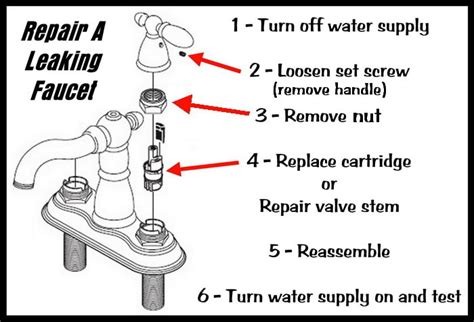
Step 1: Turn Off the Water Supply
The first and most important step is to shut off the water supply to the faucet. Locate the shutoff valves under the sink and turn them clockwise until fully closed. If you don’t have local shutoff valves, you may need to turn off the main water supply for your home.
Once the water is off, open the faucet to relieve any remaining pressure and drain the water from the pipes.
Step 2: Plug the Drain
It’s easy for small parts like screws or washers to slip down the drain during the repair. To avoid this, plug the drain with a sink stopper or cover it with a rag.
Step 3: Remove the Faucet Handle
The faucet handle covers the internal components you’ll need to work on. The process for removing the handle varies depending on the type of faucet:
- Compression Faucet: These typically have a decorative cap on top of the handle. Pry off the cap with a flathead screwdriver, then unscrew the handle.
- Cartridge Faucet: Look for a set screw on the handle side or underneath. Remove this screw and carefully pull the handle off.
- Ball or Disc Faucet: Similar to cartridge faucets but may have multiple screws holding parts in place.
If the handle is stuck due to corrosion or buildup, apply penetrating oil and wait a few minutes before trying to remove it again.
Step 4: Inspect and Remove the Cartridge or Valve Stem
With the handle off, you’ll see the cartridge or valve stem, depending on your faucet type. Use an adjustable wrench or pliers to unscrew and remove it carefully. Take note of how these parts fit together, as you’ll want to put everything back exactly as it was.
Once removed, inspect the parts for obvious signs of wear, corrosion, or damage.
Step 5: Replace Washers and O-Rings
Most leaks come from worn washers or O-rings inside the assembly. Remove the old washer and O-ring and replace them with new ones that match exactly. Applying a small amount of plumber’s grease to the new O-rings can help extend their lifespan and create a better seal.
If your faucet has a valve seat, inspect it as well. A damaged valve seat can cause leaks at the spout and may require replacement or resurfacing.
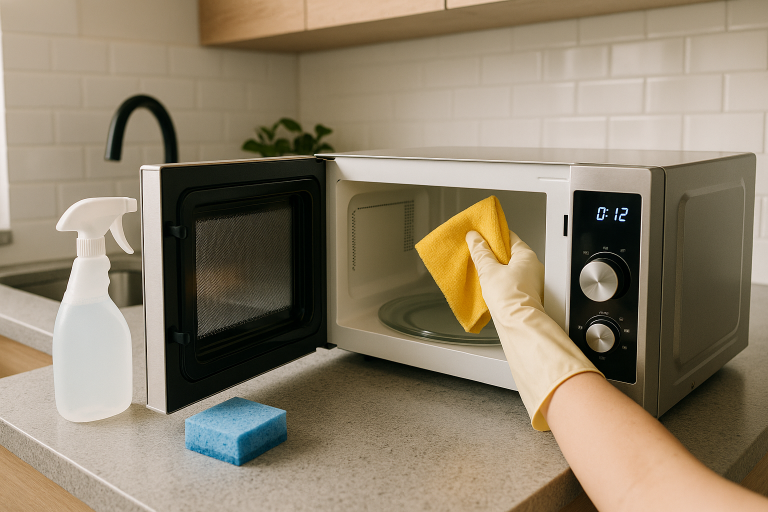
Step 6: Clean All Components
While everything is disassembled, take the opportunity to clean any mineral deposit buildup or debris from the faucet parts. Use a cloth and a mild cleaner or vinegar solution to clean the components thoroughly.
Step 7: Reassemble the Faucet
After replacing washers, O-rings, and cleaning parts, carefully reassemble the faucet in the reverse order you removed it. Ensure all parts are seated correctly and tightened properly but avoid over-tightening, which can cause damage.
Step 8: Turn the Water Back On and Test
Remove the drain plug or rag and slowly turn the water supply back on. Open the faucet and watch closely to make sure the leak is fixed and that water flows smoothly.
If the faucet still leaks, double-check your work. Ensure washers and O-rings are properly seated and that all parts are tightened correctly. Sometimes, a deeper issue like a damaged valve seat or cartridge might require professional help.
Additional Tips for Preventing Leaky Faucets
- Regularly check and maintain faucet parts to prevent wear.
- Avoid using excessive force when turning handles on and off.
- Install water softeners if you have hard water, as mineral buildup can damage parts.
- Replace old faucets if repairs become frequent or costly.
When to Call a Professional
While many faucet leaks can be fixed with DIY methods, consider contacting a plumber if:
- You’re unsure about how to disassemble your faucet.
- The leak persists even after replacing washers and O-rings.
- There is damage to internal valve seats or faucet bodies.
- You want to upgrade to a more efficient faucet.
Conclusion
Fixing a leaky faucet is a manageable task that can save water and reduce your bills. By following these step-by-step instructions, you can identify the cause of your faucet drip and replace the worn components easily. With basic tools and a little time, your faucet can operate leak-free once more. Remember to take your time, keep track of small parts, and don’t hesitate to seek professional help if needed.
Save on Pinterest