Amigurumi Cow and Bull Free Crochet Pattern
Facebook group: Amigurumi Free Patterns
Materials and tools:
– the main color yarn (I knitted jeans 160m \ 50g number 21) – 1 or one and a half skeins, depending on the density of knitting;
– yarn for clothes (at least two colors – dress and panties) at your discretion;
– some yarn for horns and tail tassels;
– some yarn for a bucket;
– cotter pin fastening or 2 buttons (for a cow with a sprout of 20 cm diameter 2 cm). or you can do without fixtures, just sew on your head));
– 2 half beads (beads, finished eyes) or just a bit of black thread for the eyes;
– 2 buttons for nostrils;
– 2 buttons for sandals;
– 2 buttons on the dress;
– plastic canvas (cardboard, plastic cover) for insoles and the bottom of the bucket;
– a piece of wire for a bucket;
– filler;
– sewing needle;
and, of course, good mood! 🙂


Legend:
ch is the air loop;
sc – single crochet;
inc – increase: 2 single crochet, knitted in one loop;
dec – decrease: 2 single crochet knit together;
sl-st – slip-stitch;
dc – double crochet;
() xN – what is described in parentheses is repeated N times.
PATTERN


Head
Dial a chain of 10 ch. Starting from the second loop from the hook we knit:
1 p.: 8sc, 3 sc last, on the other side of the chain 7 sc, inc (20)
2 p.: Inc, 7sc, 3inc, 7sc, 2inc (26)
3 p.: 1sc, inc, 7sc, (inc, 1sc) x3, 7sc, (inc, 1sc) x2 (32)
4 p.: 2sc, inc, 10sc, inc, 4sc, inc, 10sc, inc, 2sc (36)
5 p.: (5sc, inc) x6 (42)
6 p.: (6sc, inc) x6 (48)
7 p.: 2sc, (inc, 6sc, inc, 4sc) x2, inc, 18sc, inc, 2sc (54)
8 p.: 1sc, inc, 5sc, inc, 4sc, inc, 1sc, inc, 4sc, inc, 5sc, inc, 1sc, 27sc (60)
9 – 17 pp: 60sc
18 p.: (8sc, dec) x6 (54)
19 – 20 pp: 54sc
21 p.: (7sc, dec) x6 (48)
22 p.: 48sc
23 p.: (6sc, dec) x6 (42)
24 p.: 42sc
25 p.: (5sc, dec) x6 (36)
Knit 4sc and move the marker (these are the offset loops to align the knitting)
26 p.: 3sc, inc, 2sc, inc, 2sc, 2inc, 2sc, inc, 2sc, inc, 19sc (42)
27 p.: (6sc, inc) x6 (48)
If you decide to make a cotter pin or button fastening, then it is better to place it at the level of 27 rows
28 – 31 pp: 48 sc
Knit 2sc and move the marker (these are the offset loops to align the knitting)
32 p.: 2sc, dec, 20sc, dec, 2sc, dec, 2sc, dec, 8sc, dec, 2sc, dec (42)
33 p: (5sc, dec) x6 (36)
34 p: (4sc, dec) x6 (30)
35 p: (3sc, dec) x6 (24)
36 p: (2sc, dec) x6 (18)
37 p: (1sc, dec) x6 (12)
38 p: 6dec.
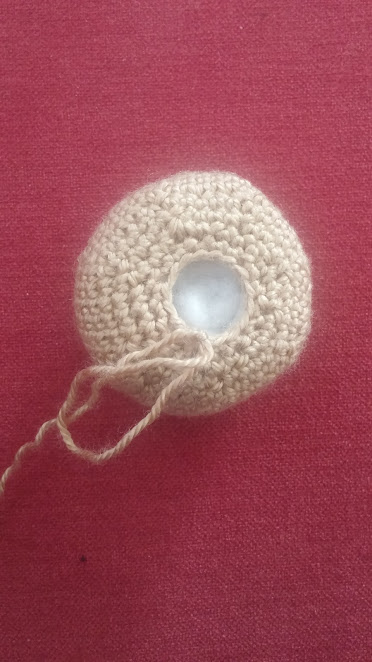
Pull the hole, fasten the thread, cut and hide inside the part.
Don’t let the strings in the photo bother you. I prefer to remove the markers and hide the ends of the threads before assembly 🙂
And this is the bottom view of the head. I already have a cotter pin inserted 🙂
Legs (2 parts)
Dial 10 ch starting from the second loop from the hook:
1 p: 8 sc, 3 sc last, on the other side of the chain 7 sc, inc (20)
2 p: inc, 7 sc, 3inc, 7sc, 2inc (26)
3 p: 1sc, inc, 8sc, inc, 3sc, inc, 8sc, inc, 2sc (30)
4 p: 2sc, (inc, 4sc) x5, inc, 2 sc (36)
At this stage, I cut out the insole from paper, after having previously circled the insole with a pencil.
5 p: 36sc for the rear arc of loops
6 – 8 pp: 36sc
Try on our paper insole. If it is in size, fits well in the leg, then cut out the insole from the plastic cover, plastic canvas or just cardboard
9 p: 12sc, dec, (3sc, dec) x2, 12sc (33)
Insert insole
10 p: dec, 10sc, 2dec, 1sc, 2dec, 10sc, dec (27)
11 p: 7sc, 6dec, 6sc, dec (20)
12 – 25 pp: 20sc
26 p: (3sc, dec) x4 (16)
27 p: (2sc, dec) x4 (12)
28 p: 6dec
Pull the hole, fasten the thread, cut and hide inside the part (I, as usual, have threads sticking out, I hide them before assembly)
Pens (2 parts)
We start knitting a handle with a hoof, which consists of 2 parts – the main and auxiliary
Auxiliary detail (2 pieces)
2ch
1 p.: 6sc in the second loop from the hook
2 p.: (1sc, inc) x3 (9)
3 – 4 pp: 9sc
Fasten, cut and hide the thread inside the parts.
The main detail (2 things)
2ch
1 p.: 6sc in the second loop from the hook
2 p.: (1sc, inc) x3 (9)
3 p.: (2sc, inc) x3 (12)
4 – 5 pp: 12 sc
Starting from the sixth row, we tie an auxiliary detail
6 p.: 6sc for the main, 9sc for the auxiliary part, 6 sc for the main (21)
Do not be confused by color. Somewhere the photo was lost, so the visual aid from the first turned up strings quickly pile up
7 p.: 10sc, inc, 9sc, inc (23)
8 p.: 23sc
9 p.: 10sc, dec, 9sc, dec (21)
10 p.: 21sc
11 p.: Dec, 8sc, 2dec, 7sc (18)
12 p.: 18sc
13 p.: (Dec, 7sc) x2 (16)
14 – 26 pp: 16sc
27 p.: (2sc, dec) x4 (12)
28 p.: 6dec
Pull the hole, fasten the thread, cut and hide inside the part.
Body (top to bottom)
For those who do the cotter pin fastening of the handle-legs: the handles are mounted at the level of 17 rows, and the legs at the level of 33 rows. So, let’s begin!
2 ch
1 p: 6sc in the second loop from the hook
2 p: 6inc (12)
3 p: (1sc, inc) x6 (18)
4 p: (2sc, inc) x6 (24)
5 p: 24sc
Fasten the head to the calf if you are doing cotter pin or button fastening
6 – 10 pp: 24sc
11 p: (7sc, inc) x3 (27)
12 – 13 pp: 27sc
14 p: (8sc, inc) x3 (30)
15 p: 30sc
16 p: (9sc, inc) x3 (33)
17p: 33sc
18 p: (10sc, inc) x3 (36)
19 p: (5sc, inc) x6 (42)
20 r: 42sc
21 p: (6sc, inc) x6 (48)
22 – 23 pp: 48sc
24 p: (7sc, inc) x6 (54)
25 – 27 pp: 54sc
28 p: 3sc, (2sc, inc) x6 (this is the butt), 33sc (60)
29 – 34 pp: 60sc
35 p: (8sc, dec) x6 (54)
36 p: (7sc, dec) x6 (48)
37 p: (6sc, dec) x6 (42)
38 p: (5sc, dec) x6 (36)
39 p: (4sc, dec) x6 (30)
40 p: (3sc, dec) x6 (24)
41 p: (2sc, dec) x6 (18)
42 p: (1sc, dec) x6 (12)
43 p: 6dec.
Pull the hole, fasten the thread, cut and hide inside the part.
Ears, horns, tail, face design
Ears (2 parts)
2ch
1 p.: 6sc in the second loop from the hook
2 p.: 6inc (12)
3 p.: 12 sc
4 p.: (3sc, inc) x3 (15)
5 p.: 15sc
6 p.: (2sc, inc) x5 (20)
7 – 10 pp: 20sc
11 p.: (2sc, dec) x5 (15)
12 p.: 15sc
Fasten the thread and leave the end for sewing parts to the head. We don’t stuff ears!
Horns (2 parts)
9ch close in a circle
1 – 4 pp: 9sc
5 p.: Dec, 7sc (8)
6 p.: 8sc
7 p.: Dec, 6sc (7)
8 p.: 7sc
9 p.: 2dec, 3sc (5)
Pull the hole, fasten the thread and hide inside the part. Fill the horns a bit.
Tail
Cut three lengths of the main thread equal to the length of the tail x 2.5. Stretch through the column in the middle of the butt, braid the braid. At the end, make a brush from the color of the horns
Decor
Sew on ears and horns, buttons. Sew \ glue eyes, embroider mouth. You can glue cilia on the ladybird if desired.
Ladybug clothes
Sandals
The threads are either the same thickness as the main ones, or thinner, but the number of the hook is the same as you knitted the cow
Dial 10 ch starting from the second loop from the hook:
1 p: 8 sc, 3 sc last, on the other side of the chain 7 sc, inc (20)
2 p: inc, 7 sc, 3inc, 7sc, 2inc (26)
3 p: 1sc, inc, 8sc, inc, 3sc, inc, 8sc, inc, 2sc (30)
4 p: 2sc, (inc, 4sc) x5, inc, 2 sc, sl-st (36)
Next we knit in matching rows
5 p.: We knit dc for the back arches of loops
3ch lift, 36dc, sl-st
6 p.: 3ch lift, 11dc, 6dec from dc, 11dc, dec from dc, sl-st (29)
7 p.: 1ch lift, 11sc, dec, 4sc, dec, 10sc, sl-st (27)
Fasten, cut and hide the thread
We make fasteners:
Attach the thread to the side of the sandal, knit a chain of 17ch,
starting with 10 loops from the hook we knit 8sl-st.
Fasten, cut and hide the thread.
We got a buttonhole
Pantaloons
I knitted from begonia, the hook is still the same, 1.75
When you pick up the initial chain, then try on the widest place (along with the legs) whether your cow will enter the panties. If anything, then increase the number of loops.
Dial a chain of 52 ch, close in a circle.
Knit in close rows. Each row starts from the ch rise and ends sl-st in 1 column of the row.
In the first row I knitted a gum thread for every occasion. So that the ladybug does not lose her trousers on the way :)))
1 p.: 1ch, 52sc, sl-st
2 – 6 pp .: 3ch, 52dc, sl-st
Next, we knit each leg separately
7 row – dial 5 ch, skip 26 loops of the previous row, sl-st to 27 loops of the previous row. 3ch lifting and then we knit 26 dc in the previous row, 5dc in the chain of 5ch, sl-st (31)
8 p.: 3ch, (ch, skip 1 loop of the previous row, 1dc) to the end of the row, sl-st
This is such fillet knitting
9 p.: 3ch, (1dc, ch) in each arch of the previous row, sl-st.
And the last row – strapping
10 p.: 3ch, in the first arch of the previous row we knit 1dc, ch, 1dc,
and then we knit into each second arch (i.e., skip one, knit into the second) alternately: 3dc with 1 ch between them, 5 dc with 1 ch between them – to the end of the row. In the last arch, we knit 1dc, ch, 1dc, ch, 1dc, ch and sl-st in the first column of the row.
Second panty:
7 p.: Attach the thread to the beginning of the chain of 5ch, 3ch lifting and knit 5dc along the chain and 26 dc along the loops of the 6th row (31)
9 – 10 pp: similar to the first pants.
Dress
The dress was knitted from kristal (450m \ 100g), the hook is still the same 1.75.
Dial a chain of 38 ch + 3ch climb
We knit in rotary rows, each row begins a 3ch lift.
1 p.: 6dc, 2v, 7dc, 2ch, 12dc, 2ch, 7dc, 2ch, 6dc
2 p.: 5dc, inc, into the arch (1dc, 2ch, 1dc), inc, 5dc, inc, into the arch (1dc, 2ch, 1dc), inc, 10dc, inc, into the arch (1dc, 2ch, 1dc), inc, 5dc, inc, in the arch (1dc, 2ch, 1dc), inc, 5dc
3 r .: 6dc, inc, into the arch (1dc, 2ch, 1dc), inc, 7dc, inc, into the arch (1dc, 2ch, 1dc), inc, 12dc, inc, into the arch (1dc, 2ch, 1dc), inc, 7dc, inc, in the arch (1dc, 2ch, 1dc), inc, 6dc
4 r.: 9dc, skip everything between the arches (this is the armhole), then we knit 18dc, skip everything between the arches (the second sleeve is the armhole), 9dc
5 p.: (Skipping 1 loop, in the next we knit 2dc, 2ch, 2dc, skip 2 singing, in the next we knit 2dc, 2ch, 2dc) to the end of the row, 1dc in the last loop of the row.
If you want the dress to be even more flared, then you can knit every second loop of the previous row.
6 p.: In each arch from 2ch of the previous row we knit 2dc, 2ch, 2dc
Connect with the beginning of the row and then knit in circular matching rows, starting from the row with ch rise and ending with sl-st
7 p.: (In one arch we knit 2dc, 2ch, 2dc, in the next 3dc, 2ch, 3dc) to the end of the row
8 – 9 pp .: similar to the 7th row.
10 p.: In each arch knit 3dc, 2ch, 3dc
11 p.: We knit similarly to the 10th.
12 p.: We tie the sc dress to each loop of the previous row, and 2 or 3 sc to the arch so that the hem of the dress is not pulled together.
Tie sc yoke in a circle, simultaneously forming loops for two buttons.
The dress is ready!
For thin strings of the lily type, we initially gain 50 ch + 3 ch rise.
The principle of knitting a yoke is similar, the difference is only in the number of loops. If in a dress made of crystal distribution
6 loops – the back shelf, 7 loops – the sleeve, 12 loops – in front, 7 loops – the sleeve, 6 loops – the back shelf, then in lily:
8 – 9 – 16 – 9 – 8
Starting from the fifth row, knitting is different.
So:
5 row: in every second loop of the previous row we knit 1dc, 2ch, 1dc
6 row: in each arch we knit 1dc, 1ch, 1dc
7 row: in each arch we knit 2dc, 2ch, 2dc
We knit the 8th row similarly to the 7th row, and at the end sl-st – we connect to the beginning of the row and then we knit in circular matching rows, where each row begins with 3 ch rise and ends with sl-st.
9 – 12rr: in each arch we knit 2dc, 2ch, 2dc.
13 row – strapping –
In each arch of the previous row we knit 6dc.
Tie sc yoke in a circle, simultaneously forming loops for two buttons.
The dress is ready!
Apron
10ch
1p inc, 8dc, pr
2p inc, 10dc, pr
3 – 5 pp: 14dc
Fasten, cut and thread the thread.
Chain of 50ch, 14sl-st top apron, 53 ch
2 row: starting from the 4th loop from the hook 114dc.
Fasten the thread, cut.
Tie the apron on three sides, knit 2sc at the corners
1 p.: Sc,
2 p.: Sc for the back half-loop
3 r.: On the front arches of the previous row
4ch, 1dc, ch, 1dc, ch, 1dc, 1ch, 1dc, 1ch, 1dc, skip 1 loop, 1sc, skip 1 loop, into the next 5 dc, separated by 1ch, skip 1 loop of the previous row, into the next 1sc and so on . We end the row with a 5dc shell divided by ch.
Fasten, cut and hide the thread.
About the outfit for the bull!
Pants knitted a goby according to the description of pantaloons, but all in single crochet columns. I think that it’s quite possible to knit double crochets – it will be faster
She knitted a shirt as well as a dress up to 5 rows. In the fifth row, I made an increase in every fourth column of the previous row, and then exactly to the desired length. If suddenly a tight shirt, then you can make an increase in every third column.
For the strings, dial 20 or 30 ch, then knit along the neck with single crochet, then continue the chain from ch 20-30 ch.
But you can just tie it along the way by making buttonholes
Milk bucket
Immediately make a reservation – this bucket for my cow fits perfectly in size. But you must “try on” the bucket and, if necessary, increase or decrease it.
2 ch, second from the hook:
1p: 7sc
2p: 7inc (14)
3p: (1sc, inc) x7 (21)
4p: (2sc, inc) x7 (28)
Cut out the bottom. I cut out of cardboard
5p: 28 sc behind the back arc of loops
6-8rr: 28 sc
9p: (6sc, inc) x4 (32)
10-11 pp: 32sc
12p: (7sc, inc) x4 (36)
13-15rr: 36sc
16p: sl-st for the front arc of loops
Fasten the thread, cut, leaving a long end. Bring the thread to the 5th row and knit 28 sc on the missing arc of loops. Knit the bottom from the inside (see photo)
Fasten the thread and hide it inside the part. Insert the bottom.
Now about milk. I just put the filler inside and lay down on top with wool for felting so that it was even.
For those who are not friends with wallowing, we knit milk
2 ch, second from the hook:
1p: 7sc
2p: 7inc (14)
3p: (1sc, inc) x7 (21)
4p: (2sc, inc) x7 (28)
5p: (3sc, inc) x7 (35)
Cut out the bottom. I cut out again from cardboard
5p: 35 sc for the rear arc of loops
Insert the bottom (our milk cannot be with a slide)
6p: (5sc, dec) x5 (30)
7p: 30 sc
8p: (4sc, dec) x5 (25)
9p: 25 sc
Fasten, cut and hide the thread inside the parts. Fill the bottom of the bucket with filler and our milk. Insert the milk inside the bucket .. You can carefully hem there to keep the milk in the bucket (I agree, it sounds funny)
Well, the handle bucket:
Cut off a piece of wire. bend the ends (look at the photo). We catch the wire by the loops on the sides of the bucket. and then just bend better with pliers, well, or with any other lips :)))
Now it remains only to give a bucket to our cow or a calf in a hoof.