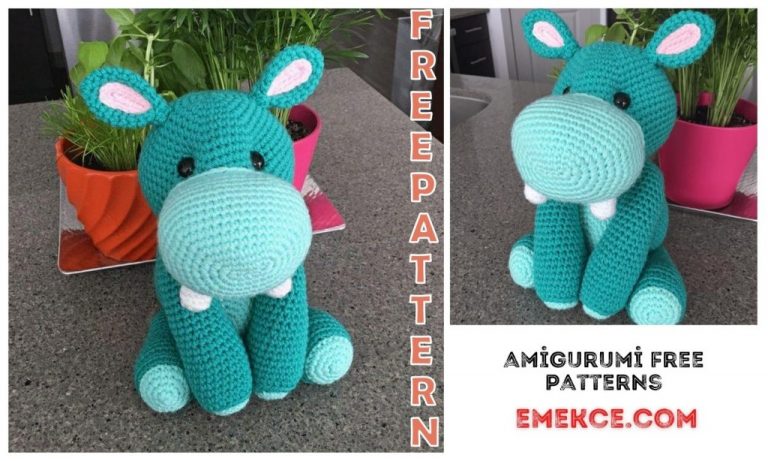
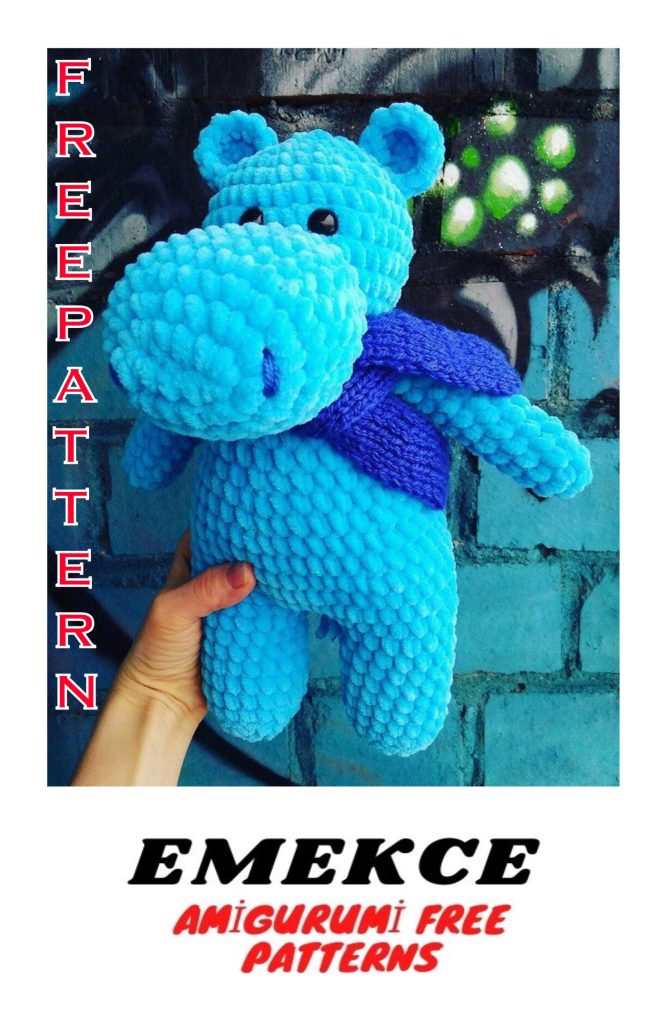
Amigurumi Velvet with Rope Hippo Free Crochet Pattern
Amigurumi, the art of crafting adorable stuffed animals and characters through crochet, has captured the hearts of craft enthusiasts worldwide. If you’re on the lookout for your next delightful amigurumi project, you’re in for a treat! In this article, we’re thrilled to present you with a charming and free crochet pattern to create a lovable Amigurumi Velvet with Rope Hippo.
Abbreviations:
CH – chain
SC – single crochet
DC – double crochet
İNC – increase
DEC – decrease
SL-ST – slip stitch
STAGE 1: LEGS + BODY
1 row: 2 CH, 6 SC in the 2nd from the hook loop
2 row: 6 İNC (12)
3 row: (1 SC, İNC) 6 (18)
4 row: 18 SC for the rear loop
5-10 rows (6 rows) 18 SC
Cut the thread, leaving a small end.
We knit the second part in the same way.
At the end of knitting the second part, the thread is not cut.
11 row: We knit 3 CH, connect with the second leg we knit 18 SC on the second leg, 3 SC on the chain of CH, 18 SC on the first leg, 3 SC on the chain of CH (42)
12 row: 17 SC, İNC, 1 SC, İNC, 1 SC, İNC, 17 SC, 3 SC (45)
13-15 rows: 45 SC
16 row: (7 SC, DEC) * 5 (40)
17 row: 40 SC
18 row: (6 SC, DEC) * 5 (35)
19 row: 35 SC
20 row: (5 SC, DEC) * 5 (30)
21-22 rows: 30 SC
23 row: (4SC, DEC) * 5 (25)
24 row: 25 SC
25 row: (3 SC, DEC) * 5 (20)
2 STAGE. HEAD.
1 row: 2CH, 6 SC in the 2nd loop (6)
2 row: 6 İNC (12)
3rd row: (1SC, İNC) * 6 (18)
4 row: (2 SC, İNC) * 6 (24)
5 row: (3SC, İNC) * 6 (30)
6 row: (4 SC, İNC) * 6 (36)
7-10 rows: 36 SC
If the eyes are on the mount – insert between the 7th and 8th rows.
We fill the part in the course of knitting.
11 row: (4 SC, DEC) * 6 (30)
12 row (3 SC, DEC) * 6 (24)
13 row (2 SC, DEC) * 6 (18)
We knit several SL-STs, cut the thread, leaving the end for stitching.
(The head will be small in relation to the body, do not be scared, it should be so) 😉🌹😄
STAGE 3: Muzzle.
1 row: We collect a chain of 6 CH. 2 SC to the second loop from the hook, 2 SC, 4 SC to the last loop of the chain, then we knit on the back of the chain 2 SC, 2 SC to the last loop (12)
2 row: 2 İNC, 2 SC, 4 İNC, 2 SC, 2 İNC (20)
3 row: (1 SC, İNC) * 2, 2 SC, (1 SC, İNC) * 4, 2 SC, (1 SC, İNC) * 2 (28)
4-7 rows (4 rows) 28 SC
8 row: (5 SC, DEC) * 4 (24)
9 row: 24 SC
10 row: (4SC, DEC) * 4 (20)
11 row: (3 SC, DEC) * 4 (16)
We knit several SL-STs, fill the part, leave the end of the thread for stitching.
Optionally, you can connect two halves of the nose (2CH, 6 SC in the second loop) and sew them between the 7th and 8th rows of the muzzle.
STAGE 4: USHI.RUKI. TAIL.
HANDLES (we knit two parts)
1 row: 2 CH, 6 Sc in the second loop.
2 row: (1 SC, İNC) * 3 (9)
3-13 rows (11 rows) 9 SC
We do not completely fill the part, fold it in half, knit 4 sc.
EARS (we knit two parts)
1 row: 2 CH, 6 SC in the second loop.
2 row: we unfold the knitting, do 3 lifting loops (3CH), we knit DC in the same SC, in each of the remaining 5 SC we knit 2 DC (12 DC)
we tie the part along the entire perimeter of SC.
Fold in half, knit 4 SC.
TAIL (we do as desired) cut 3 strings of the main yarn (15-20 cm), put them together, fasten to the butt with a hook, and braid a short pigtail (2-3 cm), make a knot, and cut the threads, leaving a small brush .
SKIRT AND BOW. ASSEMBLY,
SKIRT.
We knit a chain of CH (to tightly wrap around the tummy, everyone will have a different number of loops)
We connect the chain, knit in a circle.
1 row: 3 lifting loops (CH), DC into the same loop, then we knit 2 DC into each loop, SL-ST
2 row: 3 lifting loops, 1 DC in each DC, sl-st.
BOW:
In the amigurumi ring: 3 CH, 4 DC, 3 CH, sl-st, 3 CH, 4 DC, 3 CH, SL-ST.
Cut the thread, leave a small tip, wrap the bow in the center several times, tie a knot in the back.
All is ready!!! Now you can stitch the details.
I stitched in this sequence:
HEAD + BODY + HANDLES + Muzzle + EARS. Then she sewed her eyes and designed her eyebrows with cilia.
That’s all!!! I wish you all pleasant knitting and even loops. Waiting for your work.