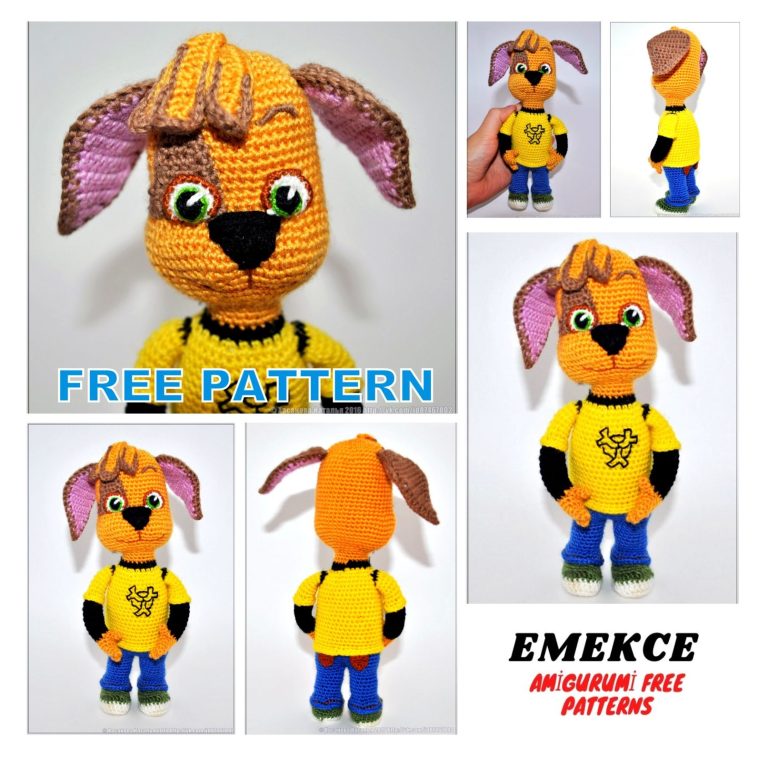
Basic Dog Amigurumi Crochet Free Pattern
This is a pattern for a basic dog. By modifying the tail, ears, legs and muzzle as you see fit,
you can turn it into many different breeds. I’ve done two different breeds to illustrate the
pattern, a very simple, solid-coloured Labrador retriever and a more detailed Australian
shepherd, to give you an idea for what you can do. Both of these dogs use the exact same
pattern, the only difference is the ears and tail (or lack of, in the aussie’s case!). As this is
meant to be a fairly “generic” pattern, I’m leaving a lot of choices open to you when it comes
to choice of yarn etc. Adjust it to suit the breed you have in mind.

Materials needed
Yarn of choice (If you want to add “fur” later make sure it’s a type of yarn that can be
brushed out – acrylic is a good choice for this, cotton is not).
For my Labrador retriever, I used a dark brown acrylic yarn. For the Aussie, I used
cream, brown, white and tan acrylic yarn for the head and legs and a multi-coloured
novelty yarn for the main body and upper legs.
Hook – I used my favourite 2.5 mm, but you can use something else that suits your
choice of yarn.
You will also need something for eyes/noses. For these, I cut pieces of felt, but you
can of course also embroider details, or use safety eyes or anything else you want to
use. A bit of felt or scrap fabric might be nice to have to create a scarf or collar out of.
Finally, you will need filling to stuff the body parts. I use the stuffing from old pillows
for my projects.
Techniques/Terms used
Chain – Ch
Single crochet – Sc
Slip stitch – Sl st
Increase – Inc – Make two Sc in the same stitch, increasing the overall number of stitches in
the round
Decrease – Dec – Make one Sc in the next two stitches, decreasing the overall number of
stitches in the round
I (still!) haven’t gotten the Magic Circle down, so I use a different method. You can exchange
my start method for the magic circle or another technique you prefer.
All parts are crocheted in spirals.


Body parts
Head
Round 1: Ch 6, join with a sl st (6)
Round 2: [Inc 2] repeat five times (12)
Round 3: [1 Sc, Inc 2] repeat five times (18)
Round 4: [2 Sc, Inc 2] repeat five times (24)
Round 5: [3 Sc, Inc 2] repeat five times (30)
Round 6 – 9: Sc around (30)
Round 10: [3 Sc, Dec 2] repeat five times (24)
Round 11: Sc around (24)
Round 12: [2 Sc, Dec 2] repeat five times (18)
Round 13: [1 Sc, Dec 2] repeat five times (12)
Round 14: [Dec 2] repeat five times (6)
Stuff until firm. Decrease the last stitches until closed. If you are going to use safety eyes,
don’t forget to attach them before you close! Save a tail and put aside.
Muzzle
Round 1: Ch 6, join with a sl st (6)
Round 2: [Inc 2] repeat five times (12)
Round 3 – 6: Sc around (12)
Cut off leaving tail, stuff and put aside – do not sew together. If you are going to use a safety
nose, it’s time to attach it.
Ears (make 2)
Here I will describe two basic types of ears.
Drop ears (as in the Labrador)
Round 1: Ch 6, join with a sl st (6)
Round 2: [Inc 2] repeat five times (12)
Round 3: [1 Sc, Inc 2] repeat five times (18)
Round 4: [2 Sc, Inc 2] repeat five times (24)
Cut off yarn. Save a tail and put aside.
Standing ears/rose ears (as in the Aussie)
This ear can be sewn onto the head as either a standing ear, or you can shape it into a rose
ear/tipped ear.
Round 1: Ch 6, join with a sl st (6)
Round 2: [Inc 2] repeat five times (12)
Round 3: [1 Sc, Inc 2] repeat five times (18)
Round 4: 8 Sc. After these, turn around and make 6 Sc in the other direction (to the right).
Turn around again and make 4 Sc in the other direction (left). Turn around again and make 2
Sc in the other direction (right). This should give you a basic triangular shaped ear.
Round 5: Sc around whole ear to smoothen edges (ca 21)
Cut off yarn. Save a tail and put aside.

Body
Round 1: Ch 6, join with a sl st (6)
Round 2: [Inc 2] repeat five times (12)
Round 3: [1 Sc, Inc 2] repeat five times (18)
Round 4 – 18: Sc around (18)
Round 19: [1 Sc, Dec 2] repeat five times (12)
Round 20: [Dec 2] repeat five times (6)
Stuff, decrease the last stitches until closed. Save a tail and put aside.
Legs (make 4)
Round 1: Ch 5, join with a sl st (5)
Round 2: [Inc 2] repeat five times (10)
Round 3 – 12: Sc around (10)
Stuff, sew together. Save a tail and put aside.
All body parts needed for a Basic Dog
Joining together
Once all parts are done, it is time to sew them together. Use the tails on each body part to
join them together with a sewing needle. I recommend trying moving the body parts around
a bit before you attach them. Depending on where you put them, it will create very different
looks. If going for a particular breed, it is a good idea to look at some photos of that breed to
see how it looks, to try to get your dog as close as you can. It’s the little details that do it!
If you do the Aussie-style ears, remember to fold them before you attach them to get the
proper shape. If you are going for tipped ears (like on a collie) you can try sewing the eartips
down to get the correct shape.


Details
Like I said above, it’s the little details that do it! I like to add as many details as I can to give
the dogs more character once the body parts have been attached. A few suggestions for
things you can try:
– Using a suitable colour, embroiden “toe outlines” on the feet. You can even sew
pawpads and/or nails.
– Using a suitable colour, embroiden little “whisker spots” on the muzzle
– Use simple chains/single crochet lines/small spirals to create blazes, spots and other
markings and then sew on.
– Cut pieces of felt or fabric into a scarf, collar, harness, blanket or similar
– If using safety eyes, sew little eyelids above the eyes for a calmer expression rather
than a wide-eyed stare. If using felt eyes, make them as detailed as you can with
pupils and eyeshines rather than just single colour blotches.
– ProMarkers or other waterproof markers can be used to draw pigment spots and
similar. I’ve tried once or twice to draw very pale pink on white areas, such as around
a nose, and it works pretty well.
Adding fur
If you’re making a longhaired breed or even a shorthaired one that has a bit of extra furry
areas, this can work very nicely – although it’s pretty time consuming! For an example of
what this looks like, see the tail of my Labrador retriever or the chest area on the Aussie,
they both use this method.
It is most suitable to try making fur with acrylic or wool yarns or others that can be brushed
out. It does not work well with cotton in my experience, although I can’t vouch for other
types of yarn as I’ve never tried them. You will need a suitable brush and a pair of scissors. I
use a small slicker brush from a pet shop, this works perfectly.
First, you need to cut a lot of strips of yarn. Depending on how much fur you want, you may
have to cut many, many of these…
Once you have enough (easiest is to cut more as you go along and see how many you need)
attach them to the dog. The method I use is to pull the crochet hook under a stitch, hook the
middle of the yarn strip and pull it back under the stitch. You will now have a loop of yarn
going under the stitch. Pull both ends of the yarn strip through the loop and pull to close it.
Repeat until the desired area is filled with yarn strips.
Now, brush through with the slicker brush. The longer you brush, the smoother the fur will
look.
When done, cut and shape the fur with the scissors until you have the desired look.