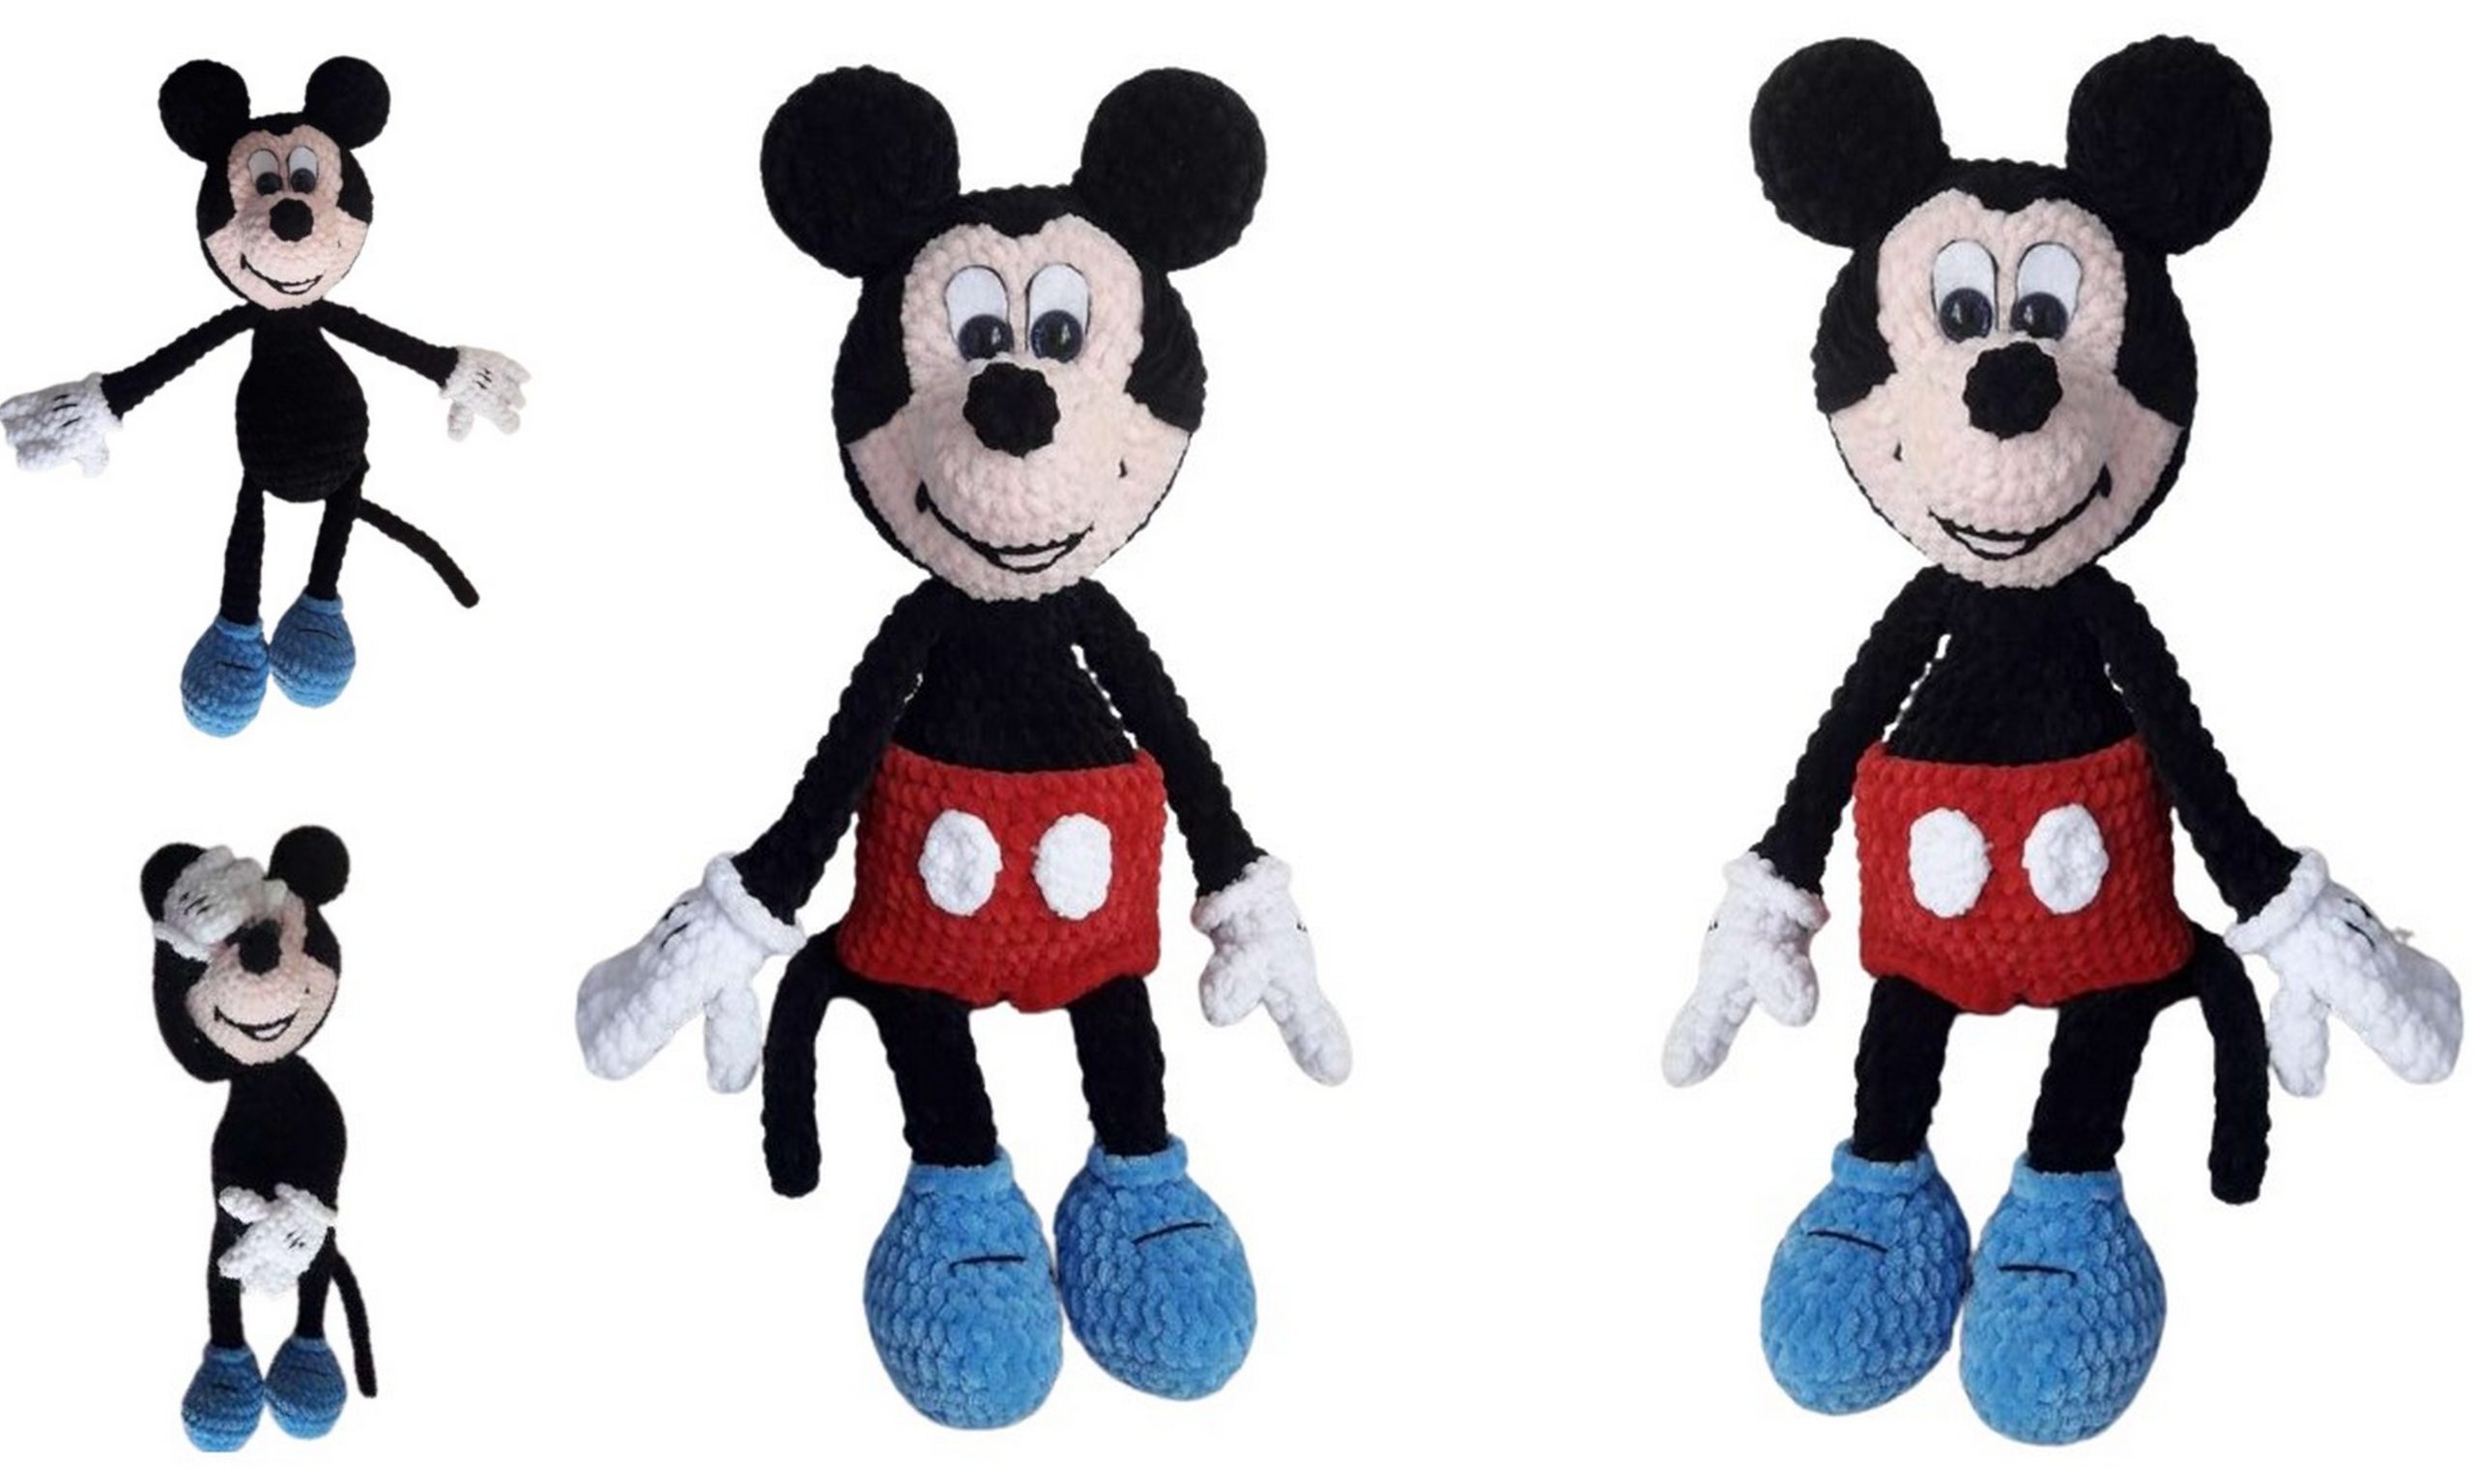
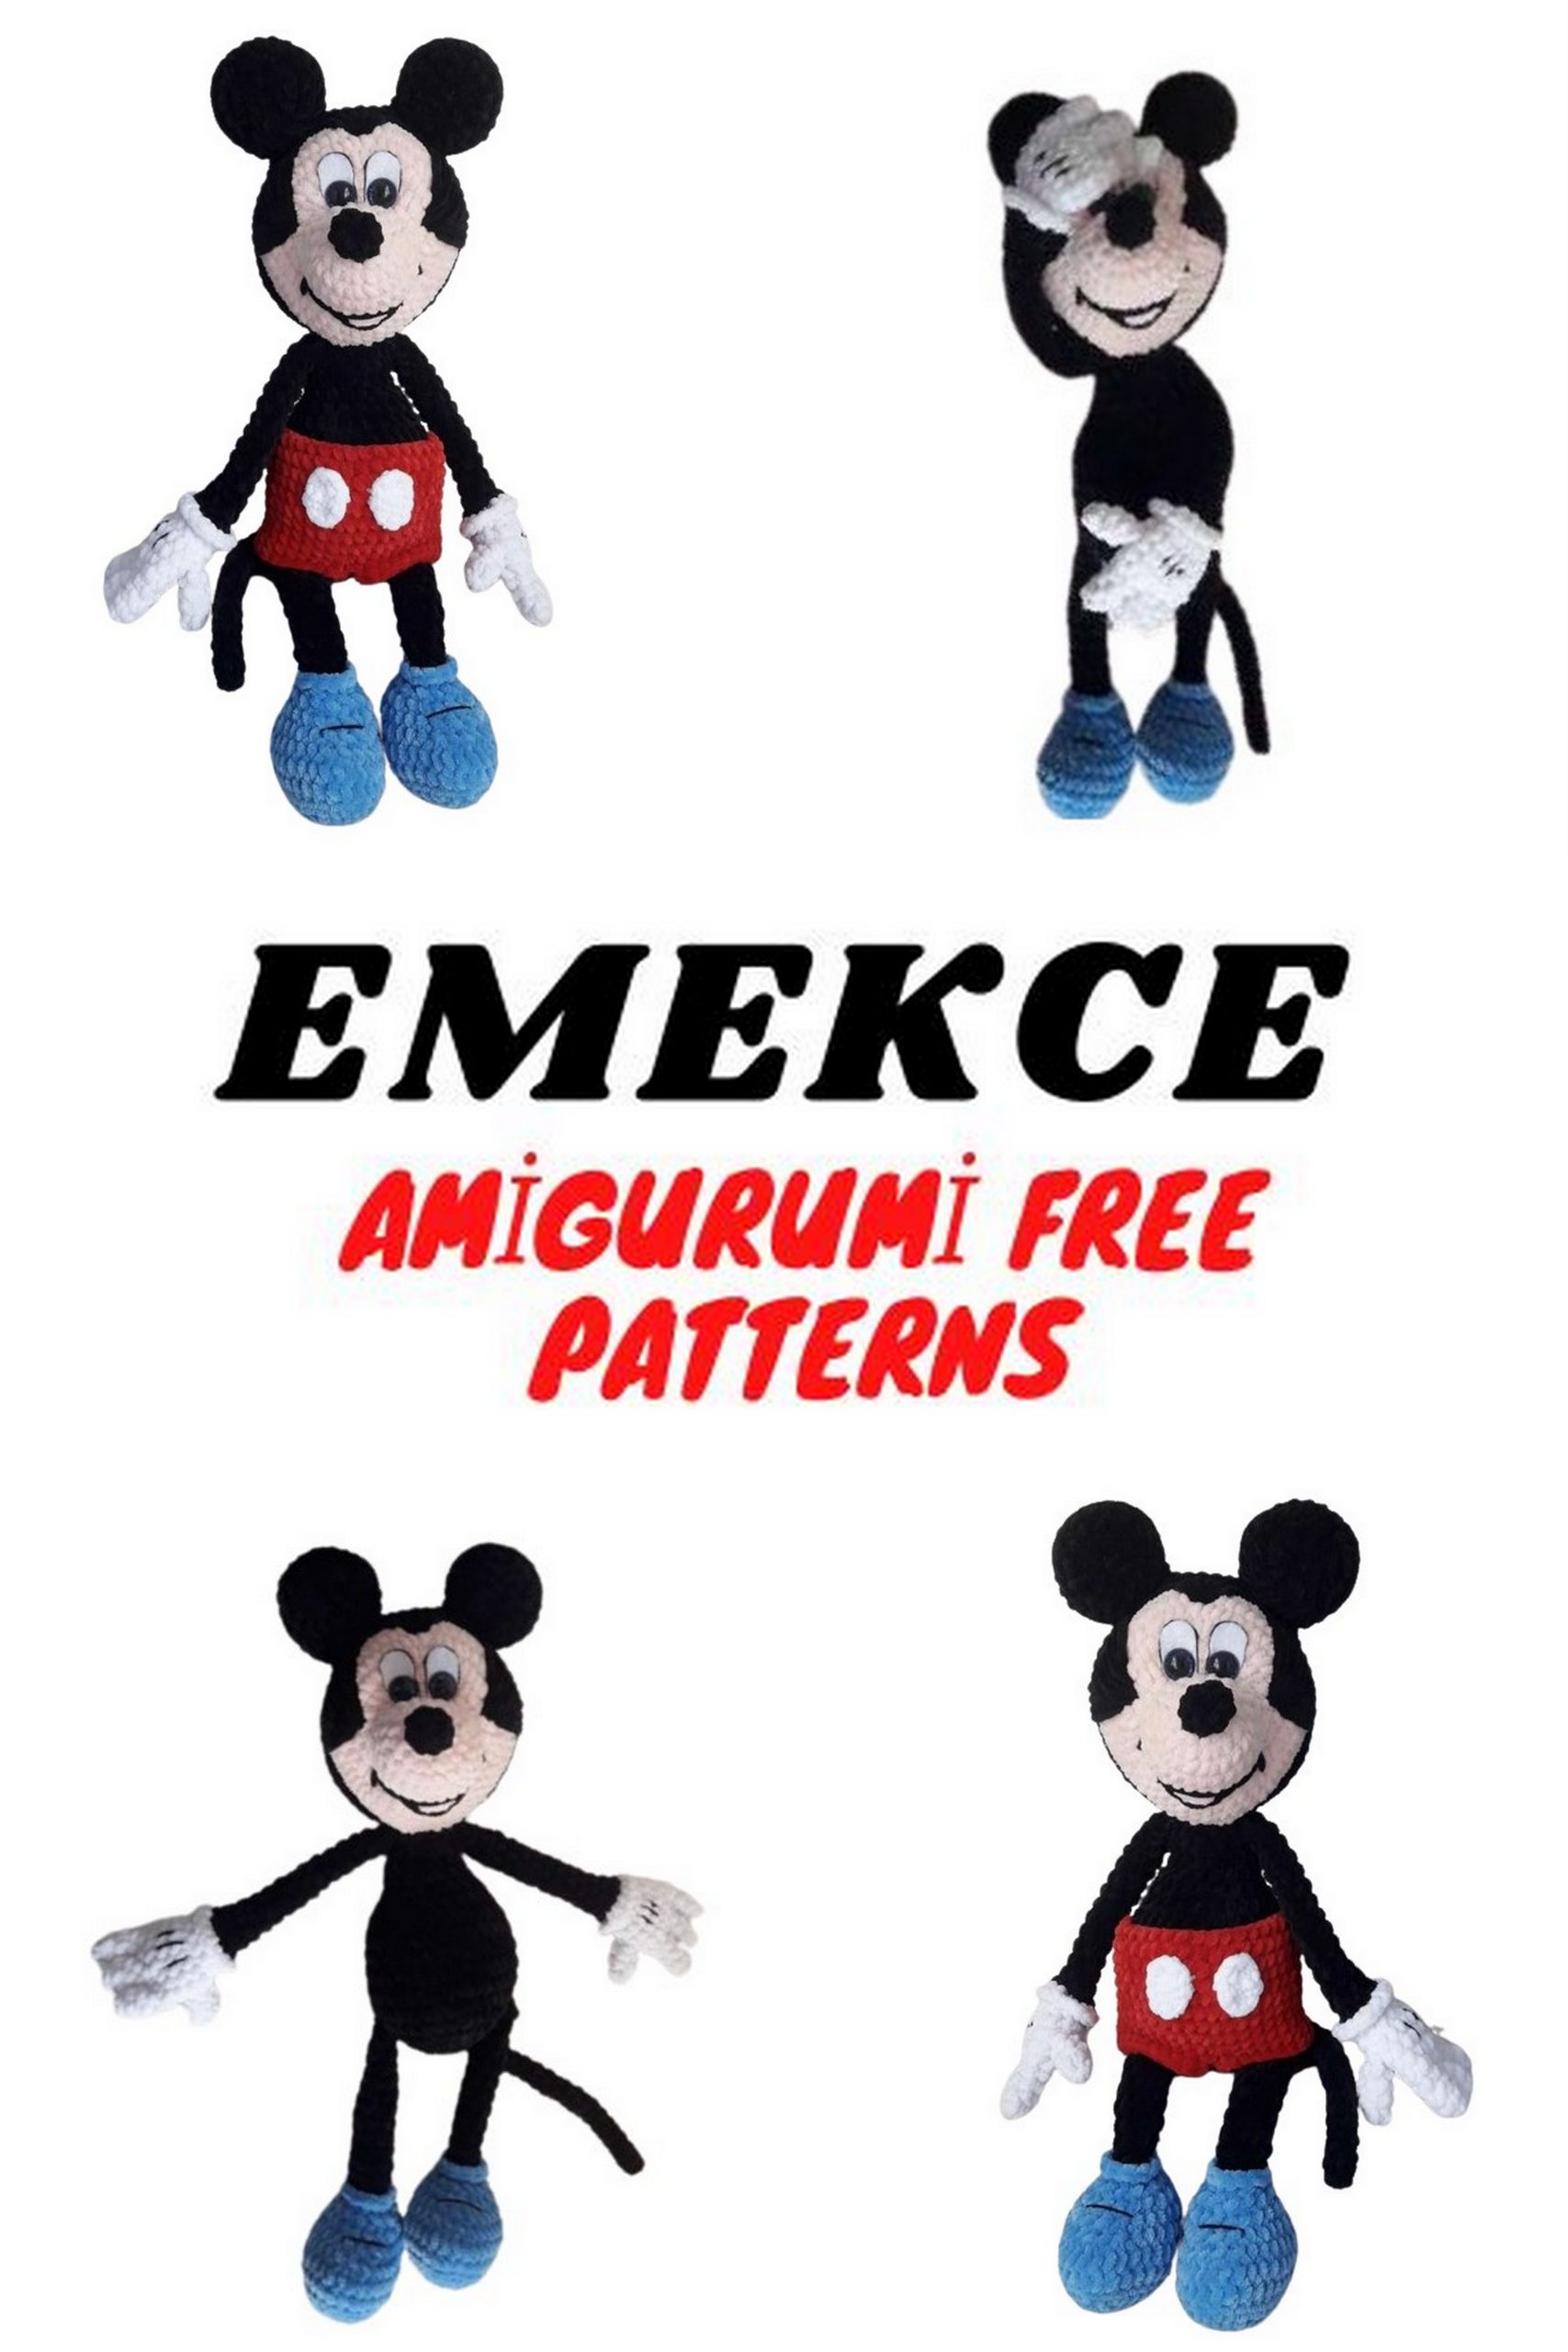
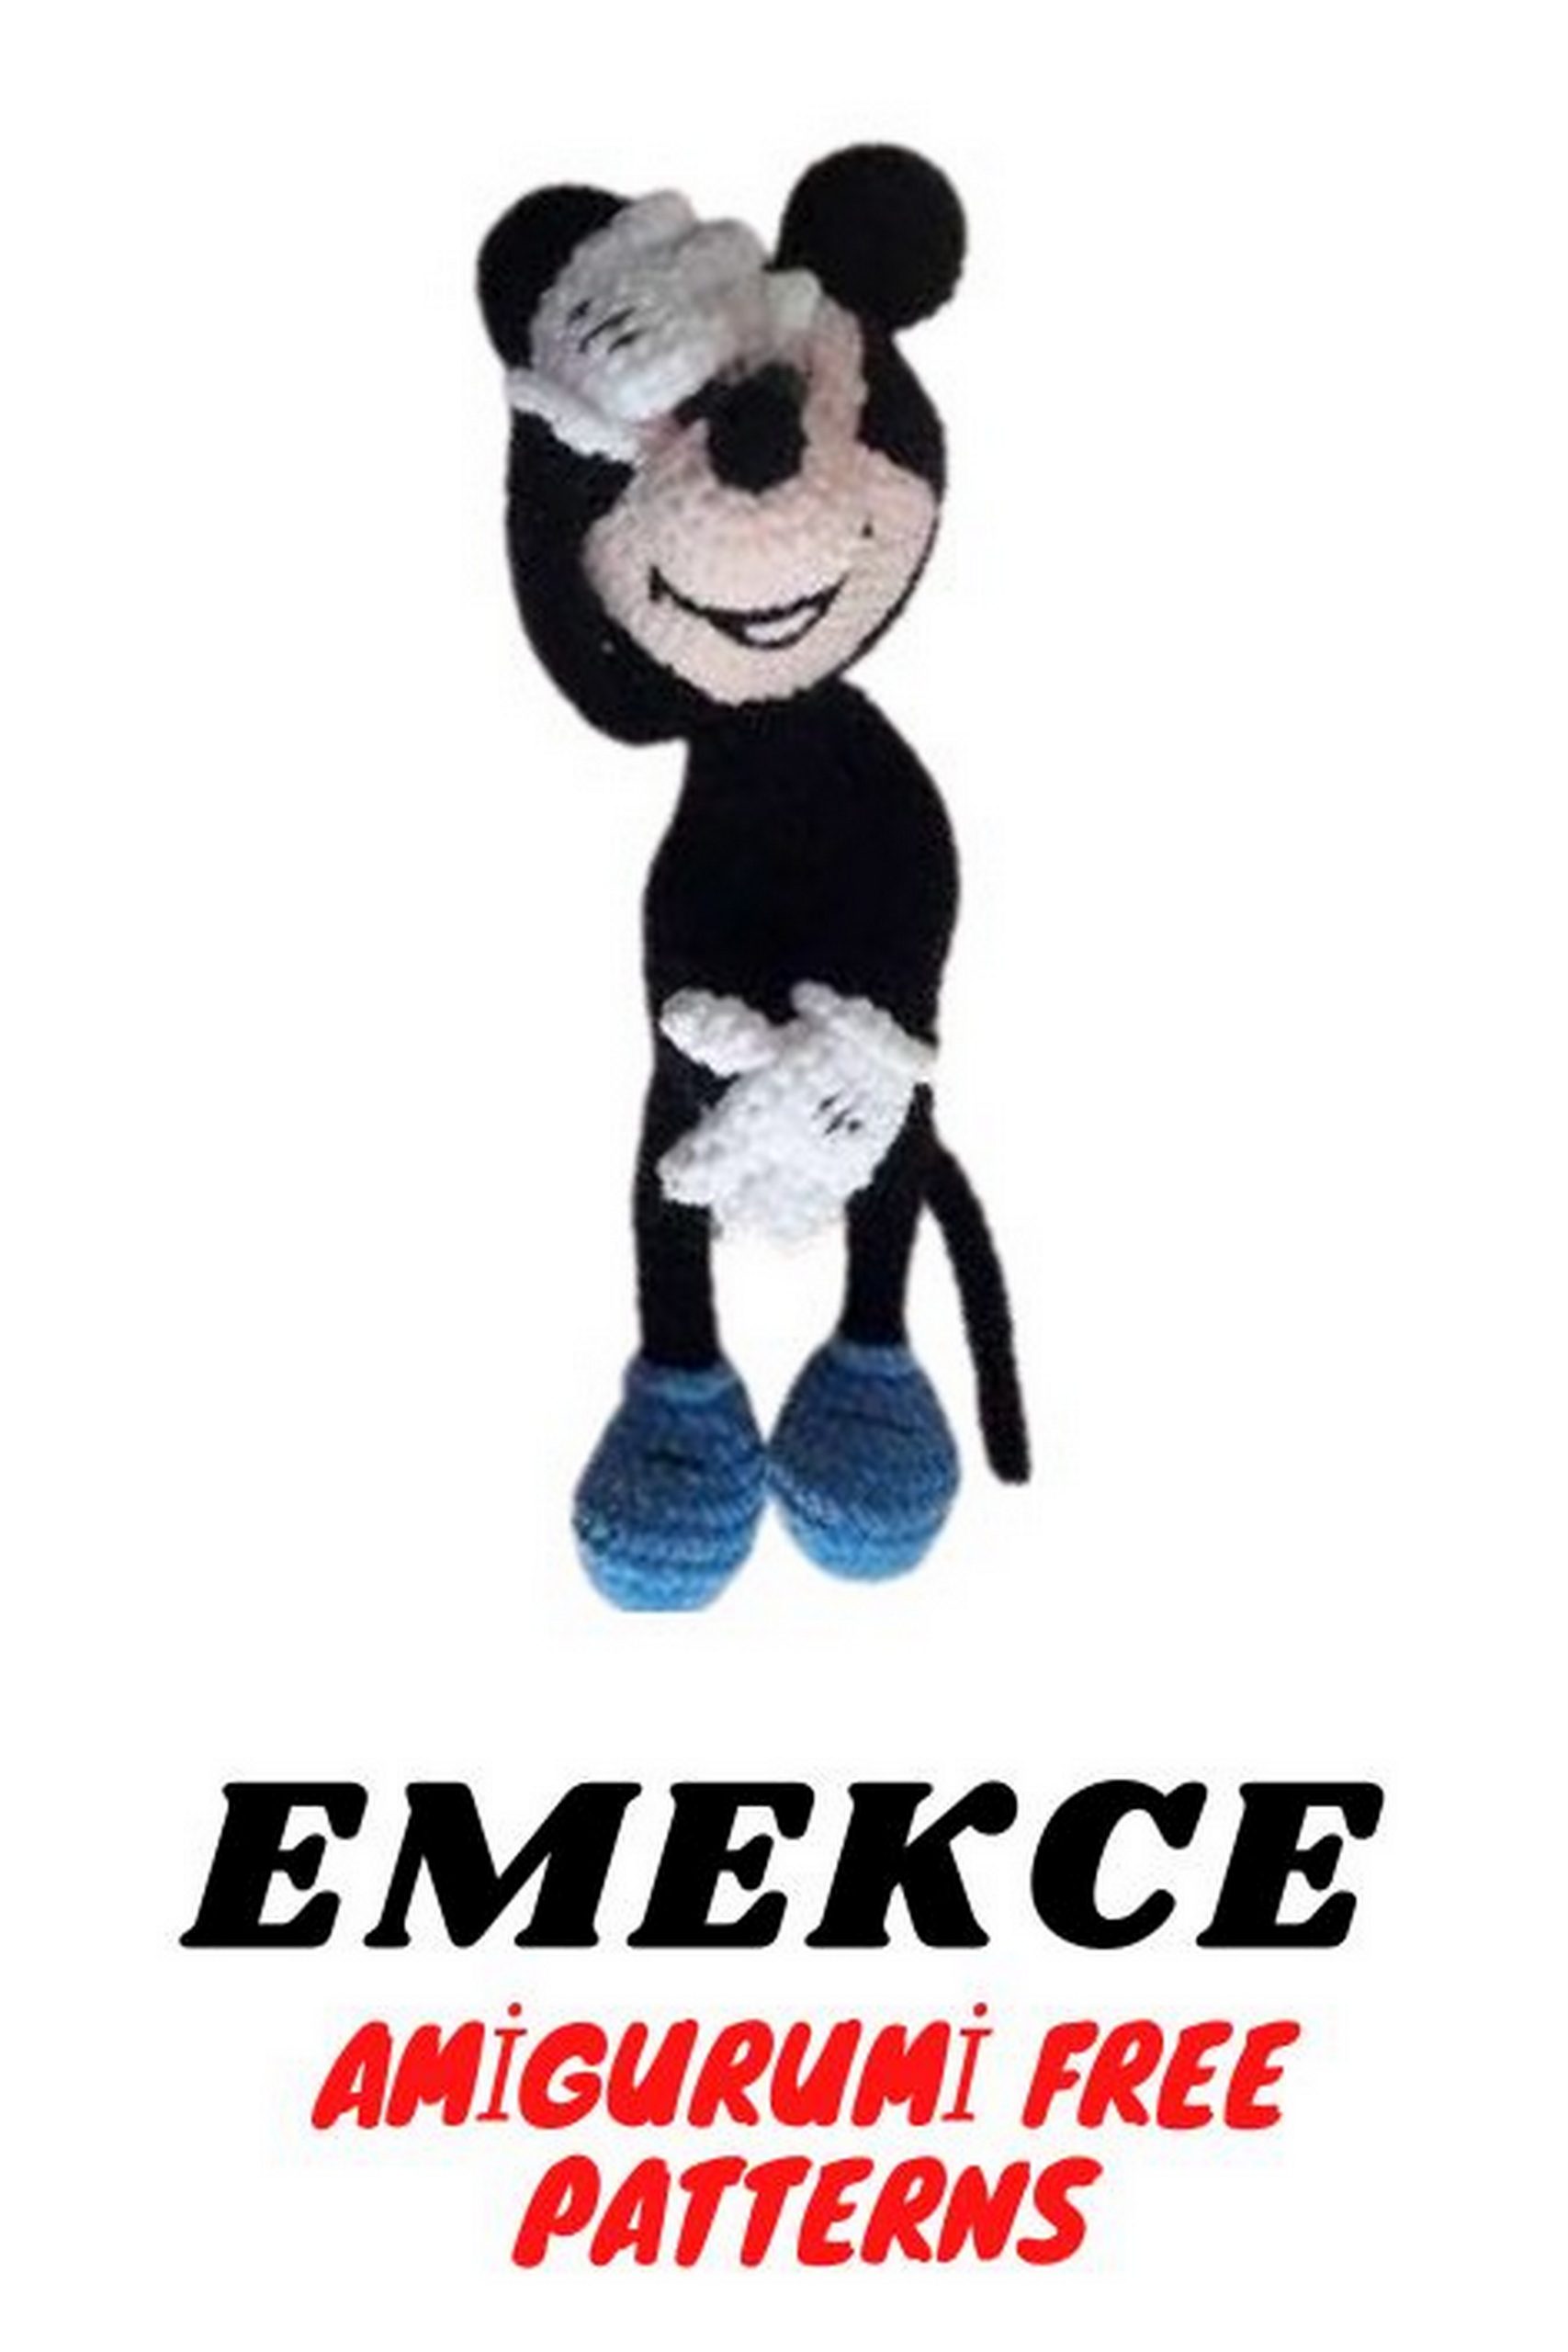
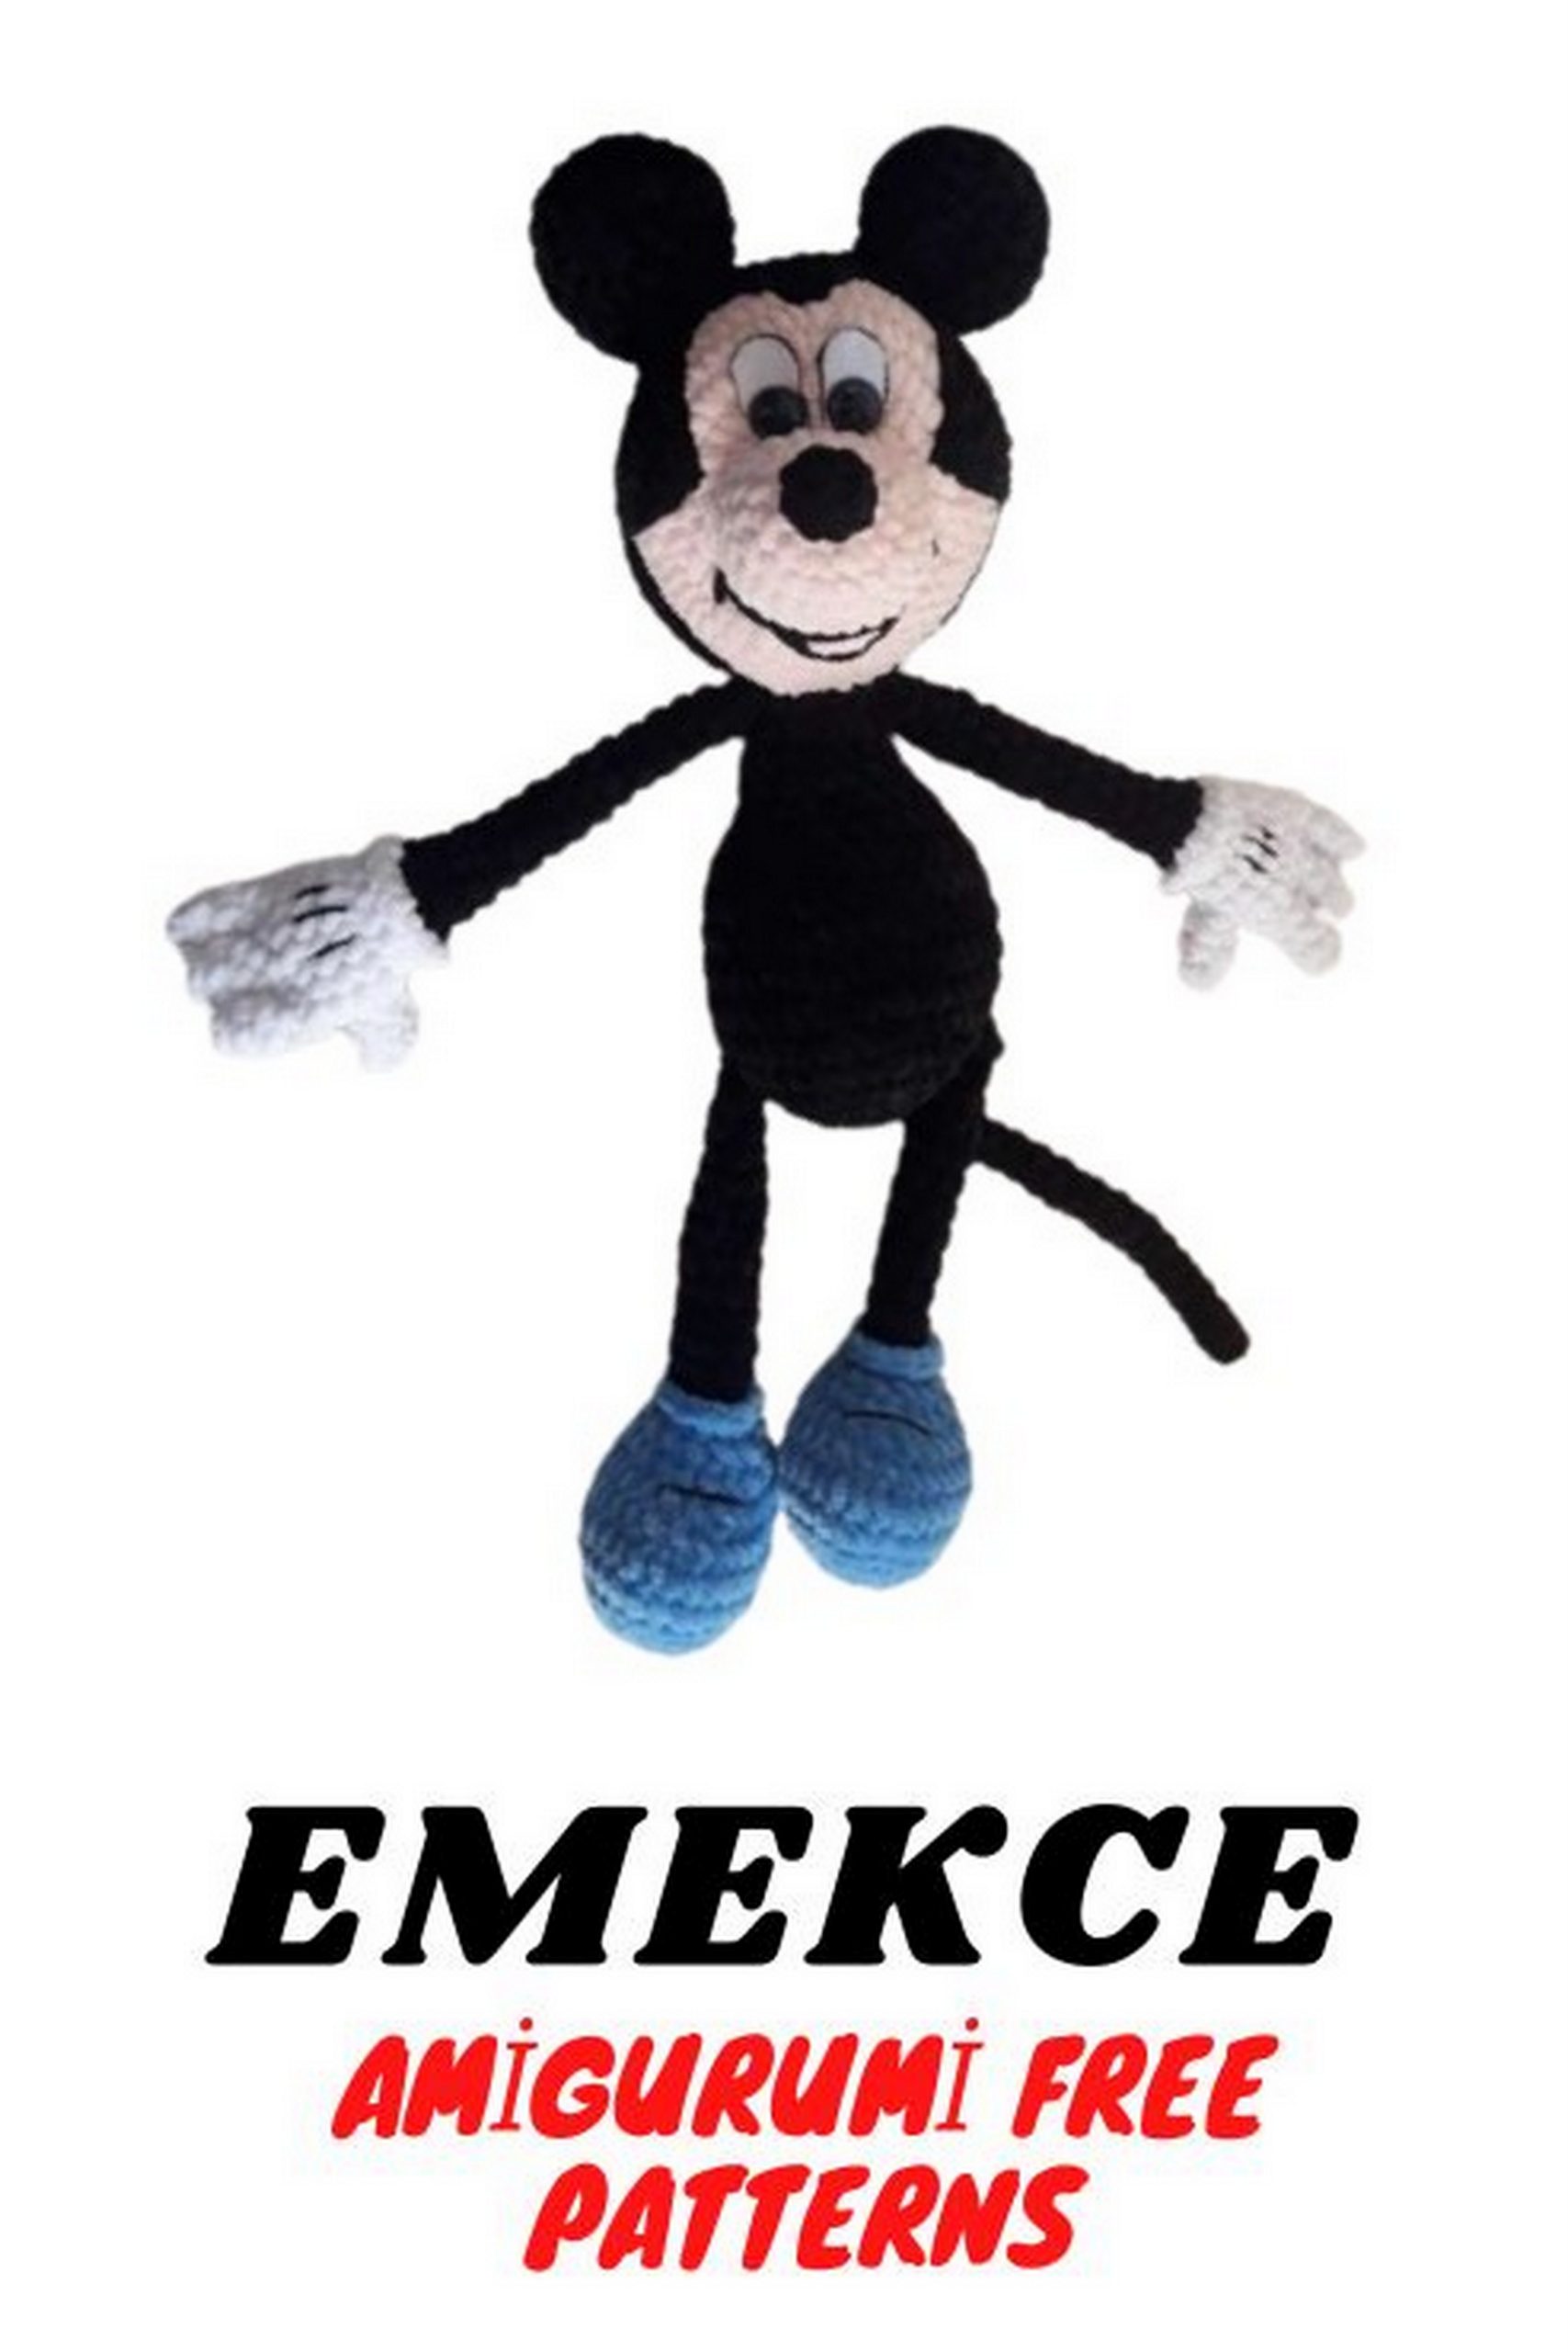
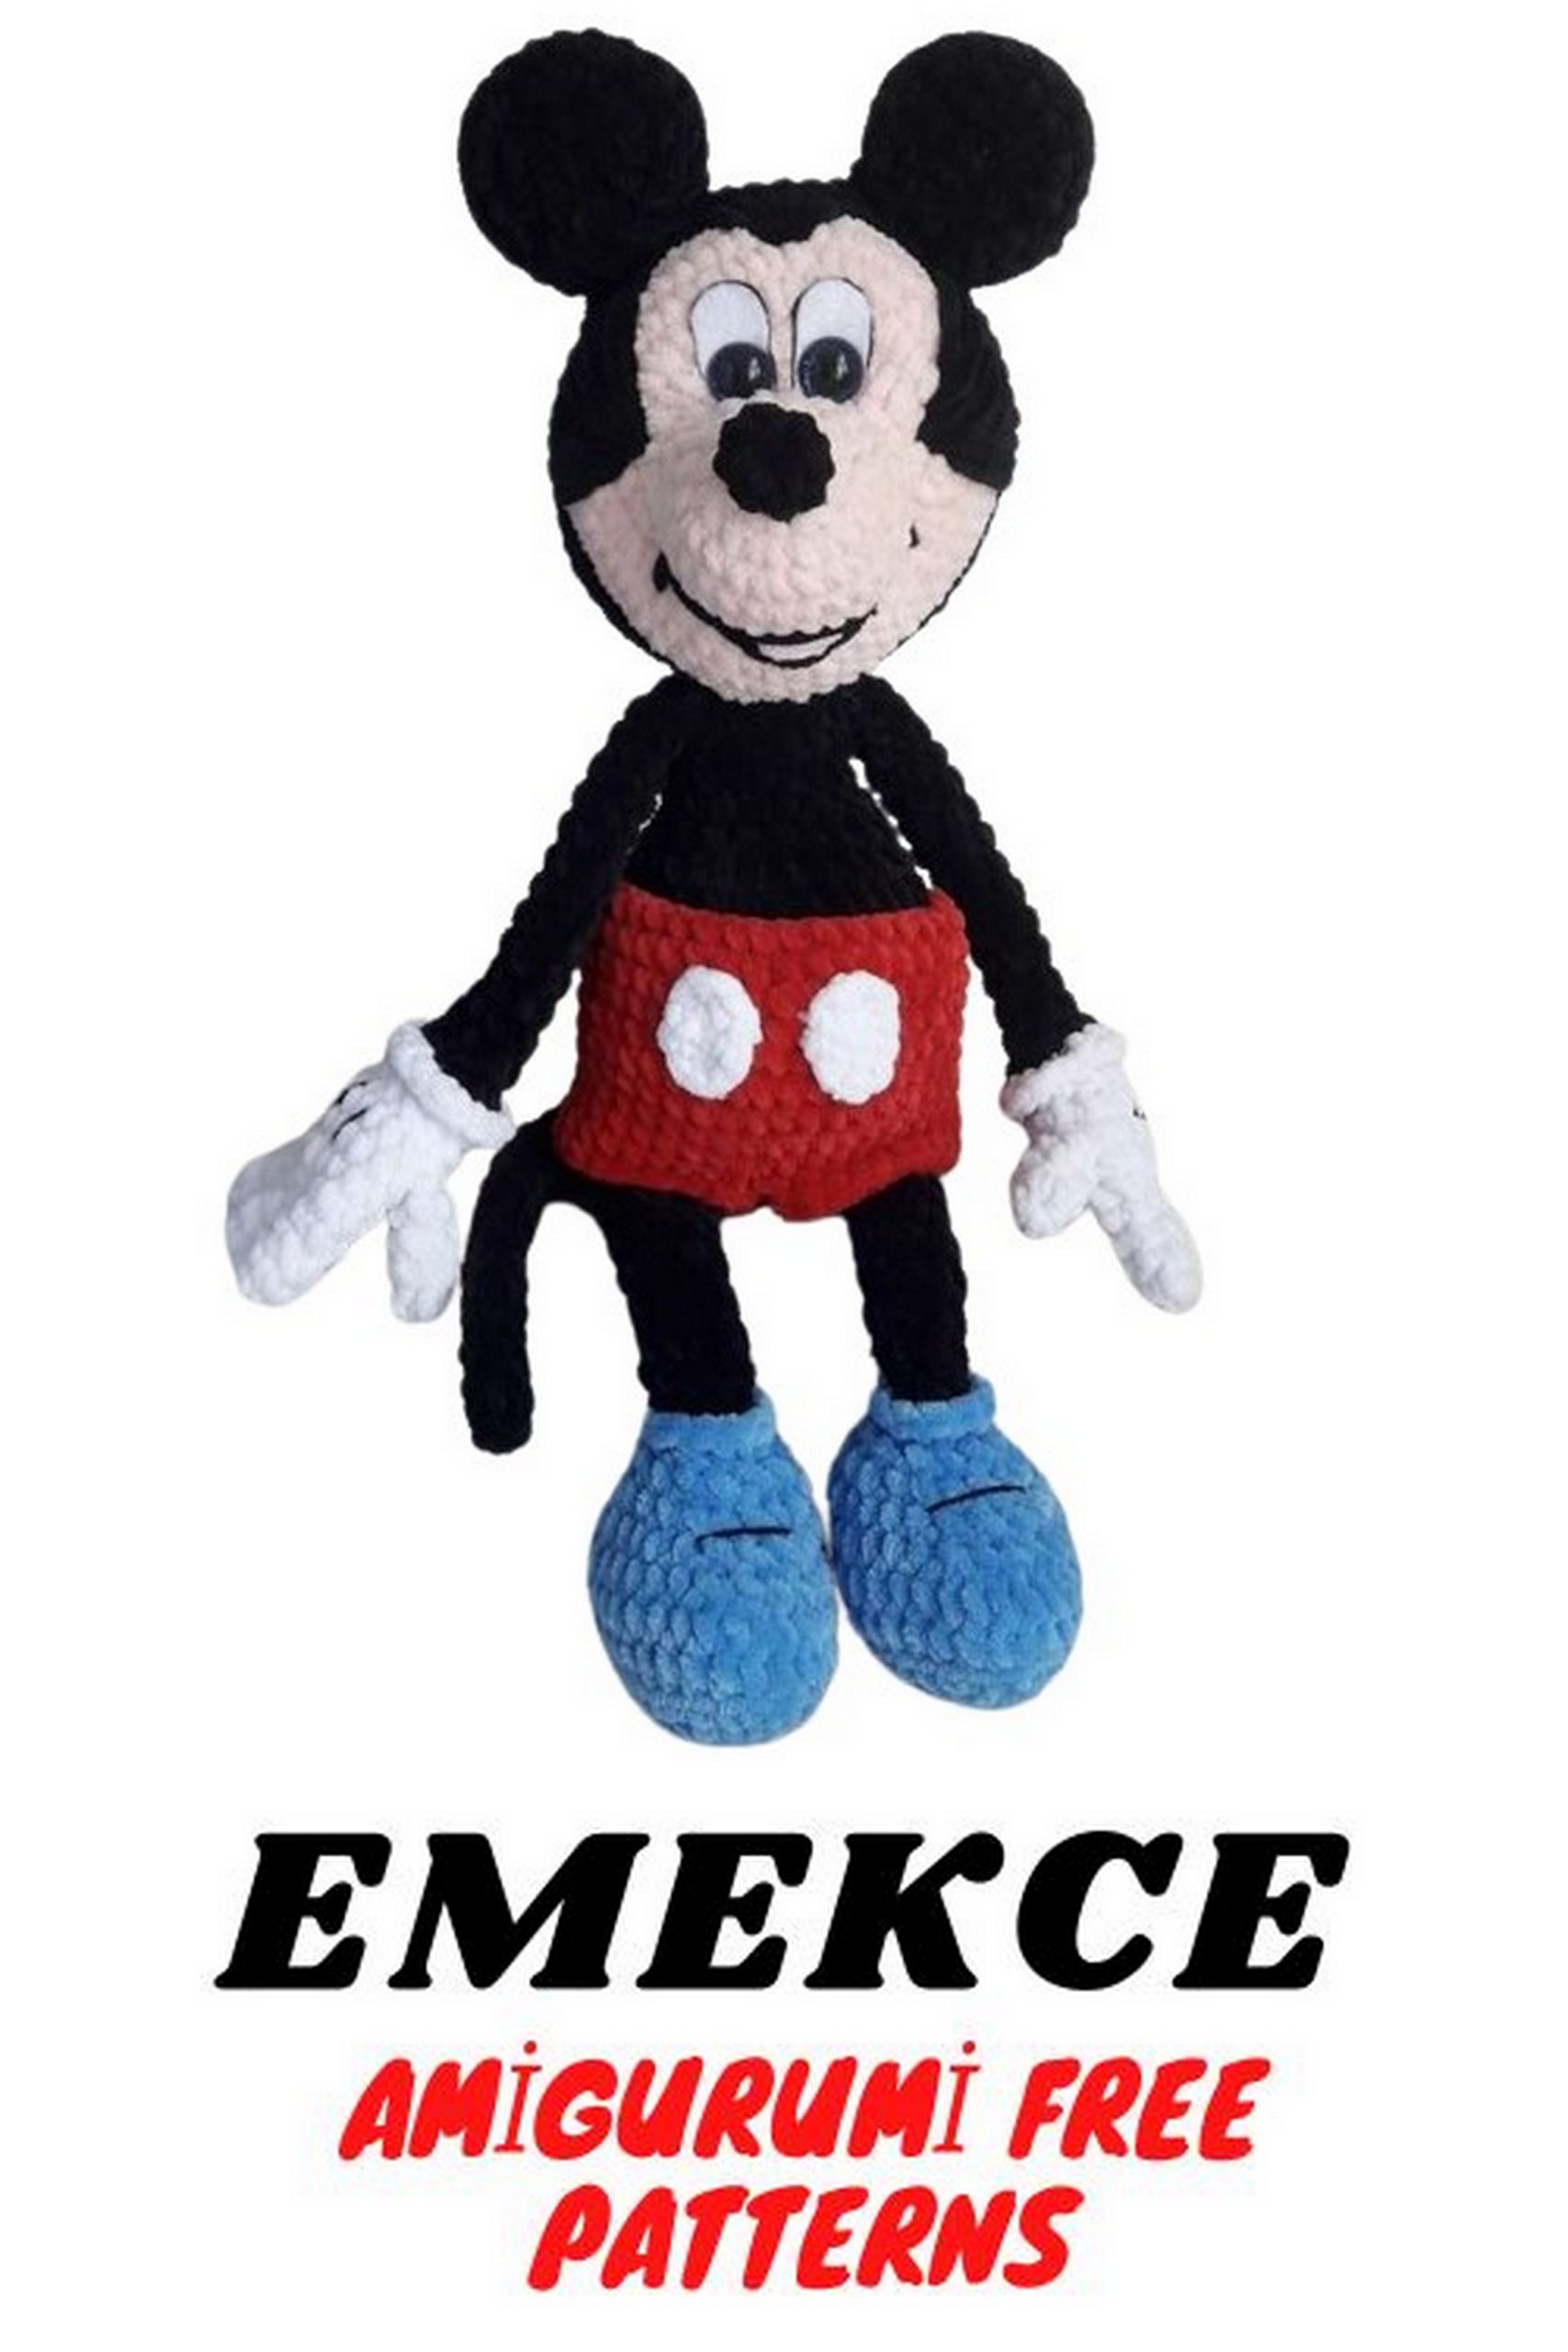
Free Velvet Mickey Mouse Amigurumi Pattern – Craft Your Soft and Huggable Disney Friend!
Welcome to the magical world of crochet, where dreams come to life one stitch at a time! If you’re a Disney fan or just adore adorable amigurumi creations, you’re in for a treat. Our free Velvet Mickey Mouse Amigurumi pattern is here to bring the iconic Disney character into your crafting repertoire. Made with plush velvet yarn, this Mickey Mouse is not only cute but irresistibly soft and huggable. Whether you’re a seasoned crocheter or a beginner, this pattern is perfect for adding a touch of Disney magic to your creations. So, grab your crochet hook and some velvety yarn, and let’s embark on a crafting journey filled with joy and nostalgia!
Materials Needed:
Yarn: I usually knit with plush yarn such as Himalaya Dolphin Baby or YarnArt Dolce.
Colors: Black, Milky, Red, Blue.
Crochet hooks size 4, 4.5.
Black thread for embroidering around the eyes, I use Alize Cotton Gold.
Yarn needle.
Safety eyes or other fastenings. I use 14mm, 16mm.
Felt for eyes.
Glue, I use gel instant glue (it doesn’t leave yellow spots).
Scissors.
Stuffing (polyfill or polyester fiberfill).
Marker or contrasting thread.
Abbreviations:
sc – single crochet.
ch – chain.
sc – single crochet.
dec – decrease – crochet 2 stitches together; most often I make decreases by working only the front loop of the stitch. First, the first one, then the second one, and then the working yarn. (if not stated otherwise).
inc – increase, crochet 2 stitches into one stitch.
MR – magic ring.
()* – repeat what is in parentheses the number of times indicated.
The toy is crocheted in a spiral without slip stitches unless otherwise stated.
PATTERN
Fingers without stuffing:
Three fingers on each hand: 6 pieces.
1: 4 sc in MR.
2: inc, 3 sc (5).
3-4: 5 sc.
Big fingers, 2 pieces:
1: 4 in MR.
2: inc, 1 sc, inc, 1 sc (6).
3-4: 6 sc.
Arms – 2 parts: only stuff the sleeves.
I recommend starting with the big finger first, then the two top fingers, then the third, and without cutting the yarn, start crocheting the arm. Then do the same for the second one.
Skip the threads from the beginning of the finger (from MR) inside the finger and tie them with a tail at the top. Do not cut all the tails, they will remain inside the hand.
Arms – 2 parts: no stuffing.
1: continue crocheting on the first finger: 3 sc, take the second finger, crochet 3 sc around it, take the third finger, crochet 5 sc around it, crochet 1 sc in the joining place of the fingers (insert the hook into the first loop of the third finger, pull out the thread – you have 2 loops on the hook. Insert the hook into the last crocheted loop of the second finger, pull out the thread. Crochet 3 loops on the hook into one), so there are no holes. 2 sc around the second finger. 1 sc in the joining place, inc (18).
2-3: 18 sc.
4 (left hand) insert the big finger by crocheting 3 sc through 3 layers (2 finger layers and 1 arm), 15 sc (18).
4: (right hand) 6 sc, crochet 3 sc through 3 layers (2 fingers, 1 arm), 9 sc (18).
5: (1 sc, dec)*6 (12).
6: 12 sc, change color in the last stitch of the 6th row.
7: crochet 12 sc through the back loop with black yarn. With the front loop, crochet white yarn (1 sc, inc)*6, sl st. Thread the white yarn down and inside, tie it with a black tail.
8: (1 sc, dec)*4 (8).
9 – 21: 8 sc.
Videos:
Crocheting fingers
Crocheting a big finger
Legs – 2 parts: only stuff the bottom and top.
1: 9 ch, in the second ch from the hook crochet: 3 sc in 1 loop, 6 sc, 3 sc in 1 loop, 6 sc (18).
2: 3 inc, 6 sc, 3 inc, 6 sc (24).
3: (1 sc, inc)*3, 6 sc, (1 sc, inc)*3, 6 sc (30).
4: 30 sc through the back loop of the stitch.
5: 30 sc.
Move the marker to the middle of the heel by crocheting 4 sc or as many as you need. Now the beginning of the row is here.
6: 12 sc, 3 dec, 12 sc (27).
7: 10 sc, 3 dec, 11 sc (24).
8: (2 sc, dec)*6 (18).
9: (1 sc, dec)*6 (12).
10: (1 sc, dec)*4 (8), change the yarn in the last stitch of the 10th row.
11: crochet 8 sc through the back loop with black yarn, through the front loop crochet with blue yarn (1 sc, inc)*4, sl st. Thread the blue yarn inside and tie it with black.
12 – 24: 8 sc.
25: fold in half and crochet 4 sc through 2 layers of crocheting.
Tail:
1: 4 sc in MR.
2: inc, 3 sc (5).
3-25: 5 sc.
26: fold in half and crochet 2 sc through 2 layers of the tail.
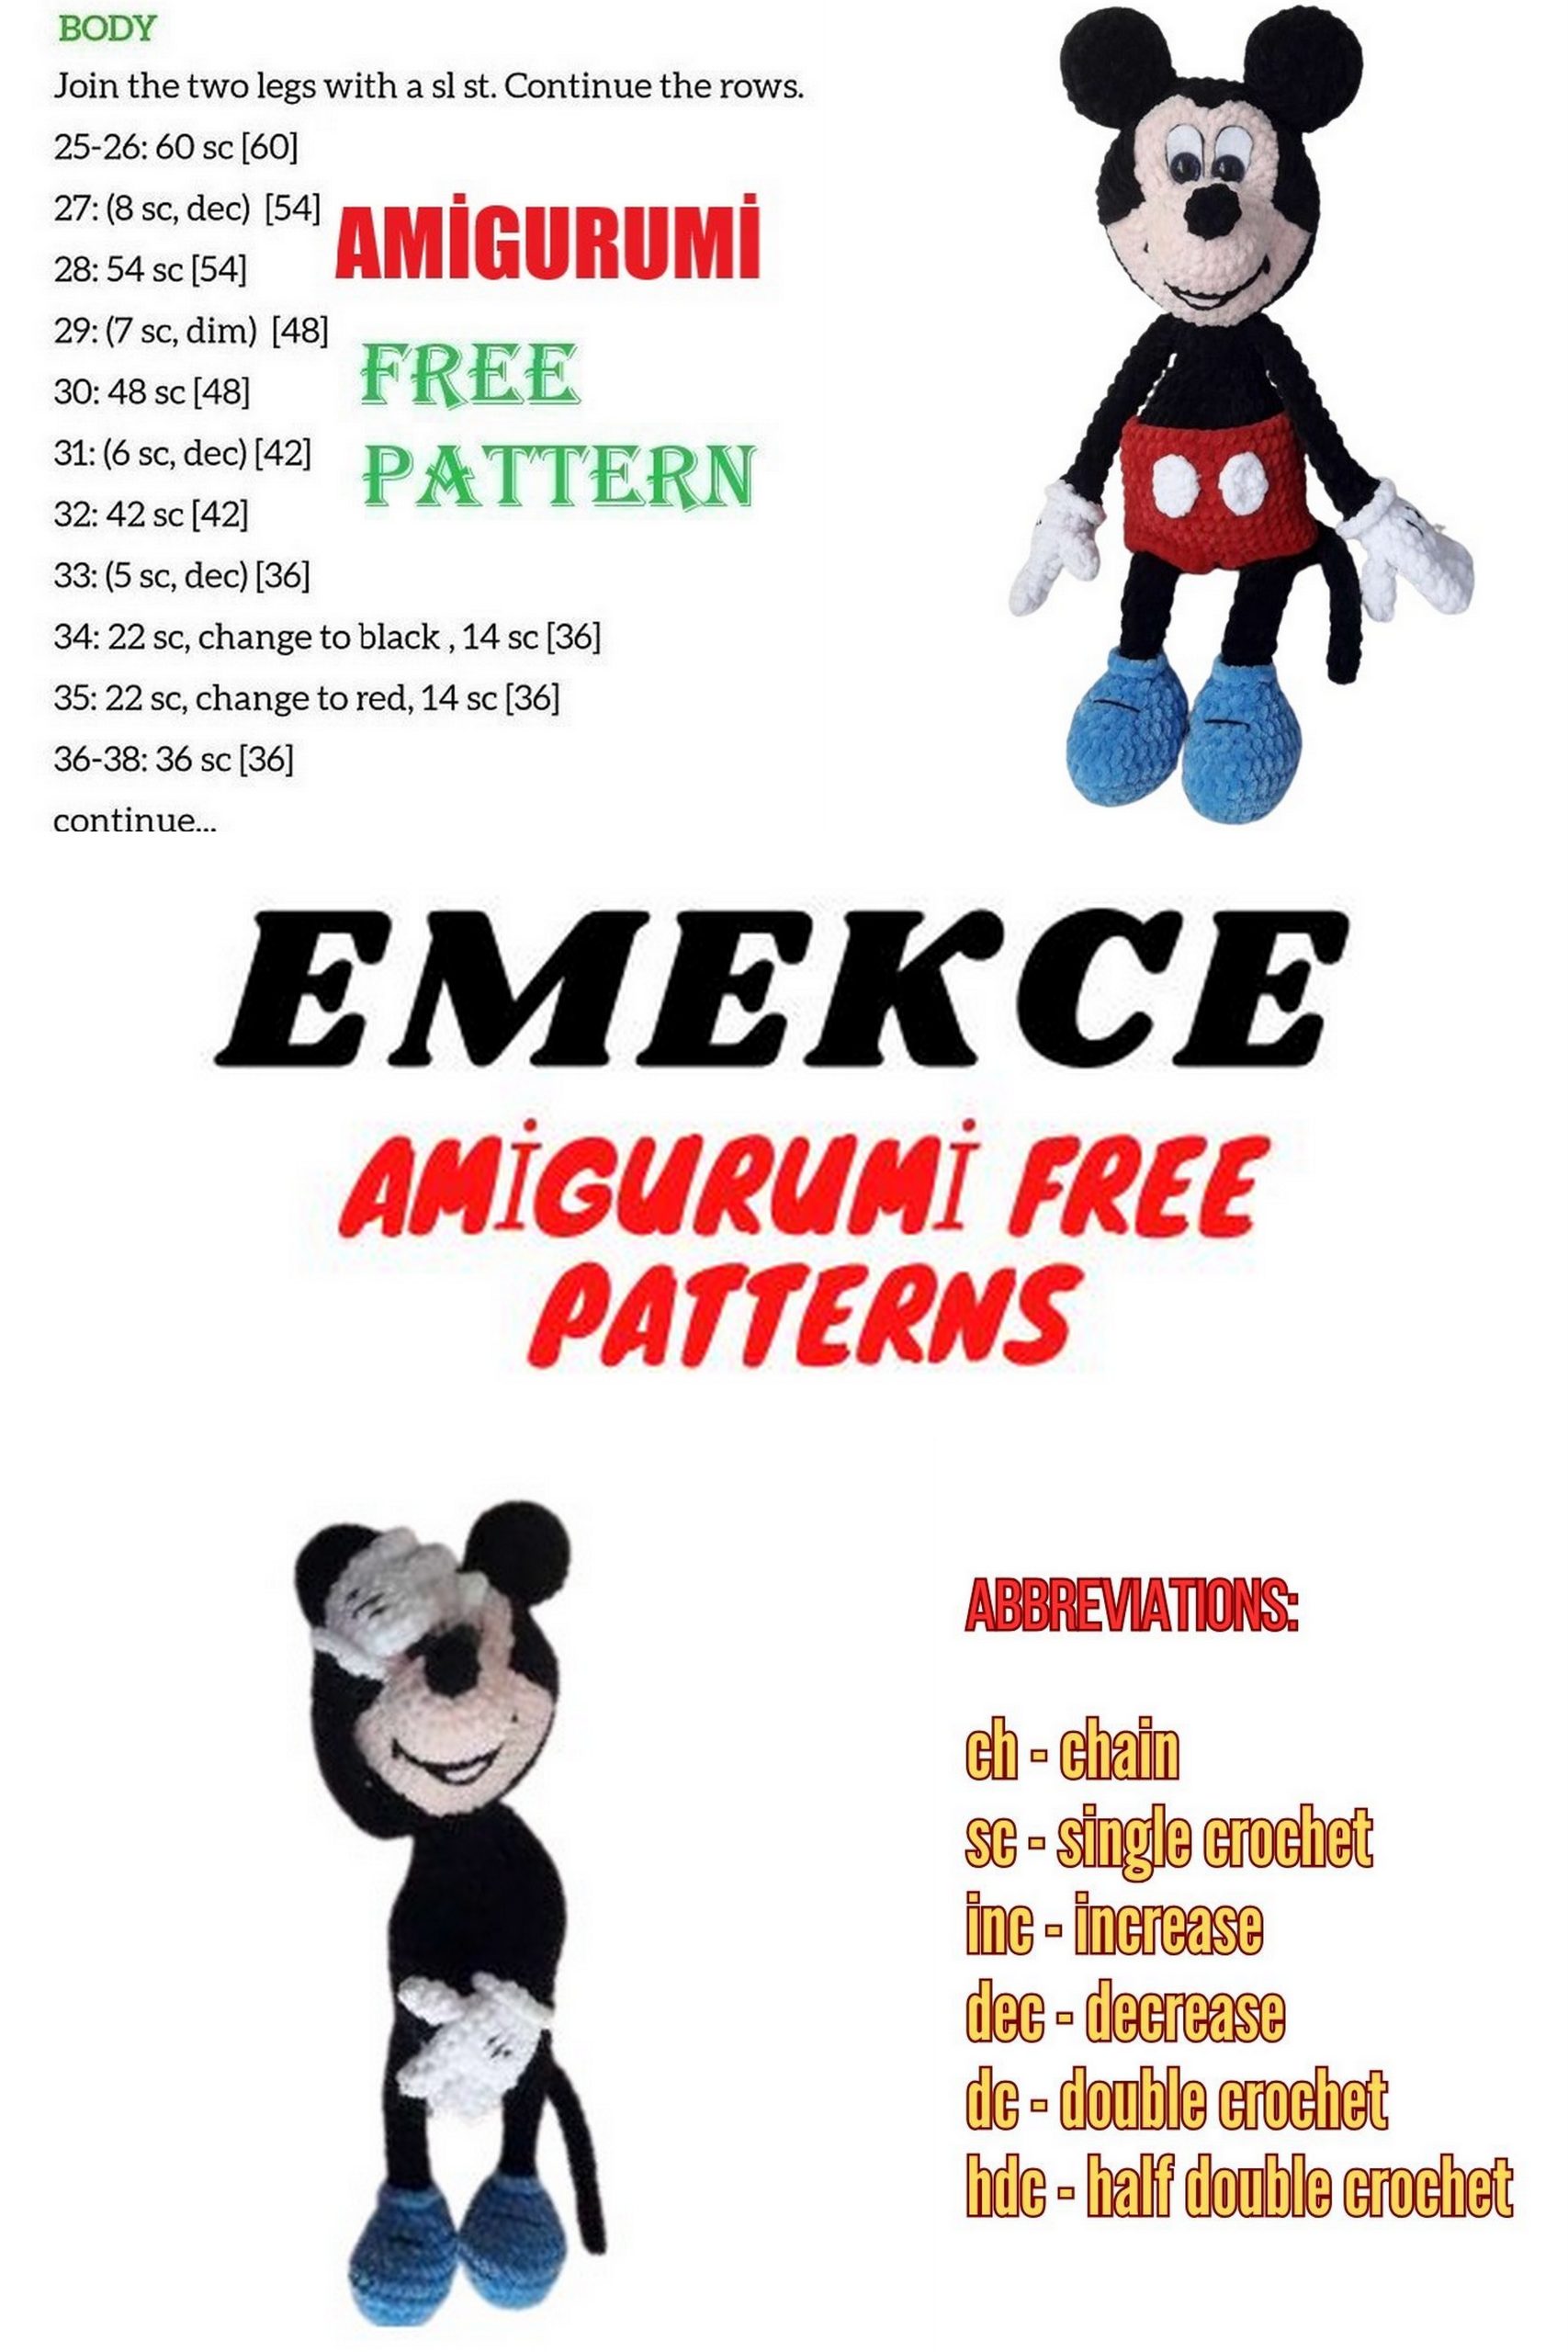
Body: stuff tightly.
Start with the nose with black yarn.
1: 6 sc in MR.
2: (2 sc, inc)*2 (8).
3: 8 sc.
4: (2 sc, dec)*2 (6), change color in the last stitch of the 4th row to flesh tone.
5: 6 inc behind the loop (12), stuff a little nose.
6: (1 sc, inc)*6 (18).
7: (2 sc, inc)*6 (24).
8-9: 24 sc.
crochet 4 inc, place a marker, now the beginning of the row is here. This is for a precise attachment of the eyes.
10: 4 inc, 16 sc, (1 sc, inc)*4 (36).
11: (1 sc, inc)*4, 16 sc, (2 sc, inc)*4 (44).
12: (2 sc, inc)*4, 16 sc, place another marker. Now the beginning is here. Leave the previous marker but crochet according to this one.
13: (7 sc, inc)*6 (54).
14: 4 sc, inc (8 sc, inc)*5, 4 sc (60).
15: 60 sc, change yarn in the last stitch of the 15th row to black. Row 16 is worked with 2 strands. Row 17 through the back loop of the stitch.
16: 60 sc.
17: (8 sc, dec)*6 (54). If you have eyes with screw fasteners, cut oval eye whites from felt, fit the eyes (make holes for the screws), glue them. Insert and secure the eyes between rows 10 and 11.
18: (7 sc, dec)*6 (48).
19: (6 sc, dec)*6 (42).
20: (5 sc, dec)*6 (36).
21: (4 sc, dec)*6 (30).
22: (3 sc, dec)*6 (24).
23: (2 sc, dec)*6 (18).
24: (1 sc, dec)*6 (12).
25: 6 dec.
Close the opening after shaping the head. Thread the yarn inside.
Head Embellishment:
Embroider around the eyes and eyelashes with thin black thread.
Embroider bangs. Find the center, count 3 stitches to the right and 3 to the left from it. Bangs are worked over 2 rows. Insert the needle under the black loops. Tie off and hide the ends.
Count 5 stitches from the edge of the bangs along the black border – this is the beginning of the sideburn. Count 15 stitches down – the bottom point of the sideburn. Sideburn width is 5 rows.
Pull the eyes back. Insert a needle with flesh-colored thread into the back of the head, bring it out at the outer lower corner of the left eye. Pull out the thread leaving a tail behind for tying. Insert the needle into the inner lower corner of the eye. Bring it out at the back of the head. Tighten. Insert into the back of the head. Bring it out at the outer lower corner of the right eye. Pull the thread. Insert the needle into the inner lower corner of the eye. Bring it out at the back of the head. Tighten. Tie several knots. Hide the ends.
Embroider the mouth with black plush yarn and the tongue with pink.
Sew the head to the body.
Shorts:
Chain 40, join in a ring.
1-4: 40 sc.
5: 10 sc, 2 ch, skip 2 sc, continue crocheting 28 sc.
6-11: 40 sc.
In the 12th row, put on the shorts on the mouse and crochet up to the middle of the buttocks, pick up 5 sc and join with the middle of the front. Crochet 3 rows in a circle around the first leg.
Attach the yarn to the second leg, crochet 3 rows around the second leg, finish crocheting. Hide the yarn.
White buttons: 2 pieces.
Chain 6, in the second from the hook crochet 3 sc, 3 sc along the chain, 3 sc in the last loop, 3 sc along the opposite side of the chain, sl st.
Sew on the buttons.
Embroider black stripes on the hands, 3 each, and on the boots, 1 each.
Congratulations, Blackie the Mouse is ready!