How to Fix a Loose Door Handle
A loose door handle can be more than just an annoyance. It can make it difficult to open or close a door properly and may eventually lead to more serious damage if ignored. Fortunately, fixing a loose door handle is usually a straightforward task that you can accomplish with basic tools and a little patience. In this guide, we’ll walk you through the process of diagnosing and repairing a loose door handle so that your doors function smoothly again.
Why Is My Door Handle Loose?
Before diving into the repair process, it’s useful to understand why door handles become loose in the first place. The most common reasons include:
- Worn-out screws: Over time, the screws holding the handle in place may loosen due to regular use.
- Stripped screw holes: Screws can sometimes lose their grip if the holes they go into become stripped or damaged.
- Internal mechanism issues: Parts inside the handle assembly might wear out or become misaligned.
- Manufacturing defects or poor installation: Occasionally, a door handle may start loose shortly after installation due to faulty parts or improper mounting.
Identifying the exact cause will help you determine the best way to fix it efficiently.
Tools You’ll Need
Before you begin, gather the following tools to make the repair process easier:
- Phillips screwdriver
- Flathead screwdriver
- Allen wrench (hex key), if your handle uses hex screws
- Wood filler or toothpicks (for repairing stripped holes)
- Utility knife or small chisel
- Replacement screws (optional)
- Lubricant (like WD-40 or silicone spray)
- Clean cloth
Step-by-Step Guide to Fix a Loose Door Handle
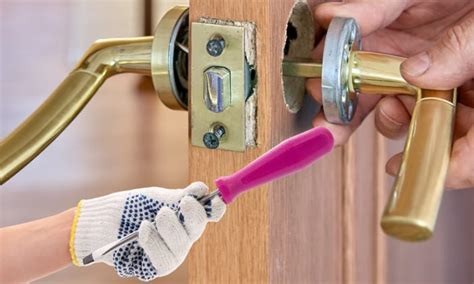
Step 1: Remove the Door Handle
Start by removing the door handle to get a closer look at the problem. Most handles have visible screws on the exterior, but sometimes screws are concealed under decorative plates or caps. Look closely and gently pry off any covers with a flathead screwdriver.
- Use the right screwdriver or Allen wrench to unscrew and remove the handle.
- Keep all screws and parts in a small container to avoid losing anything.
Step 2: Inspect the Handle and Screws
With the door handle off, inspect the screws for signs of wear or damage. If screws are stripped or bent, replace them with new ones of the same size. Also, check the screw holes on the door itself. If these are stripped, you’ll need to repair them before reinstalling the handle.
Step 3: Repair Stripped Screw Holes
Stripped screw holes prevent screws from gripping properly, which causes handles to become loose again. Here are two common methods for fixing this:
- Toothpick and wood glue method: Fill the hole with several wood toothpicks coated in wood glue. Let the glue dry completely, then trim the toothpicks flush with the door surface before reinserting the screw.
- Wood filler method: Fill the hole with wood filler, allow it to cure as per the product instructions, and then drill a small pilot hole before inserting the screw.
These repairs give the screw new material to bite into, ensuring a tighter fit.
Step 4: Clean and Lubricate the Mechanism
While the handle is removed, clean any dirt, dust, or grime from the internal mechanism. Use a cloth to wipe down the parts gently. Then, apply a small amount of lubricant such as WD-40 or a silicone-based spray to help the moving parts work more smoothly.
Be careful not to over-lubricate, as excessive lubricant can attract dirt.
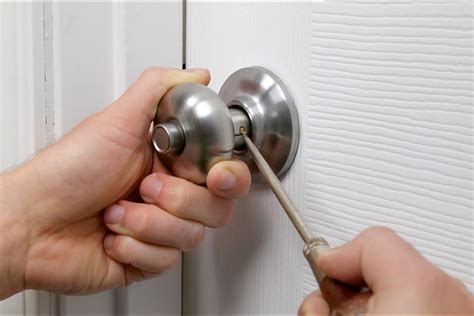
Step 5: Reinstall the Door Handle
- Align the handle back on the door, making sure any internal components fit together correctly.
- Insert screws and tighten them firmly, but don’t overtighten, as this can strip the holes again.
- Replace any decorative plates or caps you removed earlier.
Test the handle by turning and pulling it to ensure it feels secure and operates smoothly.
Step 6: Check the Door Latch and Strike Plate
If your door handle still feels loose or the door isn’t latching properly, the problem may be with the latch mechanism or the strike plate (the metal piece on the door frame where the latch fits). Tighten or adjust the strike plate screws, or replace the strike plate if it’s damaged.
Sometimes, a loose handle is a symptom of a wider alignment problem between the door and frame.
Tips for Preventing a Loose Door Handle in the Future
- Regular maintenance: Periodically check the handle screws and tighten them if needed.
- Avoid excessive force: Don’t slam doors or use excessive force on handles as this can gradually loosen screws and damage components.
- Use quality hardware: Invest in handles and screws made of durable materials for longer-lasting performance.
- Professional installation: If you’re unsure about installing door hardware yourself, call a professional to ensure proper installation.
When to Call a Professional
While most loose door handles can be fixed with DIY methods, some situations require professional help:
- If the door or frame is structurally damaged.
- If the locking mechanism inside the handle is broken.
- If you’re uncomfortable working with tools or disassembling door hardware.
- If the problem persists despite your attempts to fix it.
A locksmith or handyman can diagnose complex issues and provide more comprehensive repairs.
Conclusion
Fixing a loose door handle doesn’t have to be complicated or expensive. By following these steps, you can restore your door handle’s stability and functionality using simple tools and materials. Regular maintenance and timely repairs will extend the life of your door hardware and help keep your home secure and comfortable. Remember to take your time, inspect the components carefully, and don’t hesitate to seek professional assistance if needed.
Save on Pinterest