How to Remove Scratches from Wooden Furniture
Wooden furniture is a timeless addition to any home, offering warmth, character, and durability. However, over time, it’s common for scratches to appear on these cherished pieces, whether from daily use, moving furniture, or accidental bumps. Fortunately, removing or minimizing these scratches is often simpler than you might think. In this guide, we’ll explore practical and effective methods for removing scratches from wooden furniture, helping you restore its natural beauty.
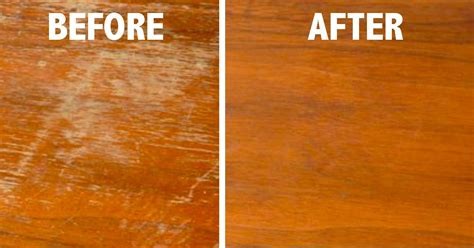
Understanding the Types of Scratches on Wood
Before diving into how to remove scratches, it’s important to understand the type and depth of the scratch. This will influence the best repair method.
- Surface Scratches: These are light scratches that affect only the finish or protective coating and don’t penetrate the wood underneath.
- Deeper Scratches: These scratches cut through the finish and into the wood itself, requiring more involved repair methods.
Assessing the scratch will allow you to pick the right approach, whether a simple polish or a more extensive repair is necessary.
Essential Tools and Materials
Here are some common tools and materials you may need to remove scratches from wooden furniture:
- Soft cloths or microfiber towels
- Furniture polish or wax
- Walnut, crayon, or colored wood markers matching furniture
- Fine steel wool (0000 grade)
- Wood filler or putty (for deep scratches)
- Sandpaper (fine-grit)
- Wood stain or touch-up pens
- Olive oil or vinegar mixture
Having these on hand will make tackling the scratches straightforward. Always test any product on a concealed area first to ensure color match and surface compatibility.
Methods to Remove or Minimize Scratches from Wooden Furniture
1. Using a Walnut to Conceal Scratches
This natural trick is incredibly simple and effective for light scratches. The oils in walnuts are great at blending small imperfections into wooden surfaces.
- Take a walnut and rub it directly into the scratch in a circular motion.
- Let the oils soak in for a few minutes.
- Buff the area with a soft cloth to remove any excess residue.
This method can darken and fill in the scratch, making it less noticeable.
2. Applying Furniture Polish or Wax
Often, surface scratches can be masked by replenishing the wood’s finish with polish or wax.
- Clean the surface gently with a damp cloth and allow it to dry.
- Apply a high-quality furniture polish or wax according to the product instructions.
- Buff the area to a shine with a soft cloth.
This process can restore the wood’s shine and obscure minor blemishes.
3. Using a Crayon or Colored Markers
For scratches that expose the lighter wood beneath a darker finish, colored wax crayons or markers specifically designed for wood touch-ups are useful.
- Choose a crayon or marker that closely matches your furniture’s color.
- Color directly into the scratch, filling it fully.
- Wipe away any excess that spreads beyond the scratch with a soft cloth.
- Buff gently to blend the repair into the surrounding wood.
This technique works well on scratches where color restoration is needed, with minimal effort.
4. Olive Oil and Vinegar Mixture
A natural remedy for shallow scratches involves a blend of olive oil and white vinegar, which nourishes the wood and blends imperfections.
- Mix equal parts olive oil and white vinegar in a small bowl.
- Dip a soft cloth into the solution and rub it into the scratch.
- Let it sit for 5-10 minutes, allowing the wood to absorb the mixture.
- Buff with a clean cloth for a polished finish.
This method is gentle and uses common household ingredients.
5. Using Fine Steel Wool and Wax
For slightly deeper scratches, lightly rubbing with 0000-grade fine steel wool can smooth out rough edges, followed by applying wax or polish.
- Gently rub the scratched area in the direction of the wood grain with fine steel wool.
- Be careful not to over-rub or damage the surrounding finish.
- Remove residue with a soft cloth.
- Apply furniture wax or polish to restore the shine.
This method requires a delicate touch but can reduce the visibility of deeper scratches.
6. Filling Deep Scratches with Wood Filler
When scratches are too deep to mask with polish or oils, wood filler is the best option.
- Clean the scratch to remove any dirt or debris.
- Apply wood filler that matches the color of your furniture using a putty knife.
- Fill the scratch completely and smooth the surface.
- Allow the filler to dry as per product instructions.
- Once dry, sand lightly with fine-grit sandpaper to level the area.
- Apply matching wood stain or touch-up pen to blend the repair.
- Finish with a coat of furniture polish or varnish as needed.
This process takes more time but offers a durable and invisible repair.
7. Sanding and Refinishing
For scratched surfaces covering large areas, a more comprehensive restoration might be necessary:
- Lightly sand the entire wood surface to remove the old finish along with scratches.
- Clean off sanding dust completely.
- Apply a suitable wood stain matched to the original color.
- Seal the wood with varnish or polyurethane for protection.
This method rejuvenates the furniture but requires patience and care to avoid uneven coloring.
Tips to Prevent Future Scratches
- Use coasters and felt pads under furniture and objects.
- Avoid dragging items across wood surfaces.
- Keep pets’ nails trimmed to reduce accidental scratching.
- Regularly dust and polish furniture to protect the finish.
Taking preventive steps will keep your wooden furniture looking its best for years to come.
Conclusion
Scratches on wooden furniture can be frustrating, but with the right approach, many of them can be effectively reduced or removed. Whether you’re dealing with light surface scratches or deeper gouges, natural remedies, proper touch-up products, or more involved repairs can restore your furniture’s beauty. Always remember to test any treatment on a hidden part of the wood first, and proceed gently to avoid causing further damage. With patience and care, your wooden pieces can continue to add charm and warmth to your home without the distraction of unsightly scratches.
Save on Pinterest