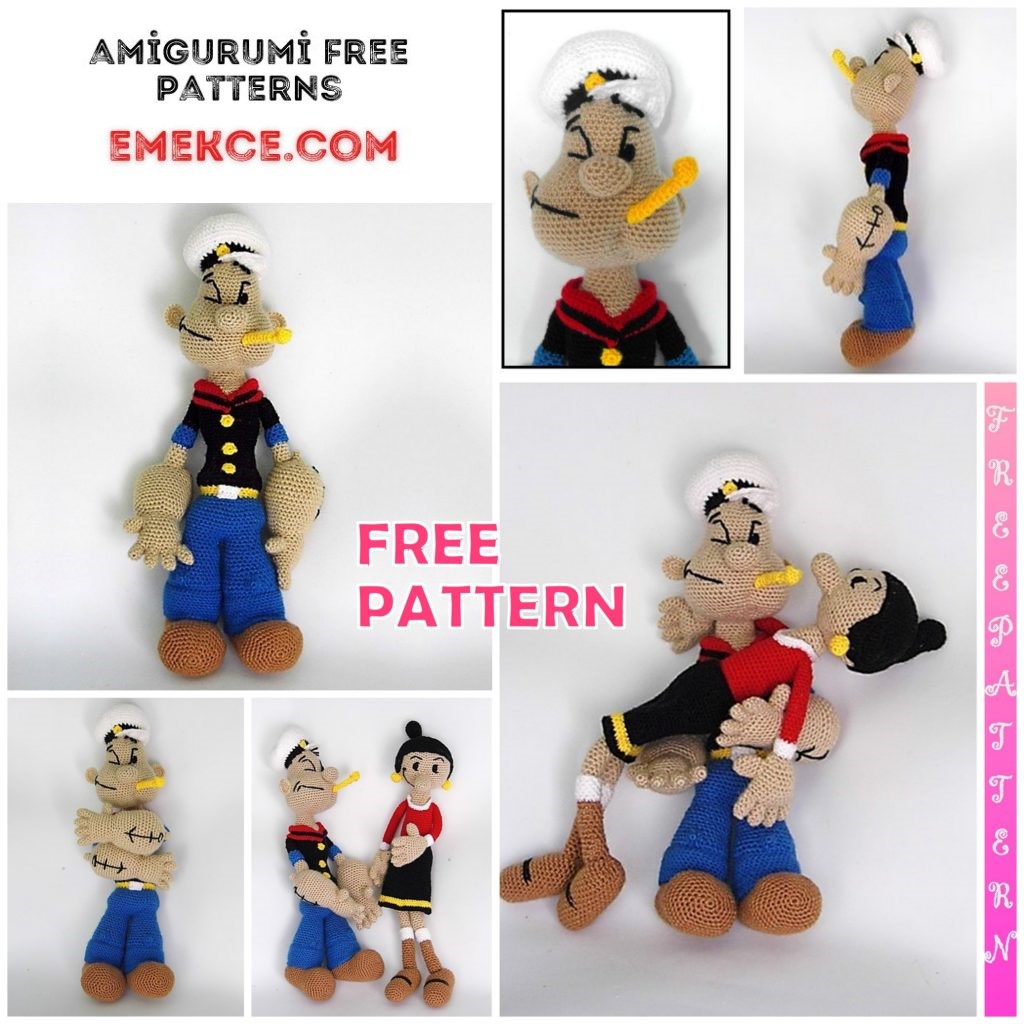
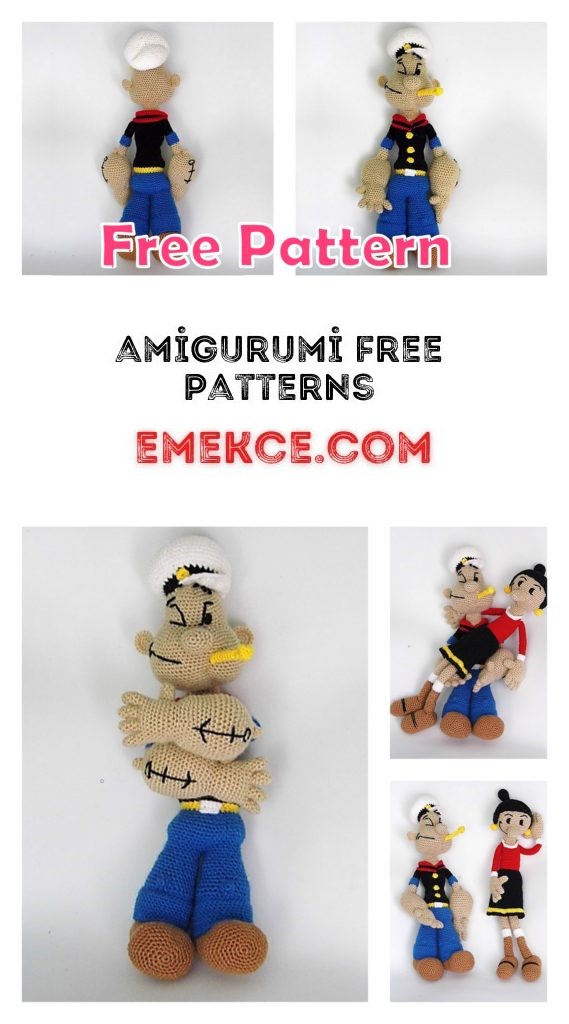
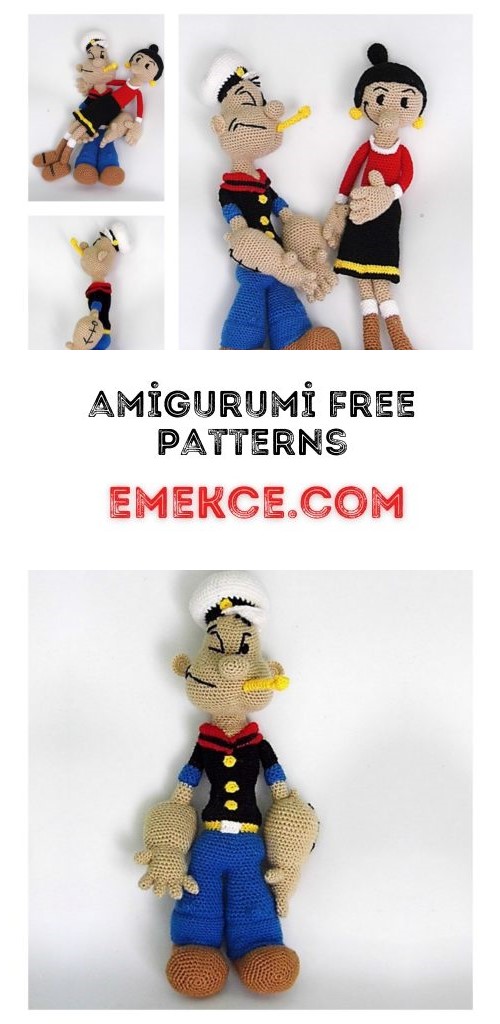
Legend Cartoon Character; Amigurumi Popeye The Sailor Man Free Crochet Pattern
I continue to share amigurumi free patterns. Popeye the sailor man amigurumi free pattern is waiting for you in this article.
MATERIALS
– Wool of different colors: red, white,
black, light brown, flesh color, blue,
yellow.
– Wool thickness: 3-4 mm.
– Crochet hook suitable for the thickness of the wool.
– Wool needle.
– Synthetic filling.
ABBREVIATIONS
Sc: single crochet
İnc: increase / increase
Dec: decrease / decrease
Character from the Popeye series, the Sailor.
Measurements: 37 cm
Difficulty: High
Estimated time: 8 h
Crochet hook: 2-3 mm
LEGS (x2)
In flesh color
1. Magic ring into 6 sc.
2. İnc at all points (12).
3. “1 sc, inc”, repeat until the end of the
turn (18).
4. “2 sc, inc”, repeat (24).
5. “3 sc, inc”, repeat (30).
6. “4 sc, inc”, repeat (36).
7. To 10. 1 sc at each point (36).
11. We change to blue and knit 1 sc in
each point (36).
12. On top of the chains
we knit 1 sc in each stitch. We will be back
at this turn to complete the pants.
(36).
13. “4 sc, dec”, repeat (30).
14. To 17. 1 sc at each point (30).
18. “3 sc, dec”, repeat (24).
19. To 22. 1 sc at each point (24).
23. “2 sc, dec”, repeat (18).
24. AND 25. 1 sc at each point (18).
We finish off the first leg. We knit the
second following the same pattern and the
we leave unfinished to start the
Joining the legs:
We put one leg next to the other and
We mark the central point between them.
We knit in the second leg that
leave 1 sc unfinished at each point
until you reach the marked point. we passed
with 1 sc to the first leg. We knit in
she 1 sc at each point until reaching
back to the marked point, we pass with 1
sc to the second leg and complete the
Union.
We close the gap between the legs
with the wool needle. We continue
weaving the…
BODY:
1. In total there will be 36 points.
2. 1 sc at each point (36).
3. We mark 18 sc, that is, half
of the trousers, to knit the back.
Over them we knit “2 sc, inc” 6
times 1 sc at each point in the rest
turn (42).
4. Now in that segment we will have
24 sc, on them we knit “3 sc, inc”,
1 sc in the rest (48).
5. At 8. 1 sc at each point (48).
9. “6 sc, dec”, repeat (42).
10. “5 sc, dec”, repeat (36).
11. “4 sc, dec”, repeat (30).
12. We change to yellow and knit 1
sc at each point (30).
13. To 15. 1 sc at each point (30).
16. We change to black and weave
inc at all points (60).
17. To 19. 1 sc at each point (60).
20. Dec at all points (30).
21. At 30. 1 sc at each point (30).
31. “4 sc, inc”, repeat (36).
32. And 33. 1 sc at each point (36).
34. “5 sc, inc”, repeat (42).
35. To 42. 1 sc at each point (42).
43. We mark 2 central sc
front we will weave in color
meat, we must knit the rest in black
of the points (42).
44. We add 1 sc of flesh color to
each side of the 2 points marked
initially. We knit the rest in black
of the points (42).
45. Again we add 1 sc to each
side. In black the rest (42).
46. For the last time we added another 2
flesh-colored dots, one each
side but this time we should
knit “5 sc, dec” changing color
where appropriate between color
meat and black (36).
47. We change to the flesh color, so
that we will no longer change to black and
we knit “4 sc, dec”, repeat (30).
48. “3 sc, dec”, repeat (24).
49. “2 sc, dec”, repeat (18).
50. At 55. 1 sc at each point (18).
We finish off.
WE COMPLETE THE PANTS:
In blue
1. We start from lap 12 of the
legs and with the feet of the doll
upwards, we knit in the part of the
chains left free, 1 sc in each
point (36).
2. At 10. 1 sc at each point (36).
We finish off.
KNEES (x2):
In blue
1. Magic ring into 6 sc.
2. 1 sc at each point (6).
We finish off.
ARMS (x2)
Fingers (x4):
In flesh color
1. Magic ring into 6 sc.
2. At 6. 1 sc at each point (6).
We knit three fingers and finish them off,
we leave the fourth finger unfinished
To start finger joining:
1. With 1 sc we move to another finger,
we knit 2 more sc, we go to the third
finger with 1 sc and again we knit 2
sc more, we go to the last finger with 1
sc. We knit 5 sc and repeat the same
sequence on the other side. We will have
24 points. (4 fingers x 6 sc).
2. At 8. 1 sc at each point (24).
9. “2 sc, dec”, repeat (18).
10. 1 sc at each point (18).
11. “2 sc, inc”, repeat (24).
12. “3 sc, inc”, repeat (30).
13. “4 sc, inc”, repeat (36).
14. to 25. 1 sc at each point (36).
26. “4 sc, dec”, repeat (30).
27. “3 sc, dec”, repeat (24).
28. “2 sc, dec”, repeat (18).
29. “1 sc, dec”, repeat (12).
30. Dec at all points (6).
31. AND 32. 1 sc at each point (6).
We finish off. We close with the needle
wool. (12).
28. White 9 sc, orange 3 sc (12).
29. White 10 sc, orange 2 sc (12).
30. Only in white we knit 1 sc in
each point (12).
31. 1 sc at each point (12).
32. Dec at all points (6).
We finish off.
Thumb Finger (x2):
1. Magic ring into 8 sc.
2. At 6. 1 sc at each point (8).
Superior part of the arm:
In black color
1. Magic ring into 6 sc.
2. “1 sc, inc”, repeat (9).
3. At 10. 1 sc at each point (9).
11. We change to blue and knit in the
top of the chains 1 sc in
each point. We will return to this return
to complete the sleeves (9).
12. To 14. 1 sc at each point (9).
15. We change to the flesh color and
knit 1 sc in each stitch (9).
16. To 20. 1 sc at each point (9).
We finish off.
We sew the two parts: the main part and the top part as shown in the pictures:
WE COMPLETE THE SLEEVES:
In blue
1 We start from round 11 of part
upper arm and with the hands of the
doll up, we knit in the
part of the chains that was free, 1
sc at each point (9).
2. At 5. 1 sc at each point (9).
We finish off.
HEAD
In flesh color
1. Magic ring into 6 sc.
2. İnc at all points (12).
3. “1 sc, inc”, repeat (18).
4. “2 sc, inc”, repeat (24).
5. “3 sc, inc”, repeat (30).
6. “4 sc, inc”, repeat (36).
7. At 15. 1 sc at each point (36).
16. “2 sc, inc” 6 times, 1 sc in each
stitch in remainder of round (42).
17. “3 sc, inc” 6 times, 1 sc in each
stitch in remainder of round (48).
18. “4 sc, inc” 6 times, 1 sc in each
stitch in remainder of round (54).
19. “5 sc, inc” 6 times, 1 sc in each
stitch in remainder of round (60).
20. At 30. 1 sc at each point (60).
31. “8 sc, dec”, repeat (54).
32. “7 sc, dec”, repeat (48).
33. “6 sc, dec”, repeat (42).
34. “5 sc, dec”, repeat (36).
35. “4 sc, dec”, repeat (30).
36. “3 sc, dec”, repeat (24).
37. “2 sc, dec”, repeat (18).
38. “1 sc, dec”, repeat (12).
39. Dec at all points (6).
We finish off.
We close with the needle
wool. We will sew the head to the neck
so that it is on a par with this one
from the back, that is, that
protrude the front.
NOSE
In flesh color
1. Magic ring into 6 sc.
2. İnc at all points (12).
3. “1 sc, inc”, repeat (18).
4. To 6. 1 sc at each point (18).
7. “1 sc, dec”, repeat (12).
8. Dec at all points (6).
We finish off.
EARS (x2)
In flesh color
1. Magic ring into 6 sc.
2. İnc at all points (12).
3. “1 sc, inc”, repeat (18).
We finish off.
SHOES (x2)
In light brown
1. Magic ring into 6 sc.
2. İnc at all points (12).
3. 3 inc, 3 sc, 3 inc, 3 sc (18).
4. “1 sc, inc” 3 times, 3 sc, “1 sc,
inc ”3 times, 3 sc (24).
5. “2 sc, inc” 3 times, 3 sc, “2 sc,
inc ”3 times, 3 sc (30).
6. “3 sc, inc” 3 times, 3 sc, “3 sc,
inc ”3 times, 3 sc (36).
7. “4 sc, inc” 3 times, 3 sc, “4 sc,
inc ”3 times, 3 sc (42).
8. “5 sc, inc” 3 times, 3 sc, “5 sc,
inc ”3 times, 3 sc (48).
9. AND 10. 1 sc at each point (48).
11. “6 sc, dec”, repeat (42).
12. “5 sc, dec”, repeat (36).
13. “4 sc, dec”, repeat (30).
14. To 25. 1 sc at each point (30).
26. “3 sc, dec”, repeat (24).
27. “2 sc, dec”, repeat (18).
28. “1 sc, dec”, repeat (12).
29. Dec at all points (6).
We finish off.
We close with the wool needle.
Let’s sew the legs as you
shows in the picture.
CAP
In white
1. Magic ring into 6 sc.
2. İnc at all points (12).
3. “1 sc, inc”, repeat (18).
4. “2 sc, inc”, repeat (24).
5. “3 sc, inc”, repeat (30).
6. “4 sc, inc”, repeat (36).
7. “5 sc, inc”, repeat (42).
8. “6 sc, inc”, repeat (48).
9. “7 sc, inc”, repeat (54).
10. “8 sc, inc”, repeat (60).
11. to 16. 1 sc at each point (60).
17. Dec at all points (30).
18. We change to black and knit 1 sc
at each point (30).
19. “4 sc, inc”, repeat (36).
20. “5 sc, inc”, repeat (42).
21. 1 sc at each point (42).
22. We change to white and weave in
the vertical part of the 18 sc chains,
we leave the rest unwoven (18).
23. Separation chain, we turn and
knit 1 sc in each stitch (18).
24. Separation chain, we turn and
we knit 1 dec at the beginning and a dec
in the last 2 points of the end (16).
25. Separation chain, we turn and
again we make 2 dec, one at the beginning
and another at the end (14).
26. Chain of separation, we turn, for
last time we do the 2 dec (12).
27. Chain of separation, we turn and
we decrease at all points (6).
28. Chain of separation, we turn and
again we decrease at all points
(3). We finish off.
GOLDEN HAT RIVETS (x2)
In yellow we knit 1 Magic ring into 6 sc.
We sew one on each side of the visor.
BUTTONS (x3):
In yellow we knit 1 Magic ring into 6 sc.
BELT BUCKLE:
In white
1. 5 chains on which we knit 4 sc.
2. Separation chain, we rotate and
knit 1 sc in each stitch (4).
We finish off.
NECK
In red
1. 49 chains on which we weave 48
sc.
2. To 5. Separation chain, we rotate
and we knit 1 sc in each stitch (48).
6. Separation chain, we rotate and
we change to black. We knit 1 sc in
each point (48).
7. Separation chain, we turn and
knit 1 sc in each stitch (48).
8. Separation chain, we rotate and
we change to red. We knit 1 sc in
each point (48).
9. Separation chain, we turn and
knit 1 sc in each stitch (48).
We finish off.
We fold the ends to fit the
cleavage and we sew to the body.
PIPE
In yellow
1. Magic ring into 8 sc.
2. At 4. 1 sc at each point (8).
We finish off.
Pipe mouthpiece:
In yellow
1. Magic ring into 4 sc.
2. At 10. 1 sc at each point (4).
We finish off.
FINAL DETAILS:
Expensive:
With flesh-colored wool we make a
Slit slightly lopsided. For it
we will use the wool needle introducing it
in the area that we want to sink and
sticking it out from behind the head with
Be careful not to sink this area too.
We pull hard and repeat throughout
about 10 sc. In that area
we will sew the pipe.
With black thread we embroider the eyes, the eyebrows and the smile.
Hair:
Our doll has 3 hairs placed
under the visor of the cap. For it
we will cut 3 equal strips of colored wool
black. To insert them into the head
we fold the strip in half and put it in
one of the holes between the points with the
crochet hook. We introduce the ends
in the gap that forms and we throw
forming a knot.
Cap:
To give a more beautiful effect to the cap, if
we want we can sink the central area
as we have previously done with the
face, this time using white wool. Of
this way will be divided into two zones,
the largest front and rear.
AND READY! HAVE FUN!
Tattoos:
In black we embroider the tattoos of the
arms.
Pattern designed by Sueños Blanditos for patronesamigurumi.org
This is a payment pattern designed by Sueño Blanditos for patronesamigurumi.org. The fact of buying it will
gives the right to knit the doll, give the doll away or sell the doll. The only limitation is the distribution of
Pattern. You can NOT publish it, sell it, give it away or make any exchange with it, whether there is money or not.