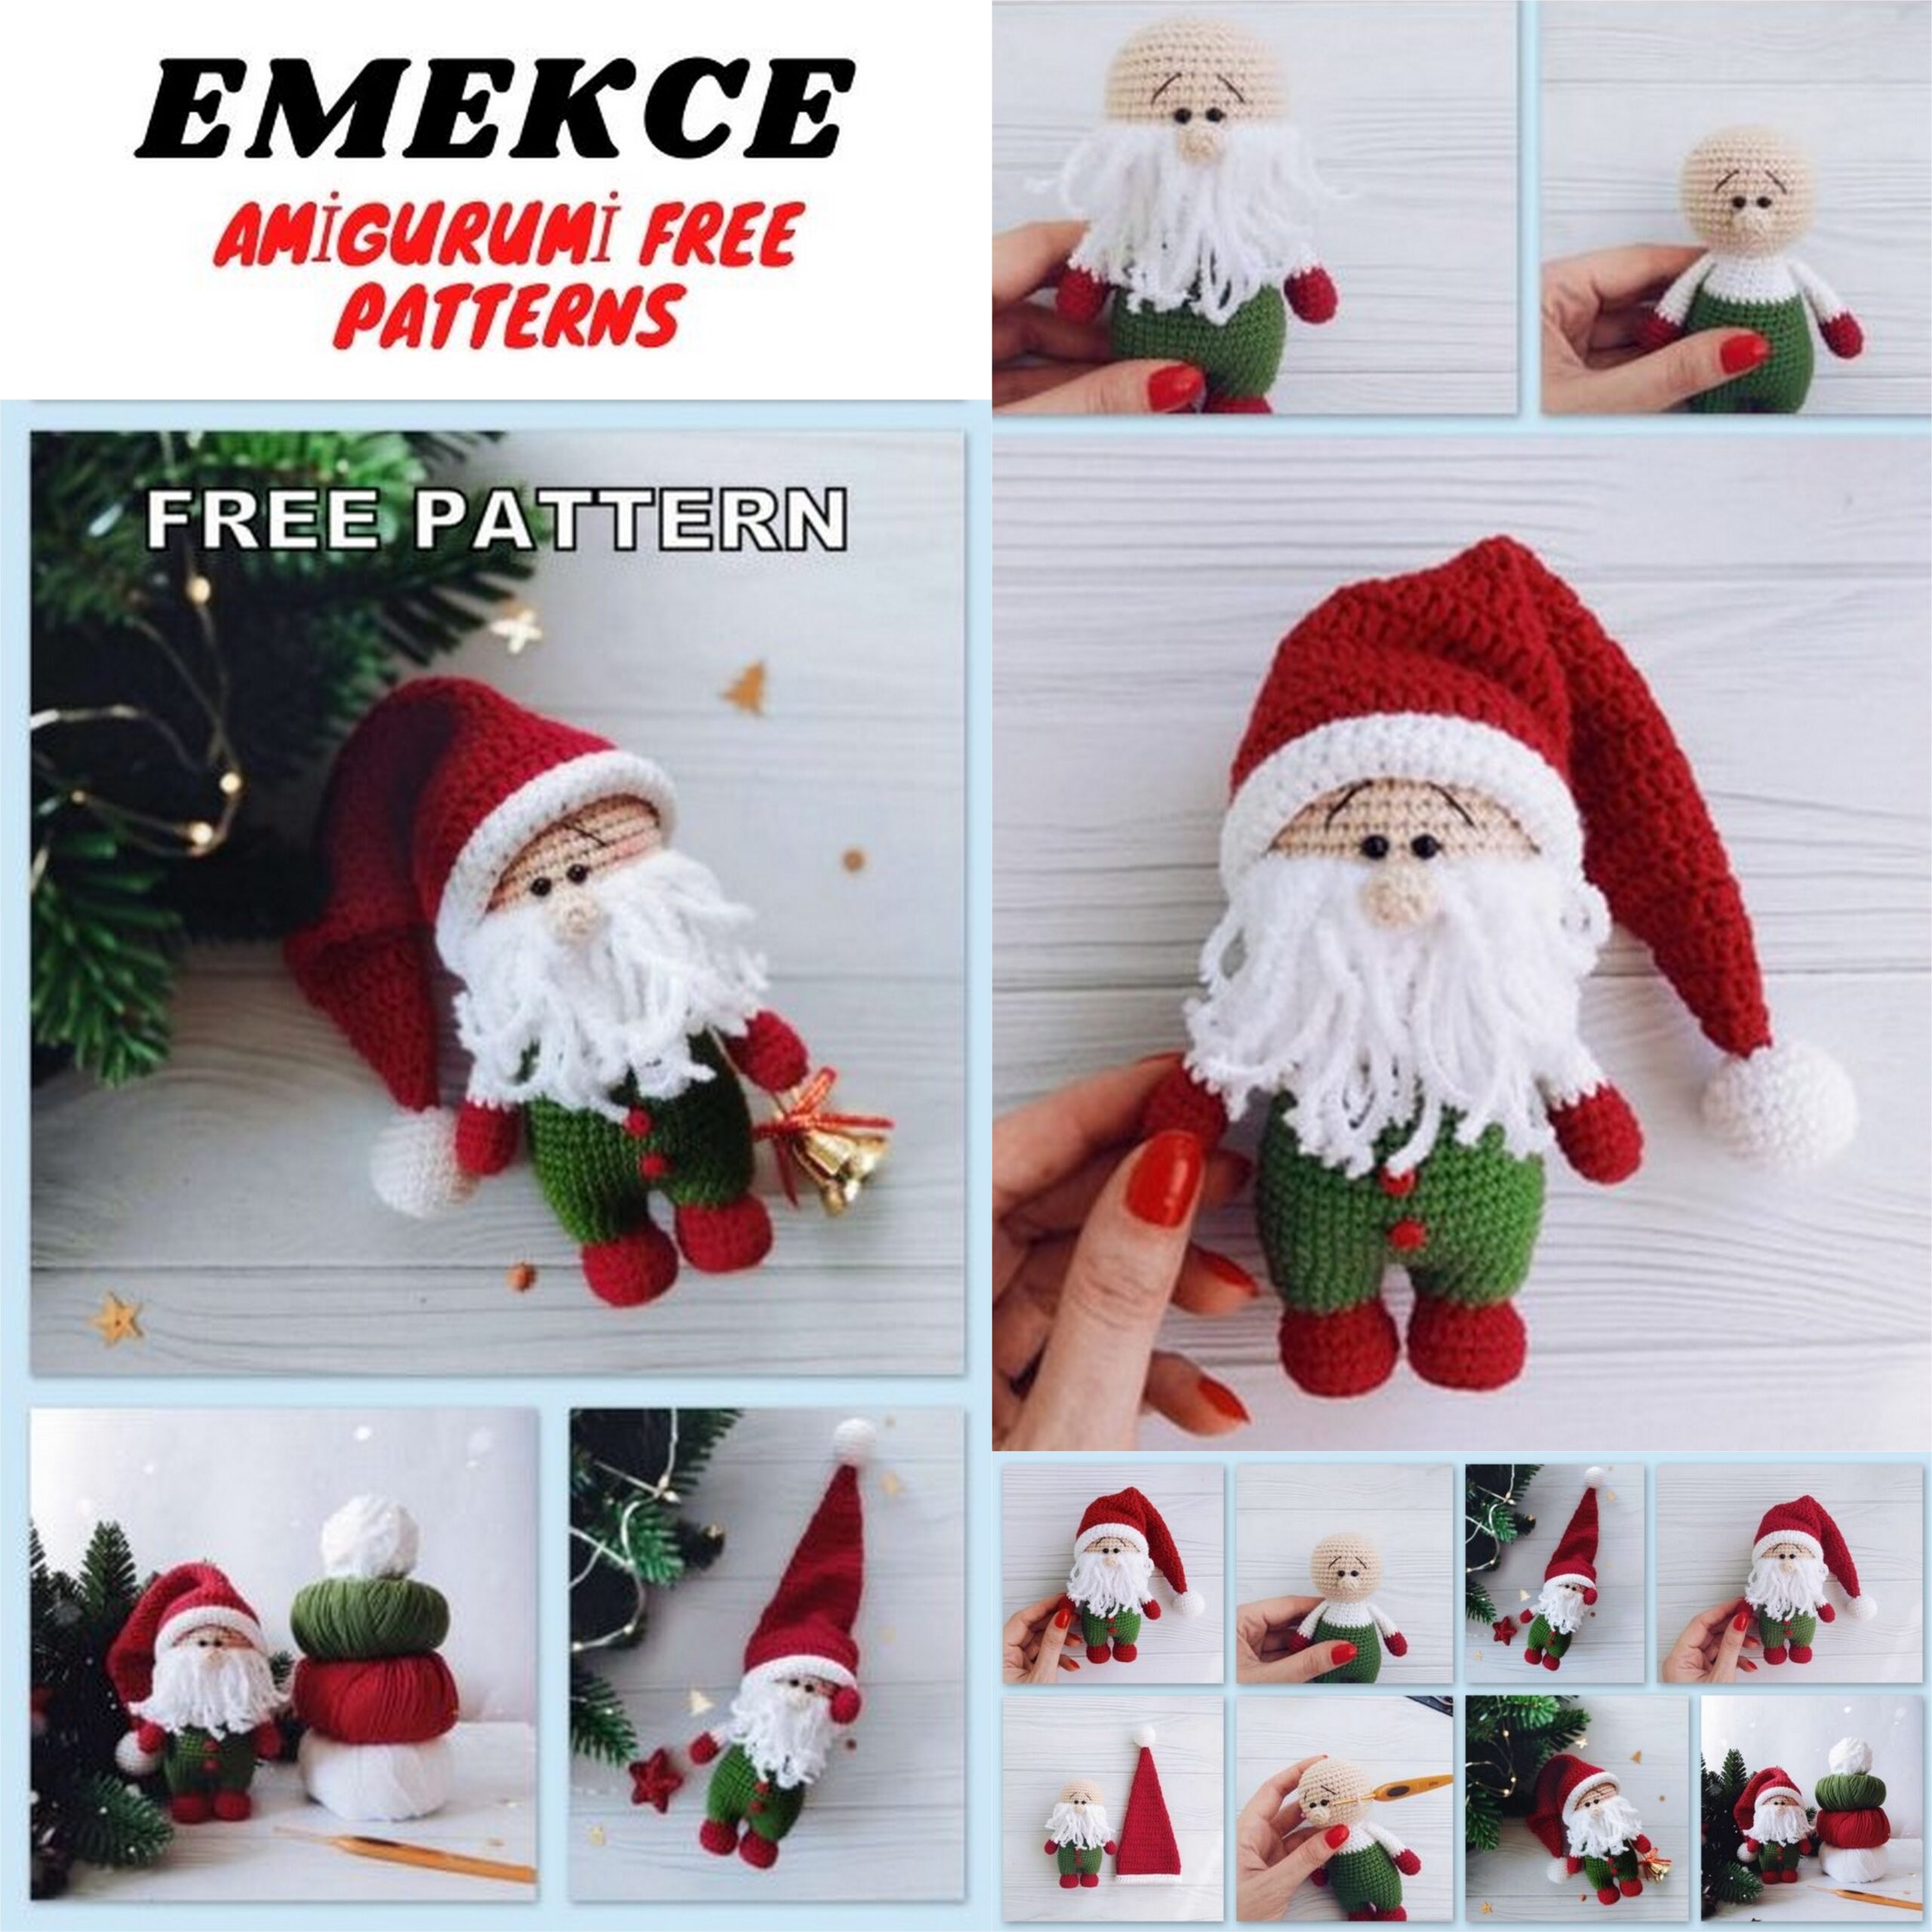
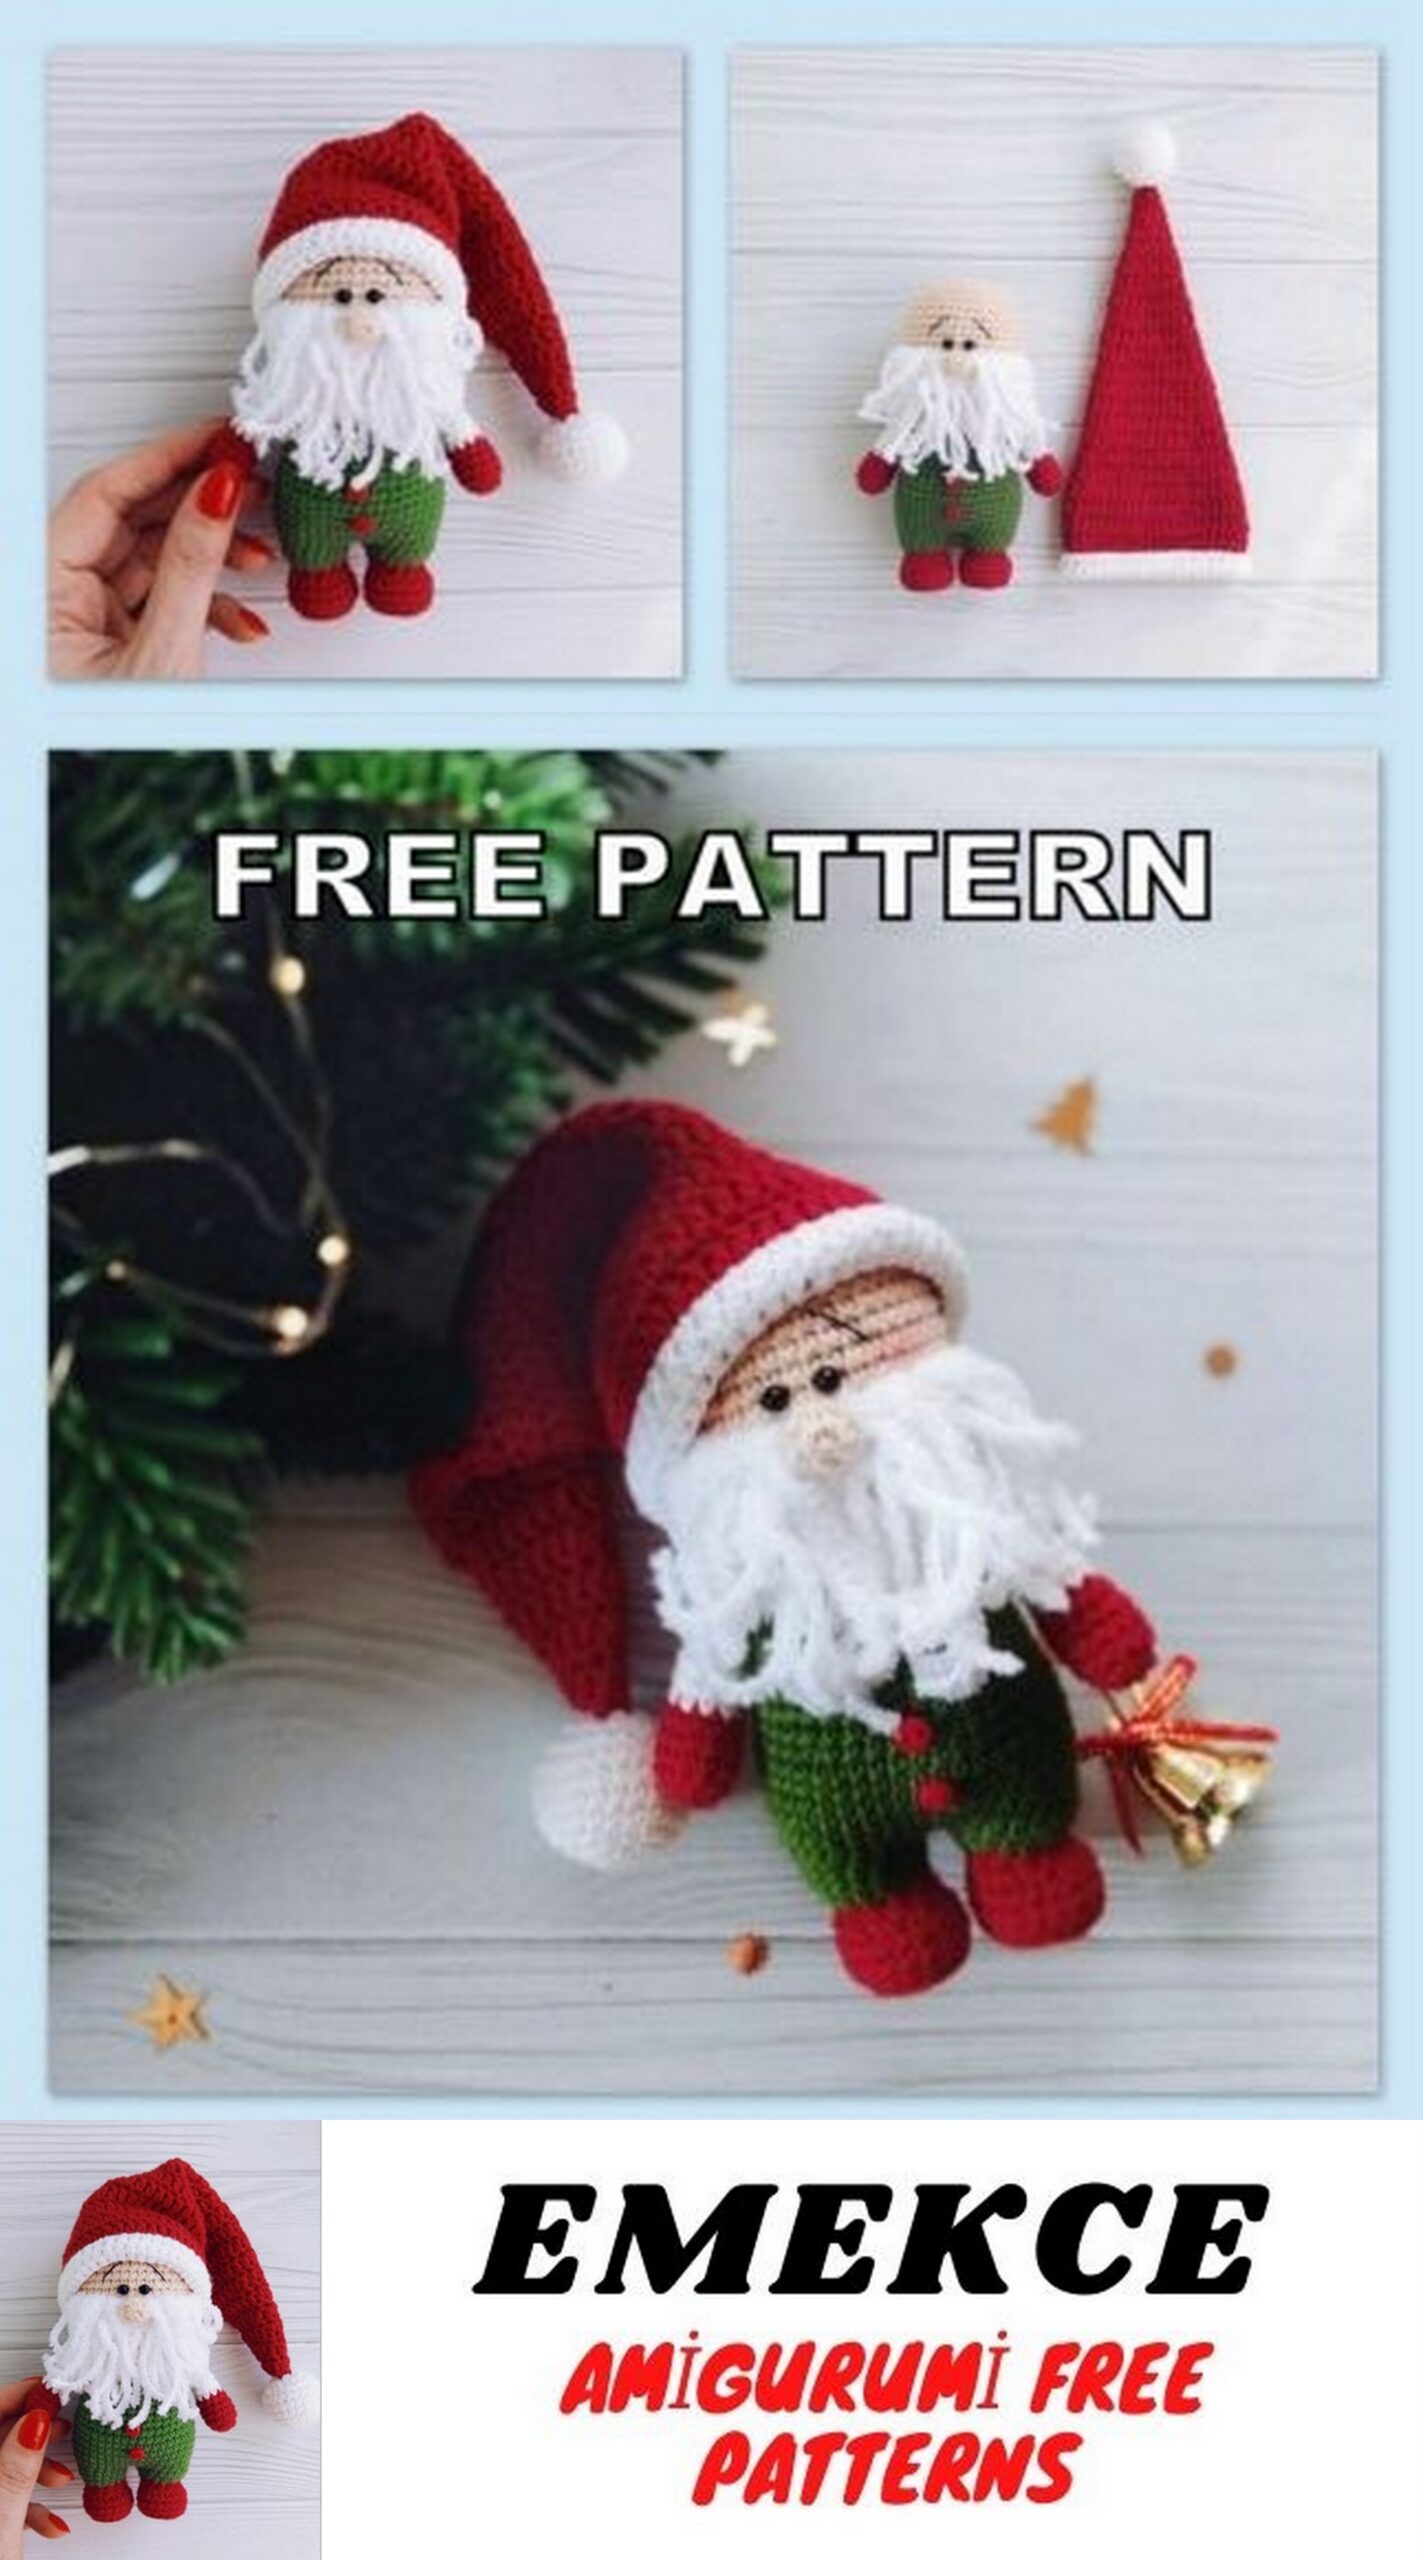
Santa Claus Amigurumi Free Pattern
We share Amigurumi organic crochet toys free patterns with you. You can knit amigurumi santa claus free pattern with pleasure.
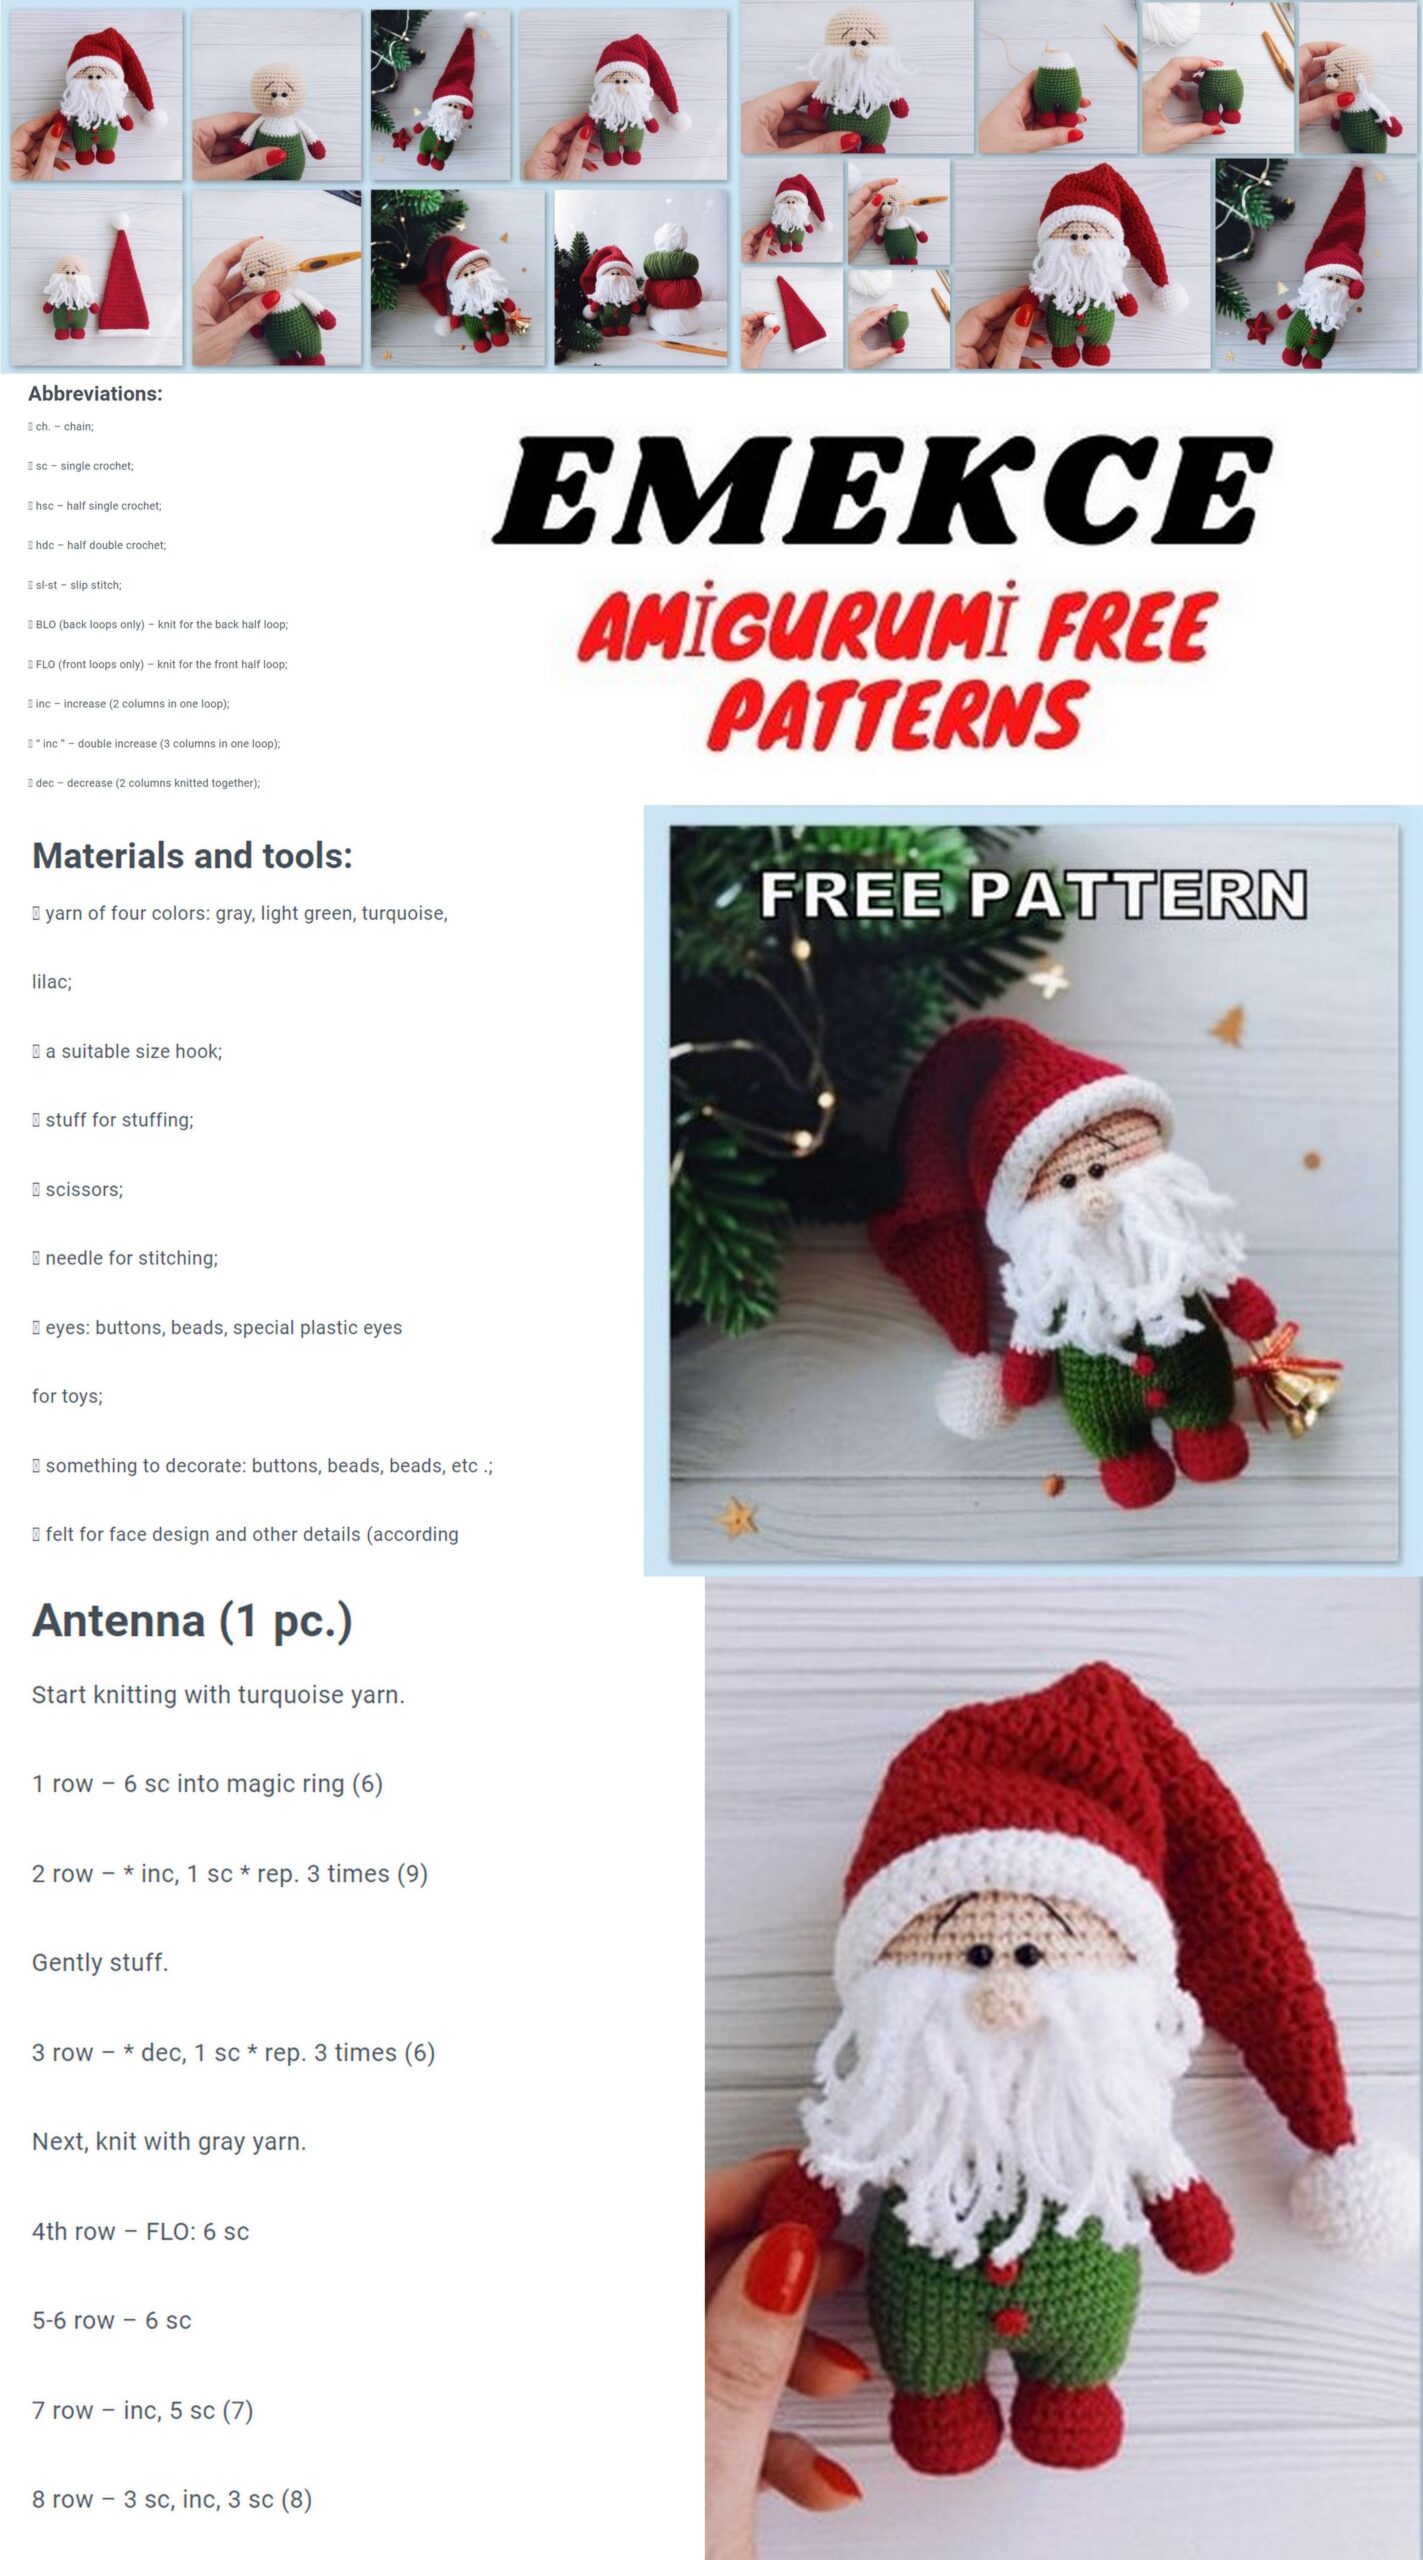
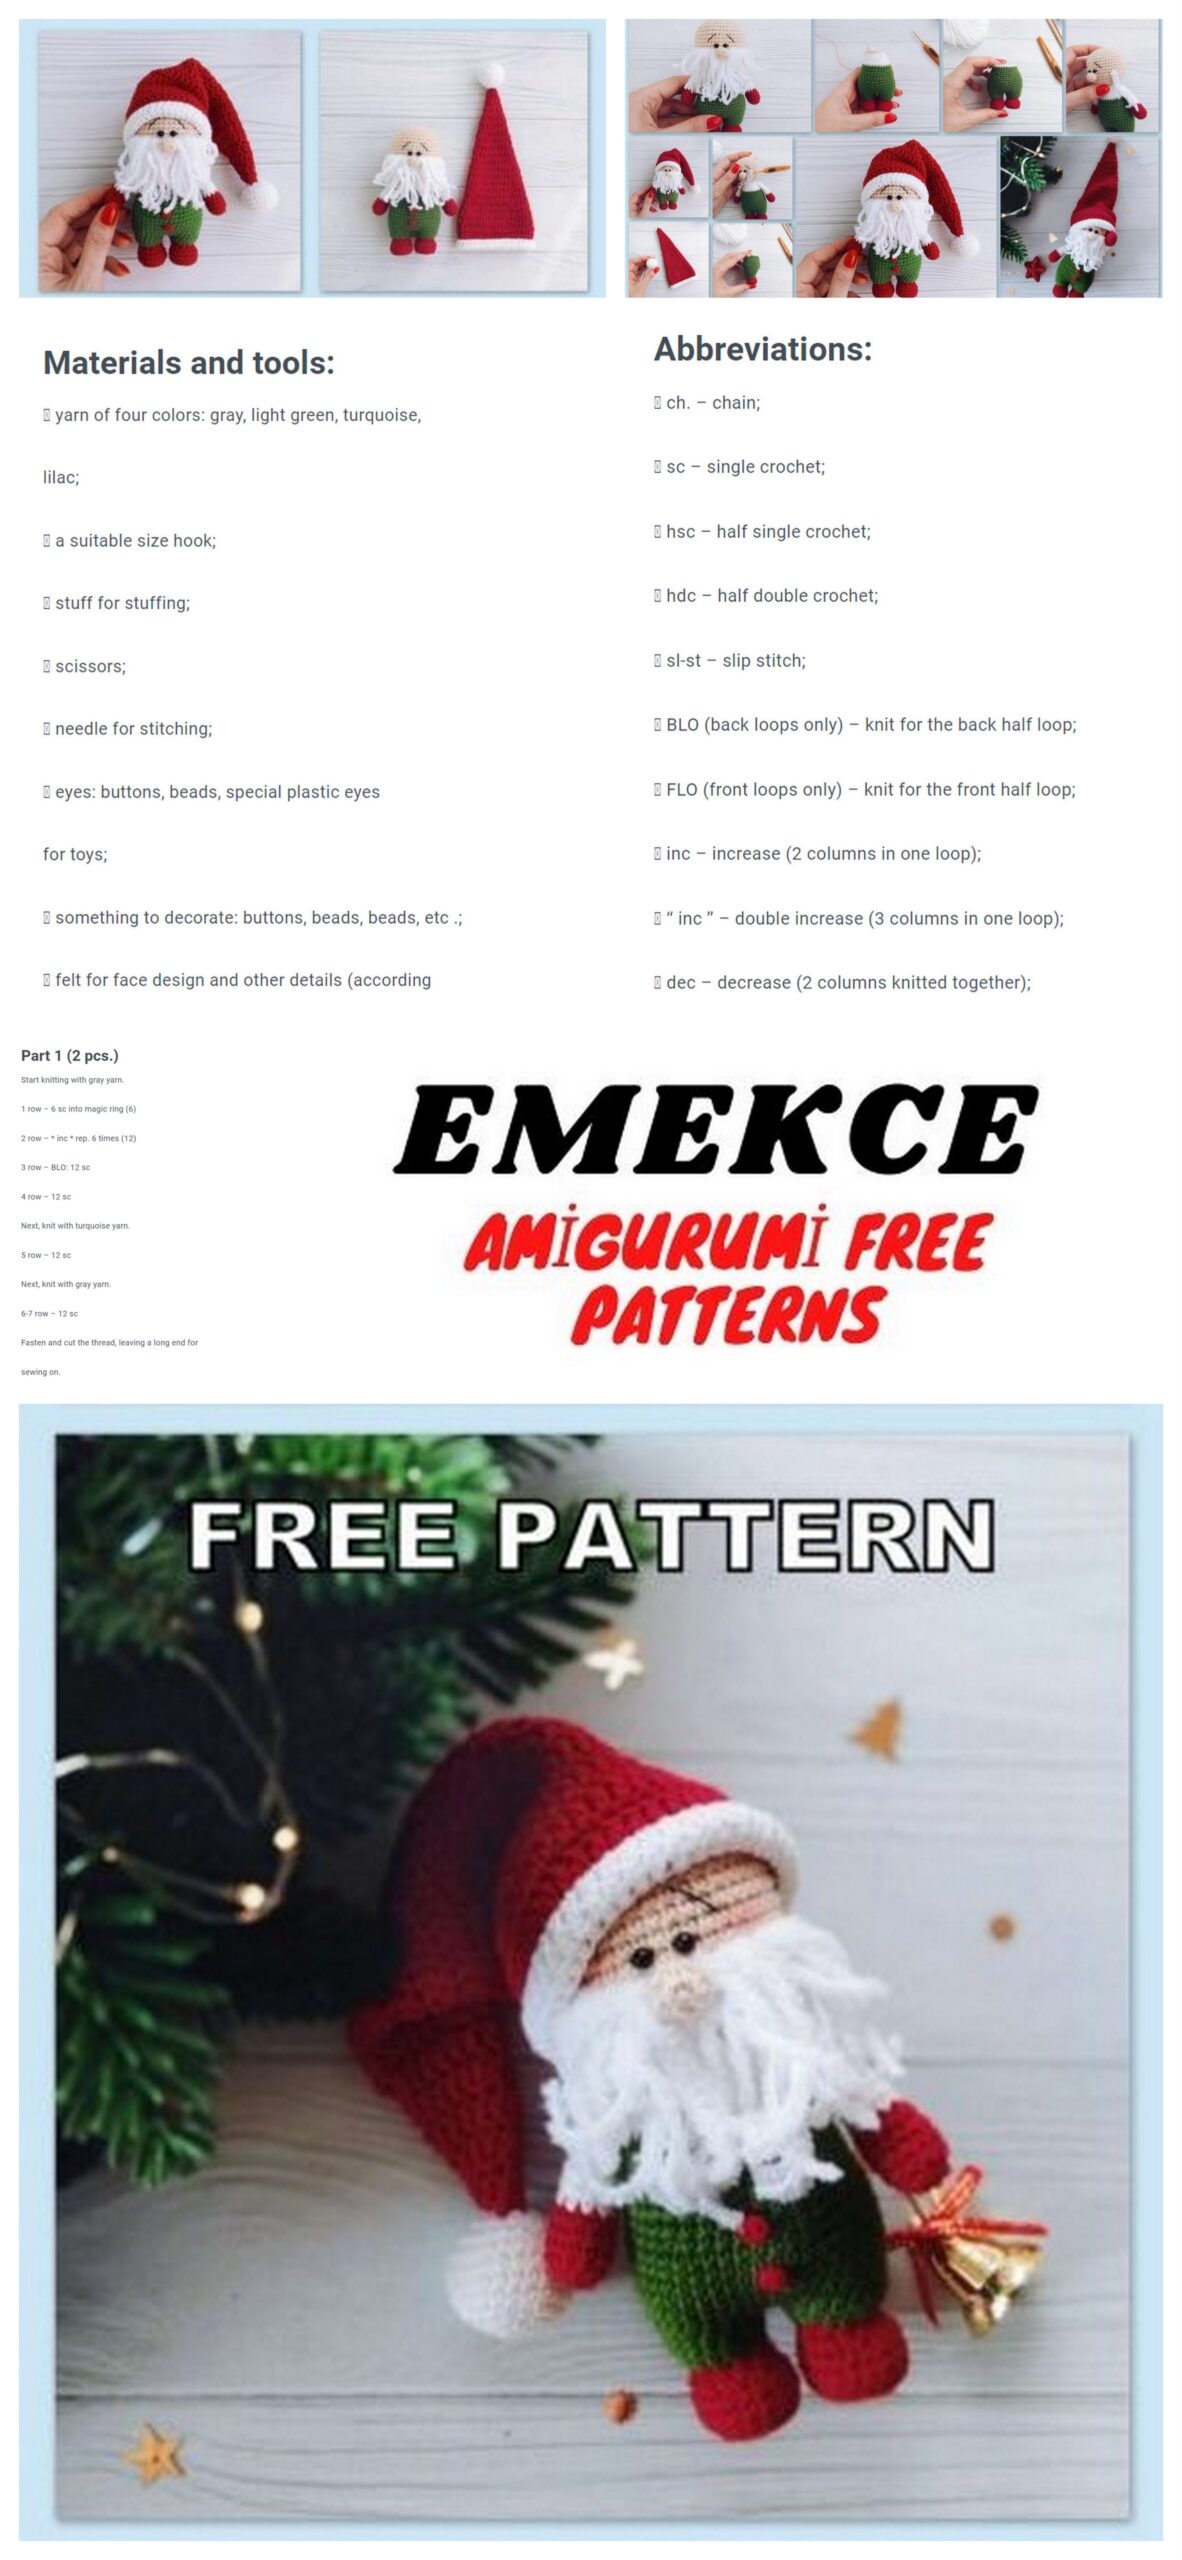
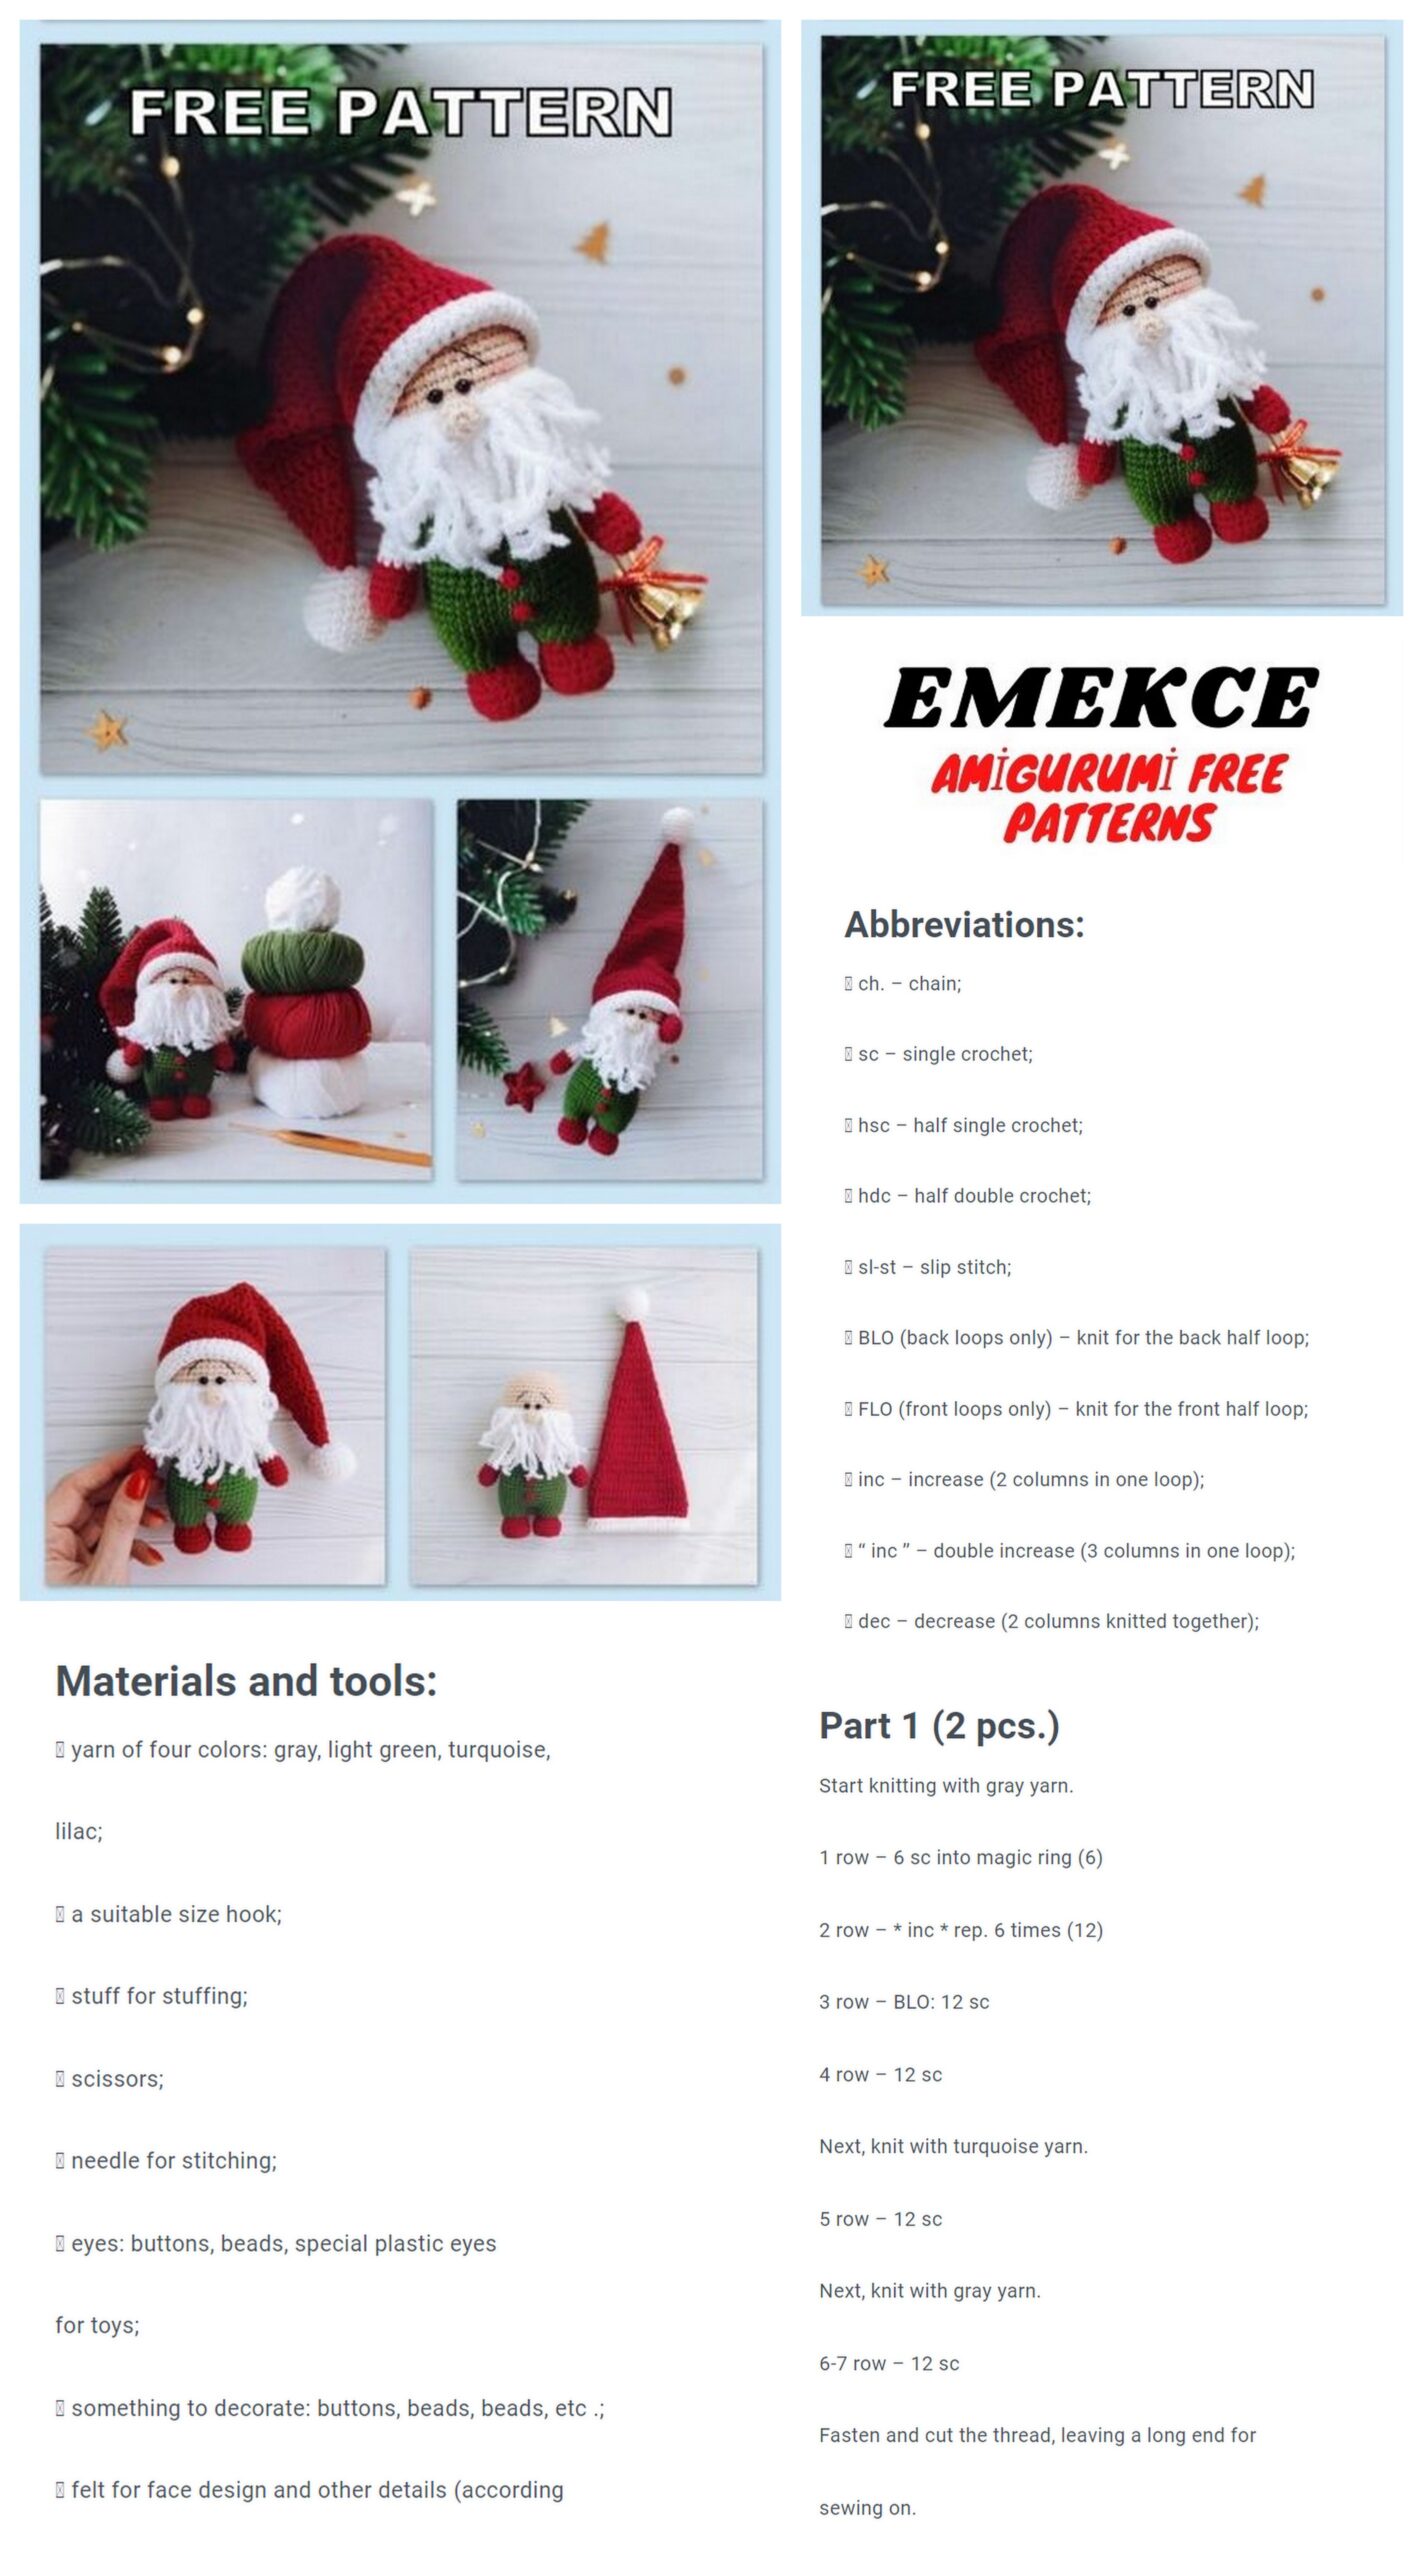
Abbreviations
Mr = Magic ring
sc = single crochet
inc = Increase
dec = decrease
sl-st = slip-stitch
dc =double crochet
Please note that the legs
fit in different ways!
PATTERN
First leg:
Start in red.
1st row: 6sc into magic ring
2nd row: inc into magic ring waiting for the loop (12sc)
3rd row: (1sc, inc) * 6 (18sc)
Next, prepare the insoles. On the sheet circle the outsole, cut, and for this pattern of plastic make round insoles for shoes.
(In this toy, insoles are used sole sole only, the toy is not worth it yourself, as the cap outweighs. Therefore their availability is optional).
4th row: behind the back wall of the 18sc loop
5-6 rows: 18sc (2 rows)
Insert the plastic insole inside.
7 row: 6dec, 6sc (12sc)
8 row: 12sc
Change the color to green:
9 row: (1sc, inc) * 6 (18sc)
10-11 rows: 18sc (2 rows)
Make slst. Finish knitting, thread fasten and cut.
Second leg:
Start in red.
1st row: 6sc into magic ring
2nd row: inc into magic ring waiting for the loop (12sc)
3rd row: (1sc, inc) * 6 (18sc)
4th row: behind the back wall of the 18sc loop
5-6 rows: 18sc (2 rows)
Insert the plastic insole inside.
7 row: 6sc, 6dec (12sc)
8 row: 12sc
Change the color to green:
9 row: (1sc, inc) * 6 (18sc)
10-11 rows: 18sc (2 rows)
On the second leg, knit another 20sc, but do not cut the thread, but continue knit the body. Put your legs close check that the decavings are exactly in front.
12 row: attach the second leg to the first leg where they finished knitting (into the loop following the slst), knit 18sc for the first part, then 18sc for second part (36sc)
In this place you need to install marker (marker is in front).
13 row: (5sc, inc) * 6 (42sc)
14-19 rows: 42sc (6 rows)
20 row: (5sc, dec) * 6 (36sc)
21-22 rows: 36sc (2 rows)
23 row: 2sc, dec, (4sc, dec) * 5, 2sc (30sc)
24-25 rows: 30sc (2 rows)
At this stage, you need to transfer the marker, for this, knit another 8sc (or other necessary amount) so that it is exactly on the side, and change color on white. Now here will be the beginning of the series.
26 row: behind the rear wall of the 30sc loop
27 row: 30sc
28 row: (3sc, dec) * 6 (24sc)
29-30 rows: 24sc (2 rows)
31 row: 1sc, dec, (2sc, dec) * 5, 1 sc (18sc)
Change the color to beige:
32 row: 18sc
33 row: inc into magic ring each loop (36sc)
34 row: (5sc, inc) * 6 (42sc)
35 row: 3sc, inc, (6sc, inc) * 5, 3sc (48sc)
36-44 rows: 48sc (9 rows)
45 row: 3sc, dec, (6sc, dec) * 5, 3sc (42sc)
46 row: (5sc, dec) * 6 (36sc)
47 row: 2sc, dec, (4sc, dec) * 5, 2sc (30sc)
48 row: (3sc, dec) * 6 (24sc)
49 row: 1sc, dec, (2sc, dec) * 5, 1sc (18sc)
50 row: (1sc, dec) * 6 (12sc)
Fasten and cut the thread, leaving a long tip with which tighten the remaining hole.
Hide the tail of the thread inside the head.
Spout:
Tie in beige, lightly fill:
1st row: 6sc into magic ring
2 row: inc into magic ring each loop (12sc)
3rd row: 6 dec (6sc)
Fasten the thread, cut, leaving a long end for sewing.
Pens:
Tie the two pieces together, knit in a knitting process. Fill tightly only lower part, then fill medium, the upper part does not need to be filled.
Start in red:
1st row: 6sc into magic ring
2 row: inc into magic ring each loop (12sc)
3-5 rows: 12sc (3 rows)
6 row: (4sc, dec) * 2 (10sc)
Change the color to white:
7-11 rows: 10sc (5 rows)
12 row: (3sc, dec) * 2 (8sc)
13-15 rows: 8sc (3 rows)
Fold the edges of the part together, knit 4sc. Fasten the thread, cut, leaving long end for sewing.
Design and assembly:
Sew the handles symmetrically on the sides, previously securing them with pins.
Sew eyelets between 39 and 40 (the distance between them is 2 sc), embroider the eyebrows with the same thread.
Sew a nose under the eyes.
Next, make a beard. For this from
Alize Softy Yarn Cook 19 lengths of 12cm. Fasten them with using the hook on row 38 (see a photo). I got 7 pcs with both sides of the nose and 5 pcs under the nose (for density you can add another row below). Trim your beard.
Cap:
In white, dial a chain of 44 ch and use slst to close it in a circle.
1 row: 2 ch lift, 44DC, slst (44dc)
2 row: 1 ch lift, 44sc, slst (44sc)
Change the color to red.
Further, each row of the cap begins with a 2 vp rise and ends with a slst.
3rd row: behind the front wall of the 44DC loop
4-5 rows: 44DC (2 rows)
6 row: (20DC, dec) * 2 (42dc)
7 row: 10 DC, dec, 19DC, dec, 9DC (40dc)
8 row: (18DC, dec) * 2 (38dc)
9 row: 9DC, dec, 17DC, dec, 8DC (36dc)
10 row: (16DC, dec) * 2 (34dc)
11 row: 8DC, dec, 15DC, dec, 7DC (32dc)
12 row: (14DC, dec) * 2 (30dc)
13 Series: 7DC, dec, 13DC, dec, 6DC (28dc)
14 row: (12DC, dec) * 2 (26dc)
15 row: 6DC, dec, 11DC, dec, 5DC (24dc)
16 row: (10DC, dec) * 2 (22dc)
17 row: 5DC, dec, 9DC, dec, 4DC (20dc)
18 row: (8DC, dec) * 2 (18dc)
19 row: 4DC, dec, 7DC, dec, 3DC (16dc)
20 row: (6DC, dec) * 2 (14dc)
21 row: 3DC, dec, 5DC, dec, 2DC (12dc)
22 row: (4DC, dec) * 2 (10dc)
23 row: 10dc