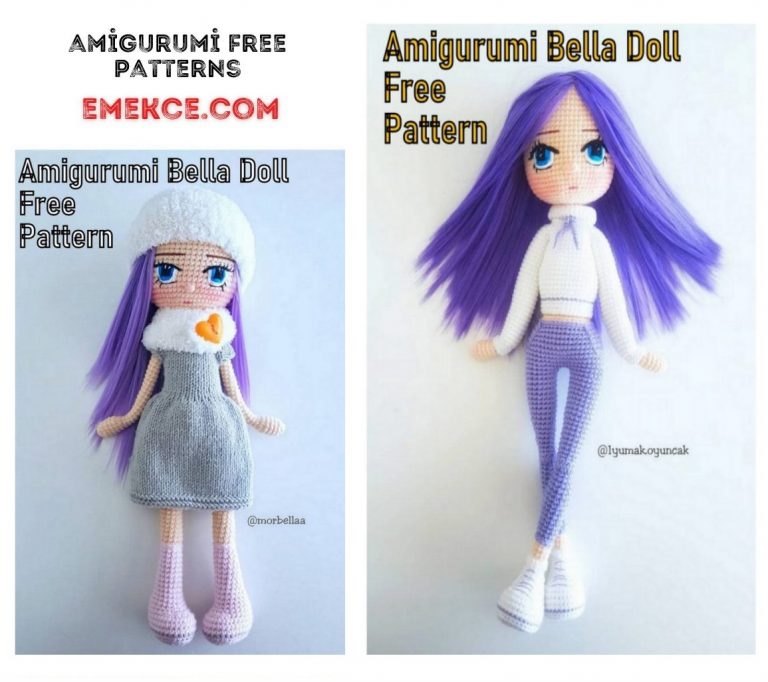
Amigurumi Doll Moy Angel Free Pattern
Facebook group: Amigurumi Free Patterns
Further, the author’s words:
“This is a universal doll, you can make it any way. It’s all about the design. The main thing
its dignity – nothing needs to be stitched, everything is securely tied. The doll is completely safe
for very young children – no metal frames, and not even eyes at all
required. However, there are no prohibitions on the frame – if you need,
please insert! … “
“… There is no decoration in the description, you can show imagination. I already have the fifth doll on it,
not one like the other … “
Angel

This is a universal doll, it can be made any way. It’s all about
clearance. Its main advantage is that you don’t need to stitch anything, everything is reliable
involved. The doll is completely safe for very young children – no
metal frames, and even the eyes are completely optional. However
no frame prohibitions exist – if you need, please
insert!
Abbreviations:
SC – single crochet
İNC – increase
DEC – decrease
CH – chain
PATTERN


Pens
4 ch, we bind in a circle: inc, 1 sc, 3 sc from one, 1 sc, inc = 9
1. (2sc, inc) x3 = 12
2. (1 sc, inc) x6 = 18
4-6. 18 sc
7. 2 sc, 4 HDC from 1 loop with 1 vertex (lush half-column), 15 sc. This is a finger.
If necessary, make a few offset loops so that the finger is on
the edge of the palm of your hand or above and inside (do not forget that the hands are different!)
8. 18 sc
9.9 dec.
10. (2sc, inc) x3 = 12
11.12 sc
12. (3 sc, inc) x3 = 15
13-18. 15sc
19. 8 sc, 7HDC. (Hdc is the elbow, so they should be on the side,
opposite finger. If necessary, align the position of the elbow with the loops
bias)
We are stuffing. The hand is tight, at the elbow – slightly.
20. Flatten the handle perpendicular to the palm (the finger turns out to be
in the middle of the fold line). We knit two loops (one from each half)
7-8sc
21. We knit 15 sc in a circle for the outer walls of the resulting pigtail.
22-32. 15 sc
33. 4 sc, 7 HDC, 4 sc (this row may be incomplete. You need to finish at the bend of the arm
when flattened. 7HDC is the shoulder, they are in the plane of the palm.
perpendicular to the fold line at the elbow. For the second hand – 13 sc, 2 HDC, start
next row 5 HDC.
Stuff the arm, the elbow is weaker.
34. Flatten your arm and knit 7-8 sc, capturing both halves.
Legs
1. 8 sc
2. İnc, 5 sc, 3 sc out of 1, 5 sc, inc = 17 sc
3. İnc, 6 sc, 3 inc, 5 sc, 2 inc = 23 sc
4.1 sc, inc, 6 sc, (1 sc, inc) x3, 5 sc, (1 sc, inc) x2 = 29
5.2 sc, inc, 6 sc, (inc 2 sc) x3, 5 sc, (2 sc, inc) x2 = 35
6.35 sc behind the back wall
7-9 35 sc. (If you need a stiff outsole, you can insert the insole. But
the doll is not worth me, so the insole is not needed).
10. Align the marker in the center of the heel. 9 sc, (dec, 1 sc) x5, dec, 9 sc = 29 sc
11.6 sc, (dec, 1 sc) x5, dec, 6 sc = 23 sc
12.6 sc, 6 dec, 5 sc = 17 sc
13. inc, 16 sc = 18 sc
Stuff your foot.
14-23. 18 sc
Option. Perhaps you want a little clubfoot. Then knit 1-2
loops after the marker and untie the same amount on the other leg: the second leg
claws to the other side!
Please note that first we knit the left leg!
24. 8 sc, 9 HDC, 1 sc (you may need to knit several sc offsets
or vice versa, do not tie a row. HDC is the knee. If the legs are not clubfoot, then
HDC should be exactly above the foot.
To fill the leg: at the foot – tightly, at the knee – slightly.
25. Flatten the leg, knit 9 sc, capturing the inner walls of both
halves.
26. 18 sc for the front halves of the loops. (If you want the doll to stand, then no
sense to do these manipulations – knit further straight, then tightly
stuff).
27-39. 18 sc.
To fill a leg – at joints slightly. Stuffing, bend the leg in the knee, then not too much
put it down.
Flatten the leg and knit 9 sc, capturing the loops of both halves. On the left
tear off the leg thread, on the right leave for further knitting.
Option. Shorter legs will also be pretty. You can stop
directly on the knee (then, of course, there will be no knee). Well, or in several rows
higher.
Body
Now we need the marker to be on the side of the right side of the body.
We knit the legs to it along the outer loops. We put a marker. Now position
this: the feet are looking at us, the priest will be behind, the marker from the right side of the doll, but on the left
from U.S. Go!
1. 9 HDC for the front wall (if still these loops were not knitted to fit), 3
ch, go to the second leg, 9 HDC and 9 sc for the front half loops, 3 sc on
chain of ch, 9 sc. = 42
2. (2HDC, inc HDC) x3 3HDC on the back of the ch chain, (incHDC, 2HDC) x3, 21 sc
= 48
3. (3 HDC, inc HDC,) x3, 3 HDC, (inc HDC, 3 HDC) x3, 21 sc = 54
4. Knit in rotary rows: 32 sc, SL-ST, turn 30 sc, SL-ST, turn, 28 sc, sl-st,
twist, 26 sc, SL-ST twist, knit to the end of the row, getting loops around the edge
rotary knitting. If you want a more protruding butt, knit a couple more
rotary rows, you can connect these through one not sc, but HDC.
5-14. 54 sc
15. Return the marker to the sideline. I have 3 sc offsets.
(3 sc, dec) x 6.24 sc.
16. (6 sc, dec) x6 = 42
17-22. 42 sc
23. We knit about 17-20 sc, try on a pen. If necessary, a few
loops add or dissolve. We knit further together with the loops of the hand.
We knit to the opposite side, attach the handle, knit
together with hand loops. Here you grab the loops of the next row, it’s not scary.
Move the marker and then just knit as described.
24. (5sc, dec) x6 = 36
25. (4 sc, dec) x6 = 30
26. (3 sc, dec) x6 = 24
27. (2 sc, dec) x6 = 18
28-29. 18 sc. Do not break the thread, continue to knit the head.
Head
1. (2 sc, inc) x6 = 24
2. (2 sc, inc) x8 = 32
3. (3 sc, inc) x8 = 40
4. (4 sc, inc) x8 = 48
5. (7 sc, inc) x6 = 54
6. (8 sc, inc) x6 = 60
7. (9 sc, inc) x6 = 66
8-11. 66 sc
12. We look where the marker appeared. We knit to the middle of the occipital part and
move it.
13. 18 sc, (dec, 3 sc) x3, put an additional marker for the nose, (3 sc, dec) x3, 18
sc = 60.
14.18 sc, (2 sc, dec) x3 (dec, 2 sc) x3, 18 sc = 54
15-22. 54 sc
23. (7 sc, dec) x6 = 48
24. (6 sc, dec) x6 = 42
25. (5sc, dec) x6 = 36
26. (4 sc, dec) x6 = 30
27 (3 sc, dec) x6 = 24
28. (2 sc, dec) x6 = 18
29. (1 sc, dec) x6 = 12
30 6 dec
Wing for an angel
1.6 in the ring
2.6 inc = 12
3-4 12 sc
5. 4 ch, put the marker, knit along the chain: inc ,, 2 sc, go to the circle – 12 sc,
on the other side of the chain 3sc = 19 sc
6-8. 19 sc
6. 4 ch, 4 ch, put the marker, knit along the chain: inc ,, 2 sc, go to the circle – 19
sc, on the other side of the chain 3sc = 26 sc
8-10. 26 sc
11.4 ch, put the marker, knit along the chain: inc ,, 2 sc, go to the circle – 26 sc, along
the other side of the chain 3sc = 33 sc
12-16. 33 sc
17.1sc, dec, 30 sc = 32
18.1 sc, dec, 29 sc = 31
19.1 sc, dec, 28 sc = 30
We make sure that the decreases go along the bend of the wing, along its lateral line. If a
necessary – we knit displacement loops.
20. (dec, 3) x6 = 24
21. (dec, 2 sc) = 18
22. (dec, 1 sc) = 12
23.6 dec = 6
Loops to tighten.
So is the second wing.
If you need a wing with a lot of “feathers” – do a few more
“Steps”. You can also make steps more clearly by adding rows.
(if when tying chains somewhere loops are lost – do not spread,
“Feathers” do not have to be exactly the same).
Nose
3 ch, we bind 1 sc, inc, 1 sc, inc = 6 sc
(1 sc, inc) x3 = 9.
9 sc. Leave the thread for sewing.
Option. You can do without a nose at all or embroider it in place of a marker
several horizontal stitches.
Ears (if you need them)
1. 6 sc in an amigurumi ring or in the second loop of a 2-xch chain. We turn
knitting.
2. İnc, 2 sc, 2 HDC, inc dc, turn
3.2 ch, 2HDC, 4 sc.
4. You can also make a turn and tie sc.
Boots, shoes.
Threads Nazar Velor
We start by describing the legs.
1. 8 sc
2. İnc, 5 sc, 3 sc out of 1, 5 sc, inc = 17 sc
3. İnc, 6 sc, 3 inc, 5 sc, 2 inc = 23 sc
4.1 sc, inc, 6 sc, (1 sc, inc) x3, 5 sc, (1 sc, inc) x2 = 29
5.2 sc, inc, 6 sc, (inc 2 sc) x3, 5 sc, (2 sc, inc) x2 = 35
6.3 sc, inc, 6 sc, (inc, 3 sc) x3, 5 sc, (inc, 3 sc) x2 = 41
7.2 sc, inc, 10 sc, (inc, 3 sc) 8 sc, (inc, 2 sc) x2 = 47 Marker set by
mid-heel, do 1 increase. = 48
8-13. 48 sc
14.13 sc (dec, 2 sc) x5 = 42
15.13 sc, (dec, 1 sc) x5, dec, 13 sc = 36
(if you knit shoes, you can stop here)
16-18 – 36 stitches
19. (8 sc, inc) x4 = 40
We knit to the desired height (4-6 rows). Tie with a step with a crustacean.
Dress
We knit raglan on top. The calculation is done as follows: We estimate how many loops are necessary
on the doll’s neck in front, from shoulder to shoulder. Usually it is 8-12 loops. Divide in half.
Got 4-6 loops. Now we count. (I will count based on 5 loops).
10 front loops, 5 loops of the first shelf, 5 loops of the second shelf, 2×5 – sleeves. =
30 loops.
İncavail:
4 loops on raglannye lines
2 edge loops
4 loops for the strap (for the straps we grab a loop from the shelves).
Total 38 loops.
We collect 38 loops, knit 2-4 rows of garter stitch.
Next, mark the hinges of the ragled line. We knit three loop stitches with a garter stitch.
Before and after the ragged line, we make incavations in each front row (if
we need openwork – just crochets, if the knitting is tight – from a broach or from
crossed yarn).
We knit to the armhole. We close the loop of the sleeves, in their place we do 2-3
crossed nakida for widening armholes. In the wrong row
knit seamy.
Now you need to insert loops to expand the dress. Here I rely on your
imagination. It is usually enough to make an increase after 2 loops, but maybe you
need a wider dress.