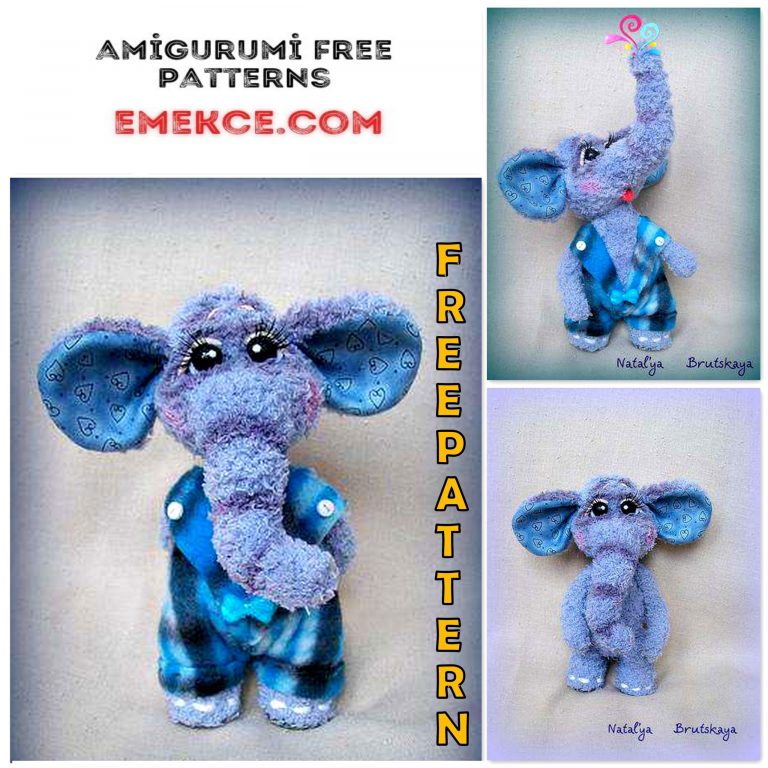
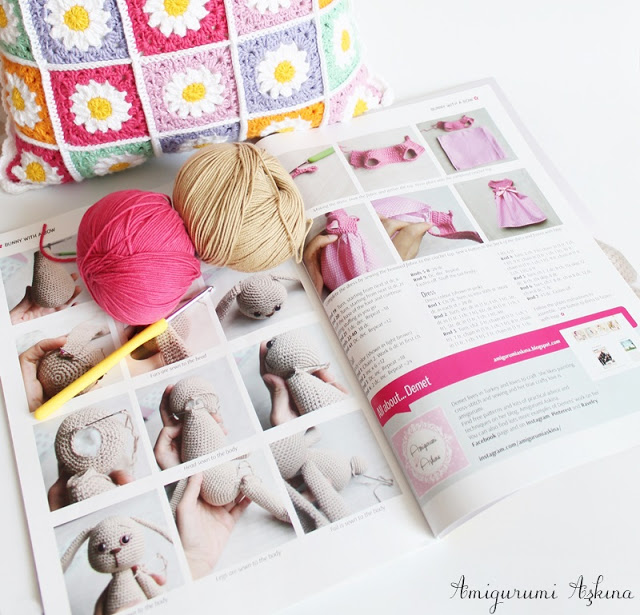
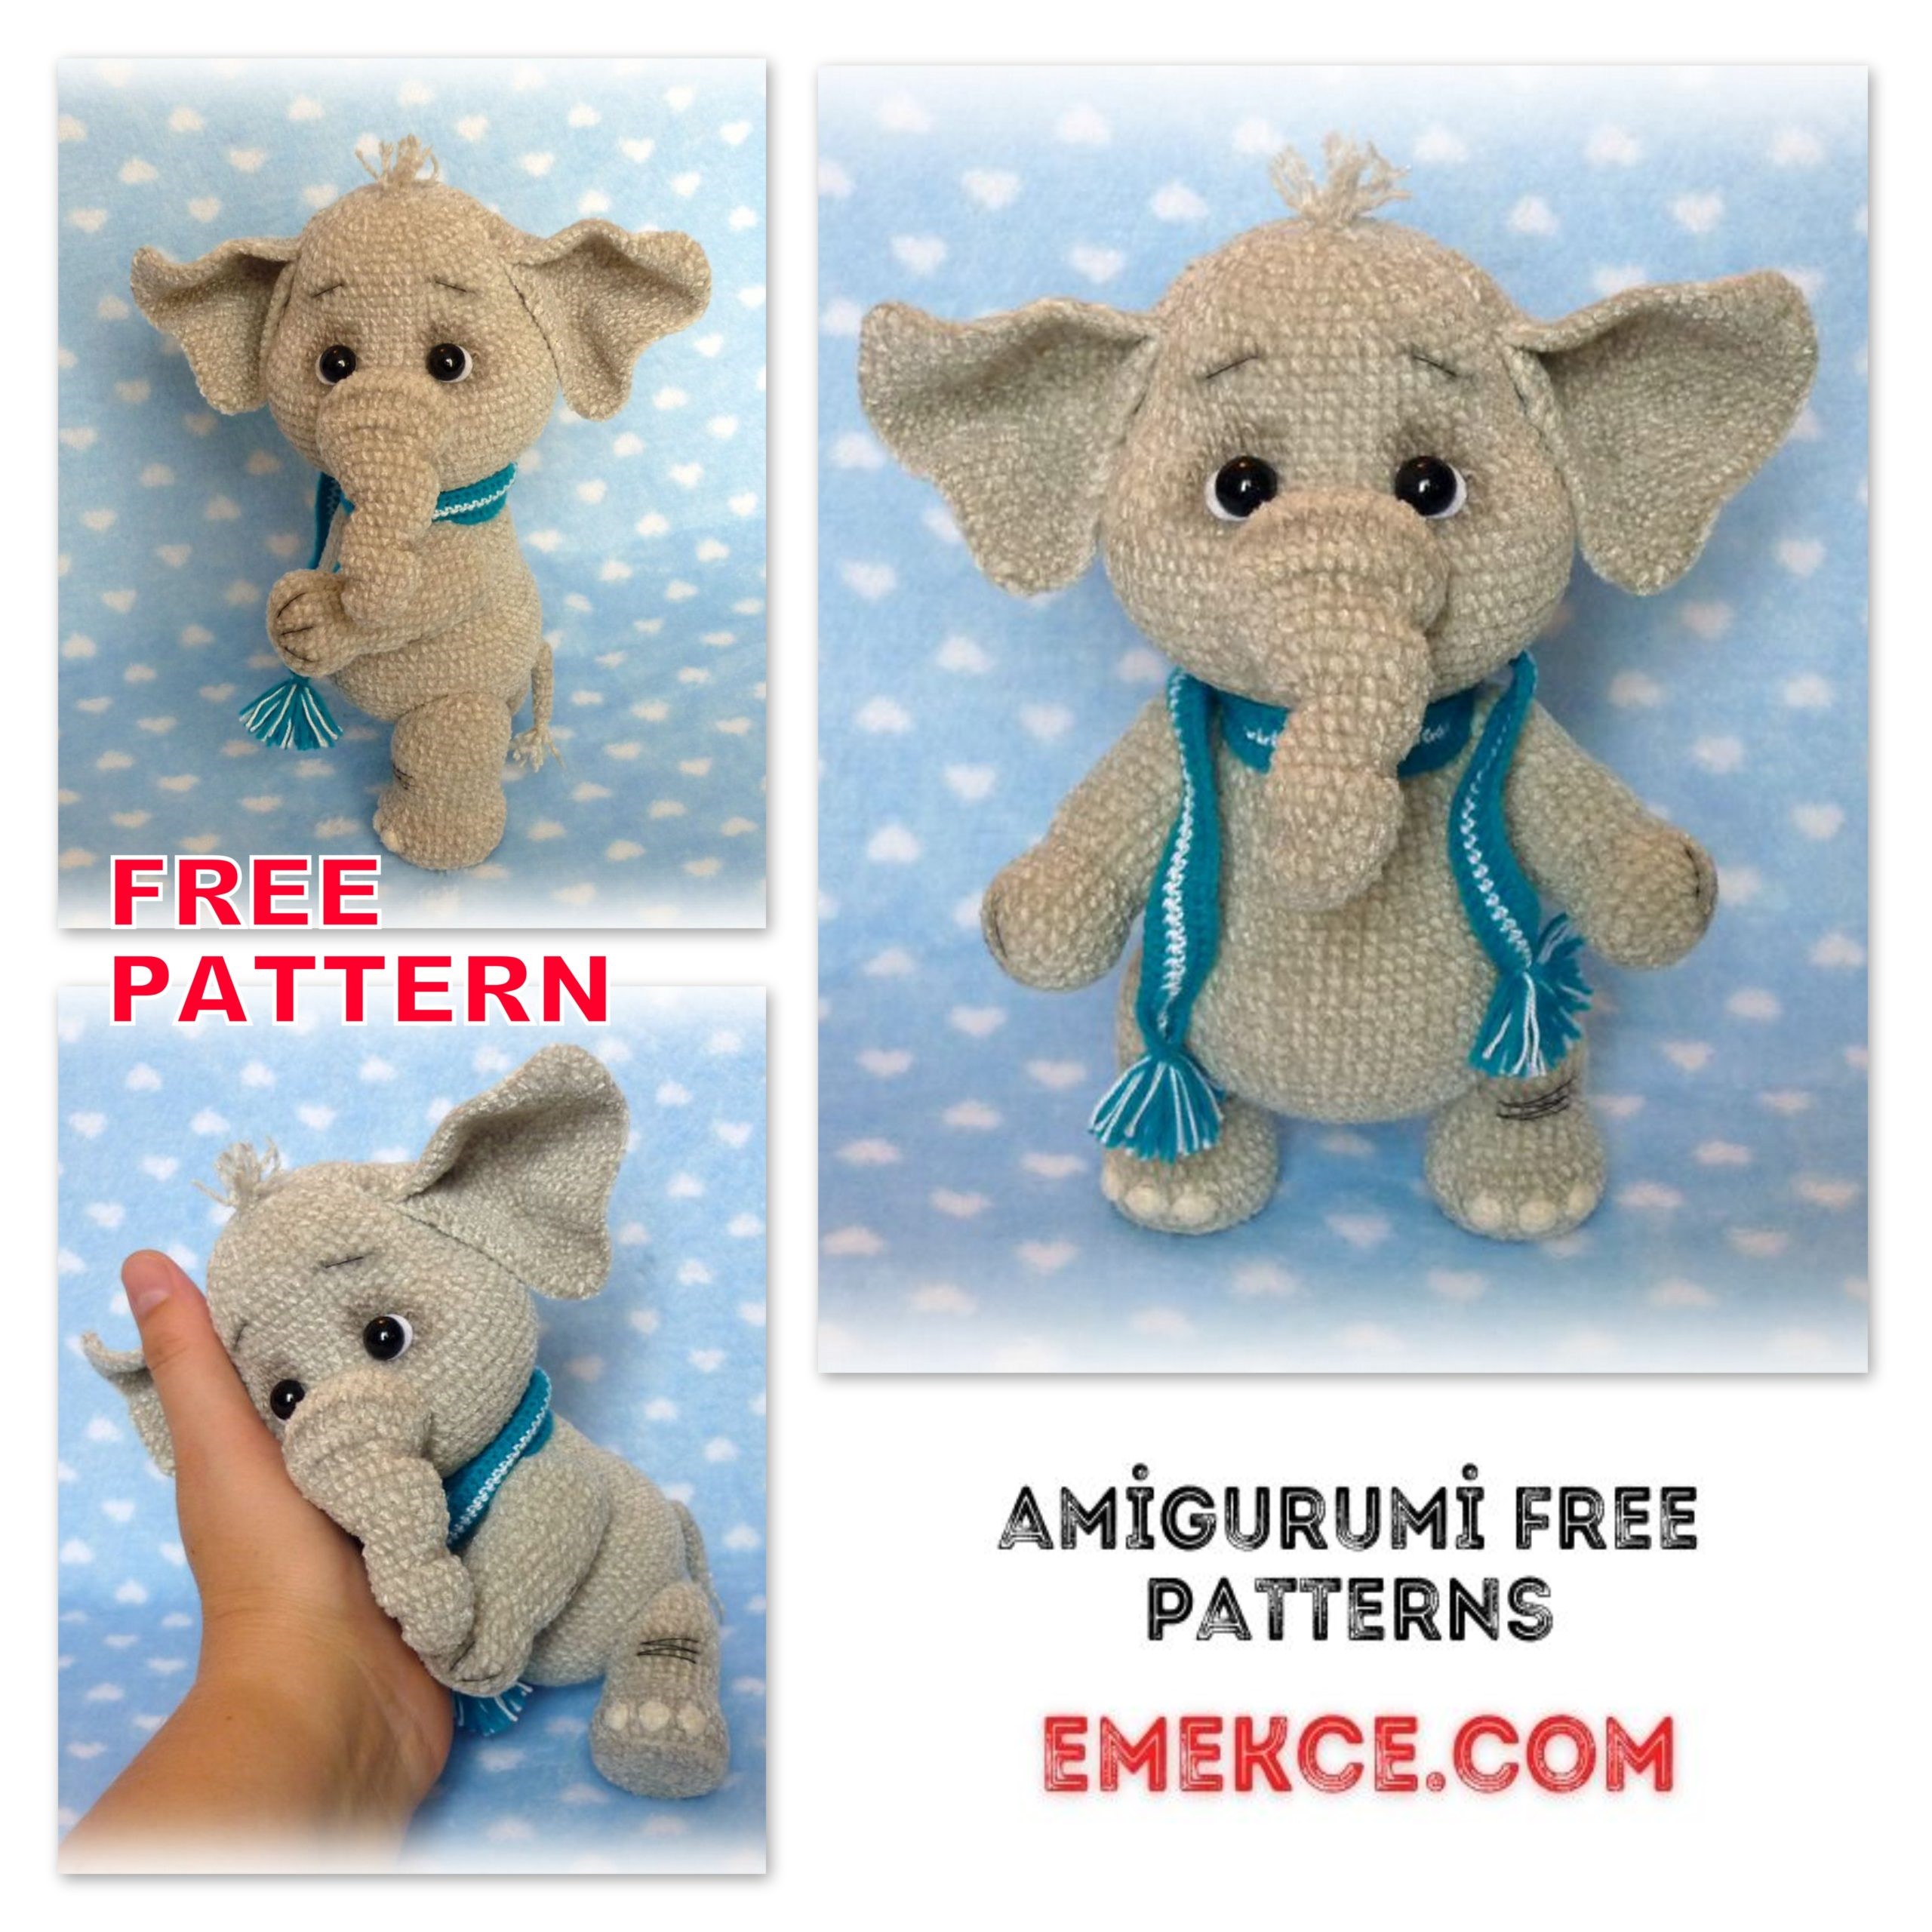
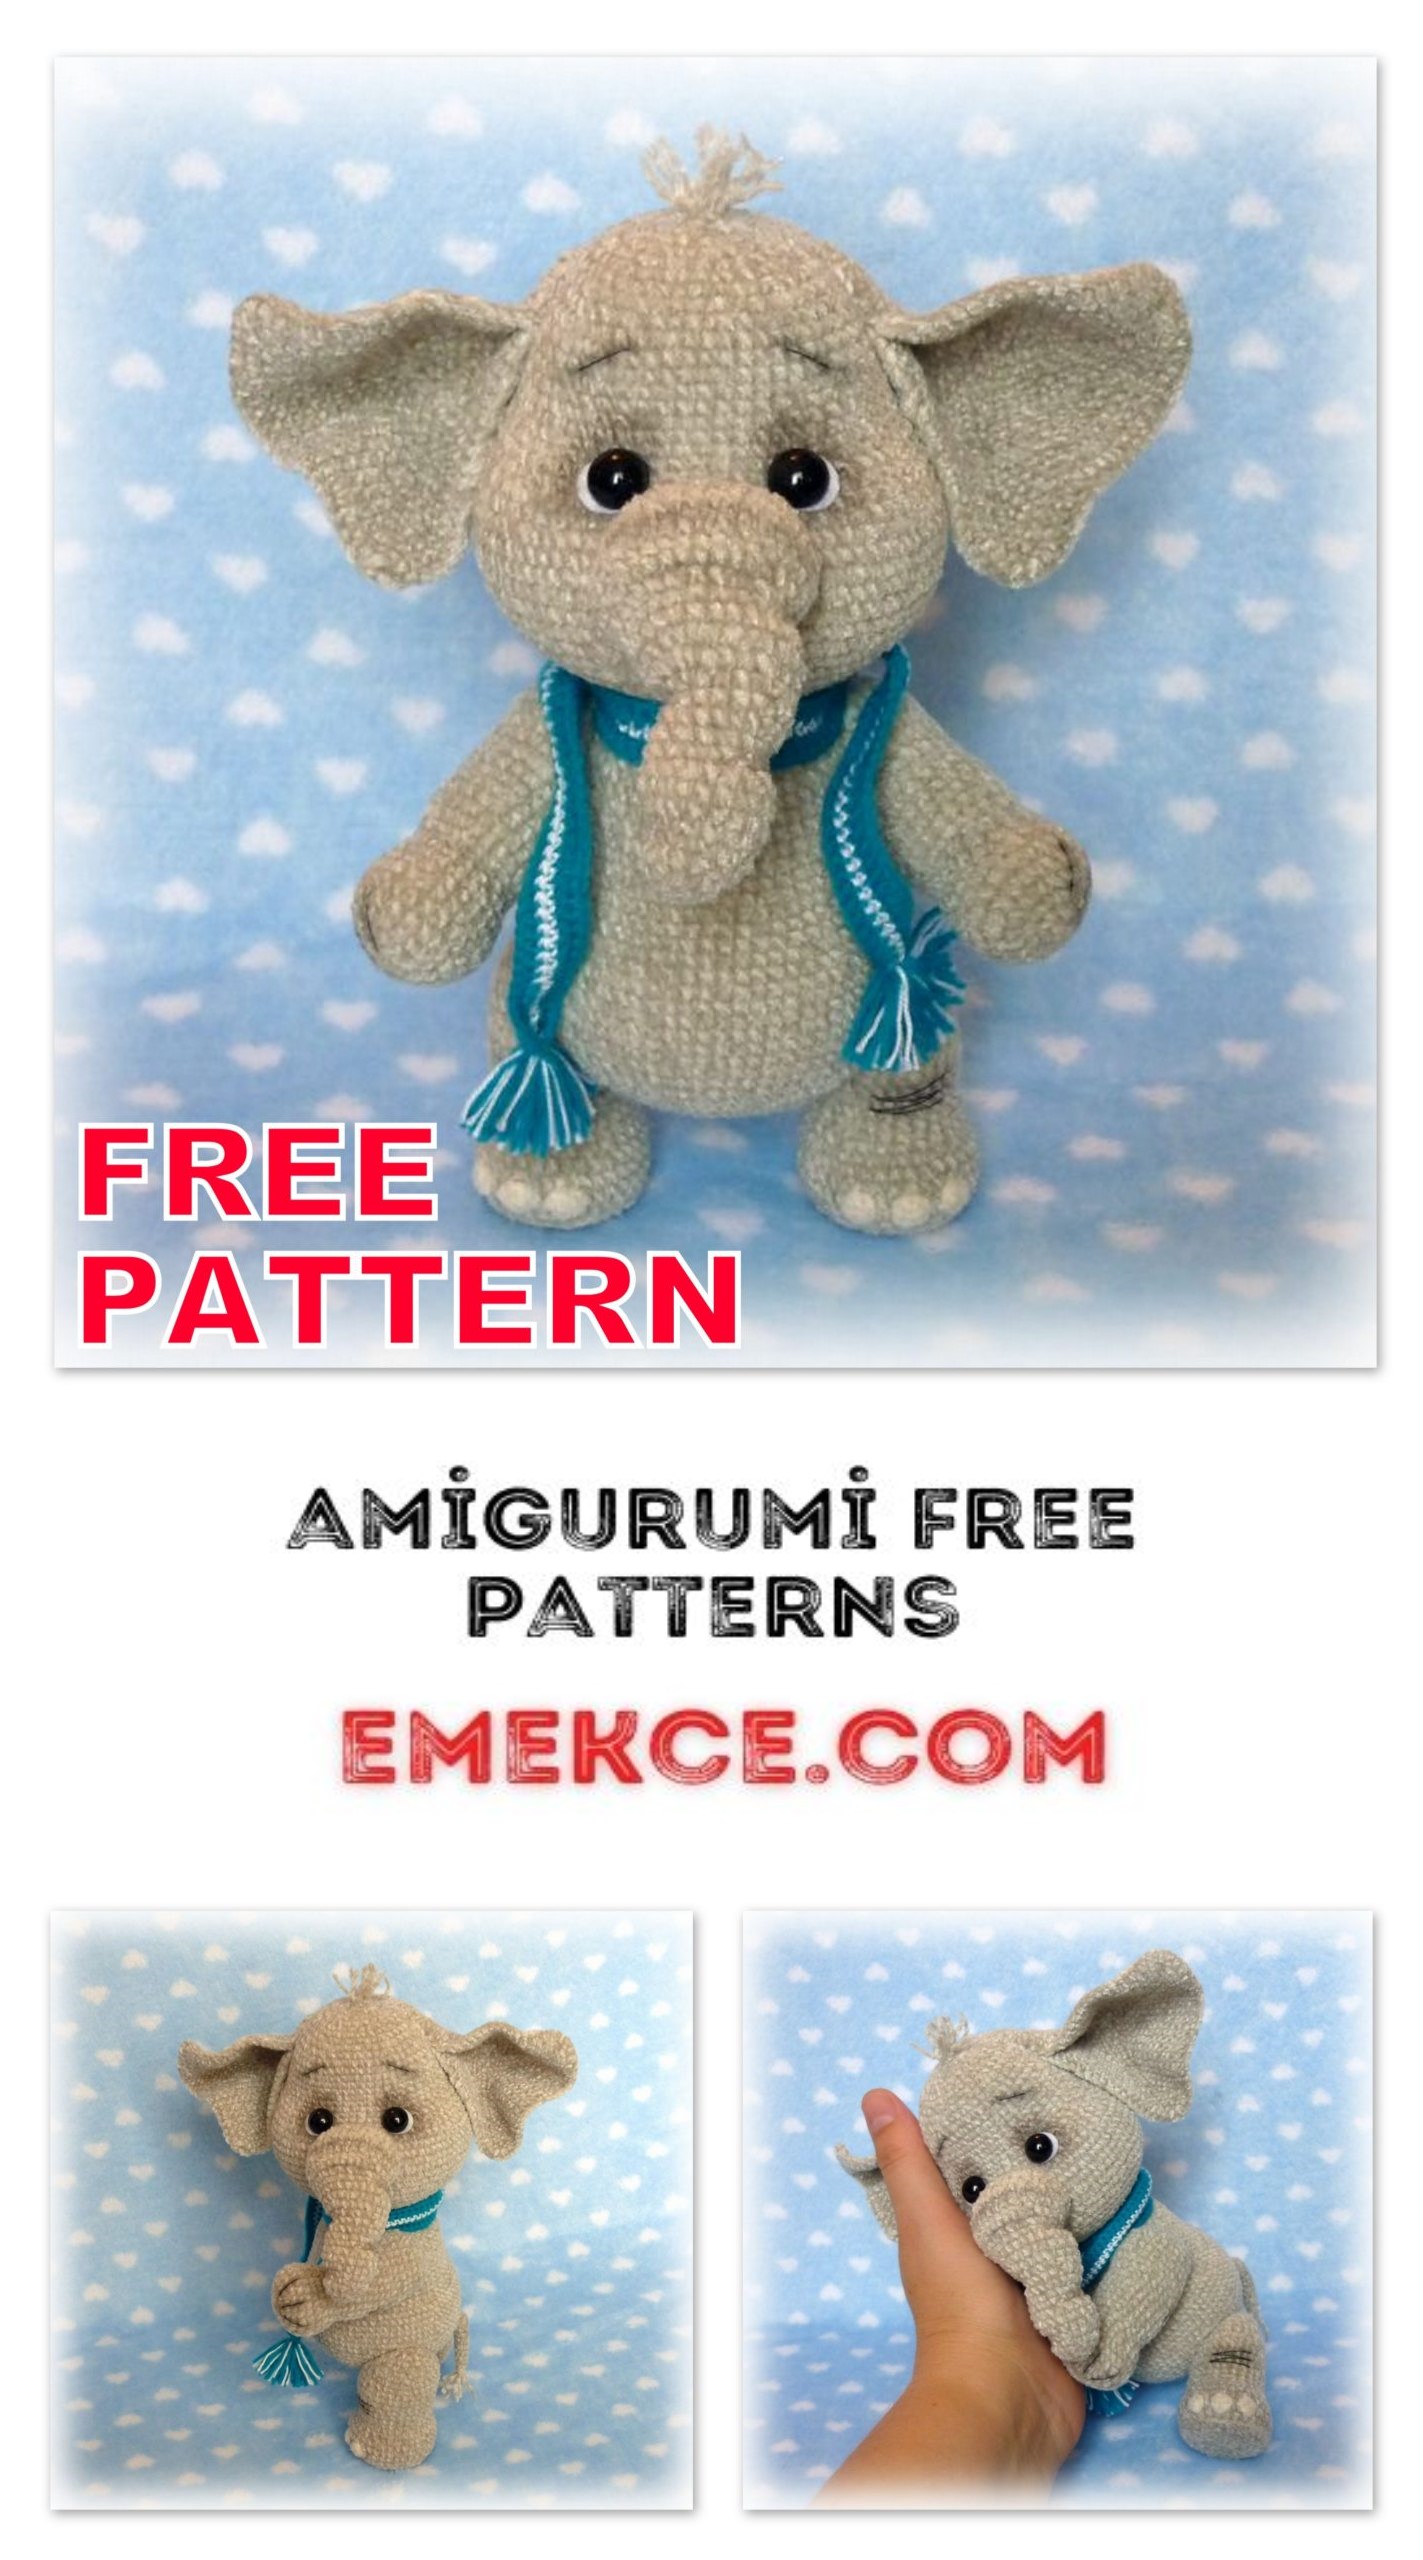
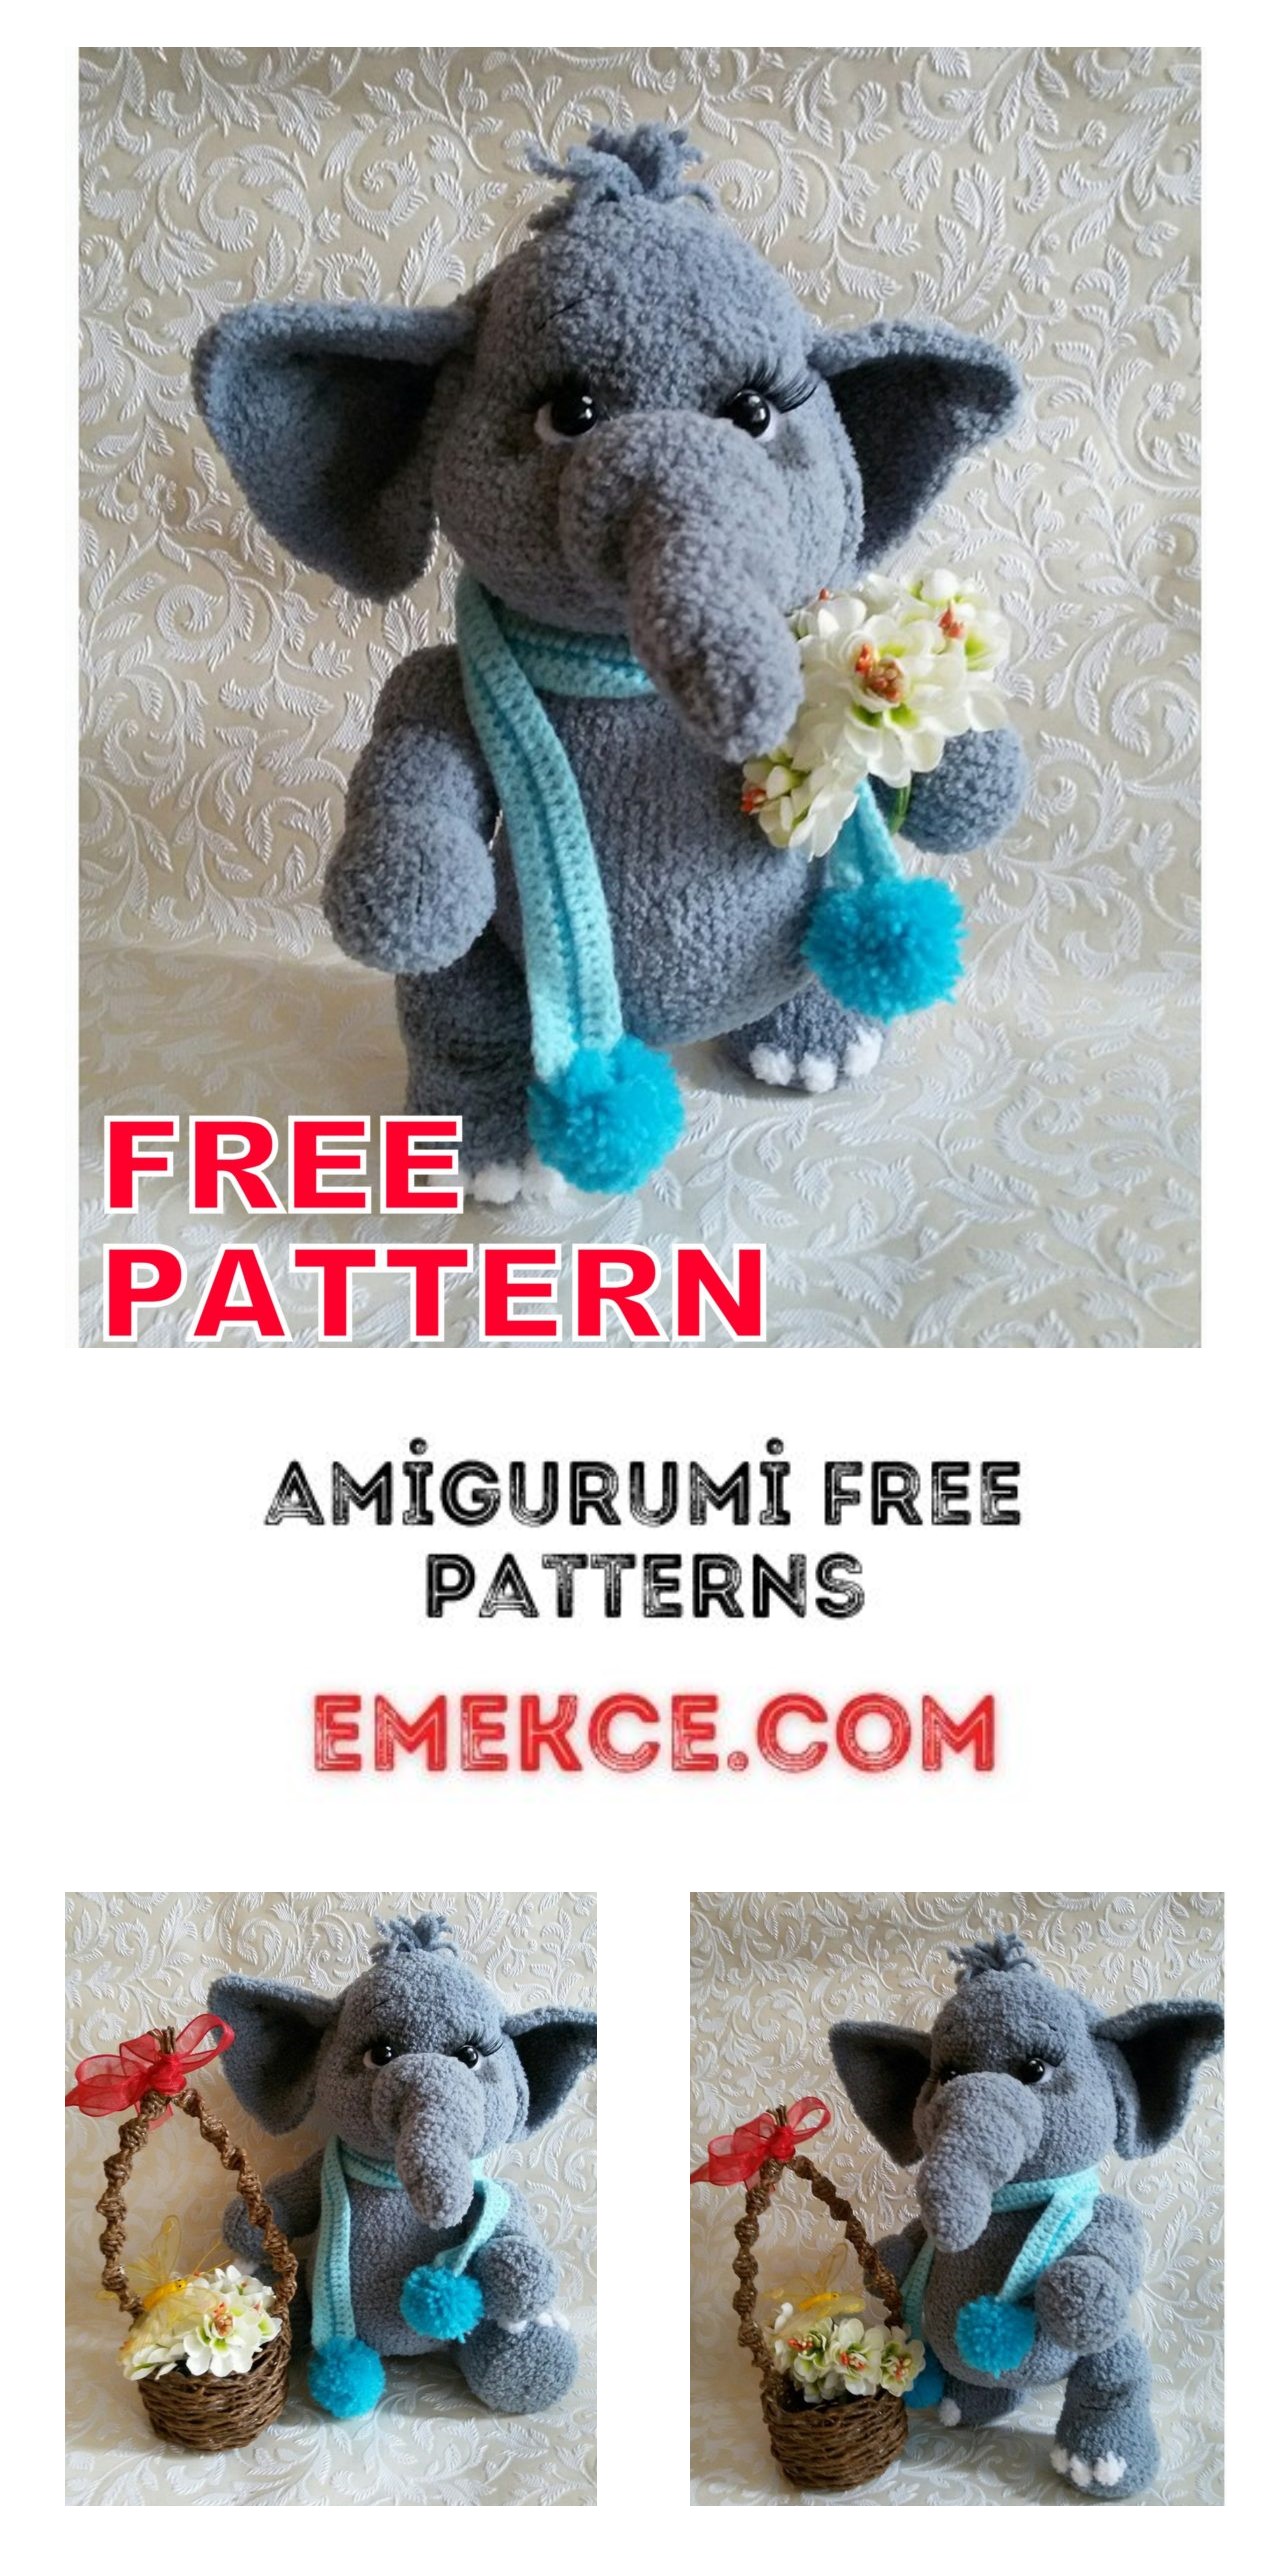
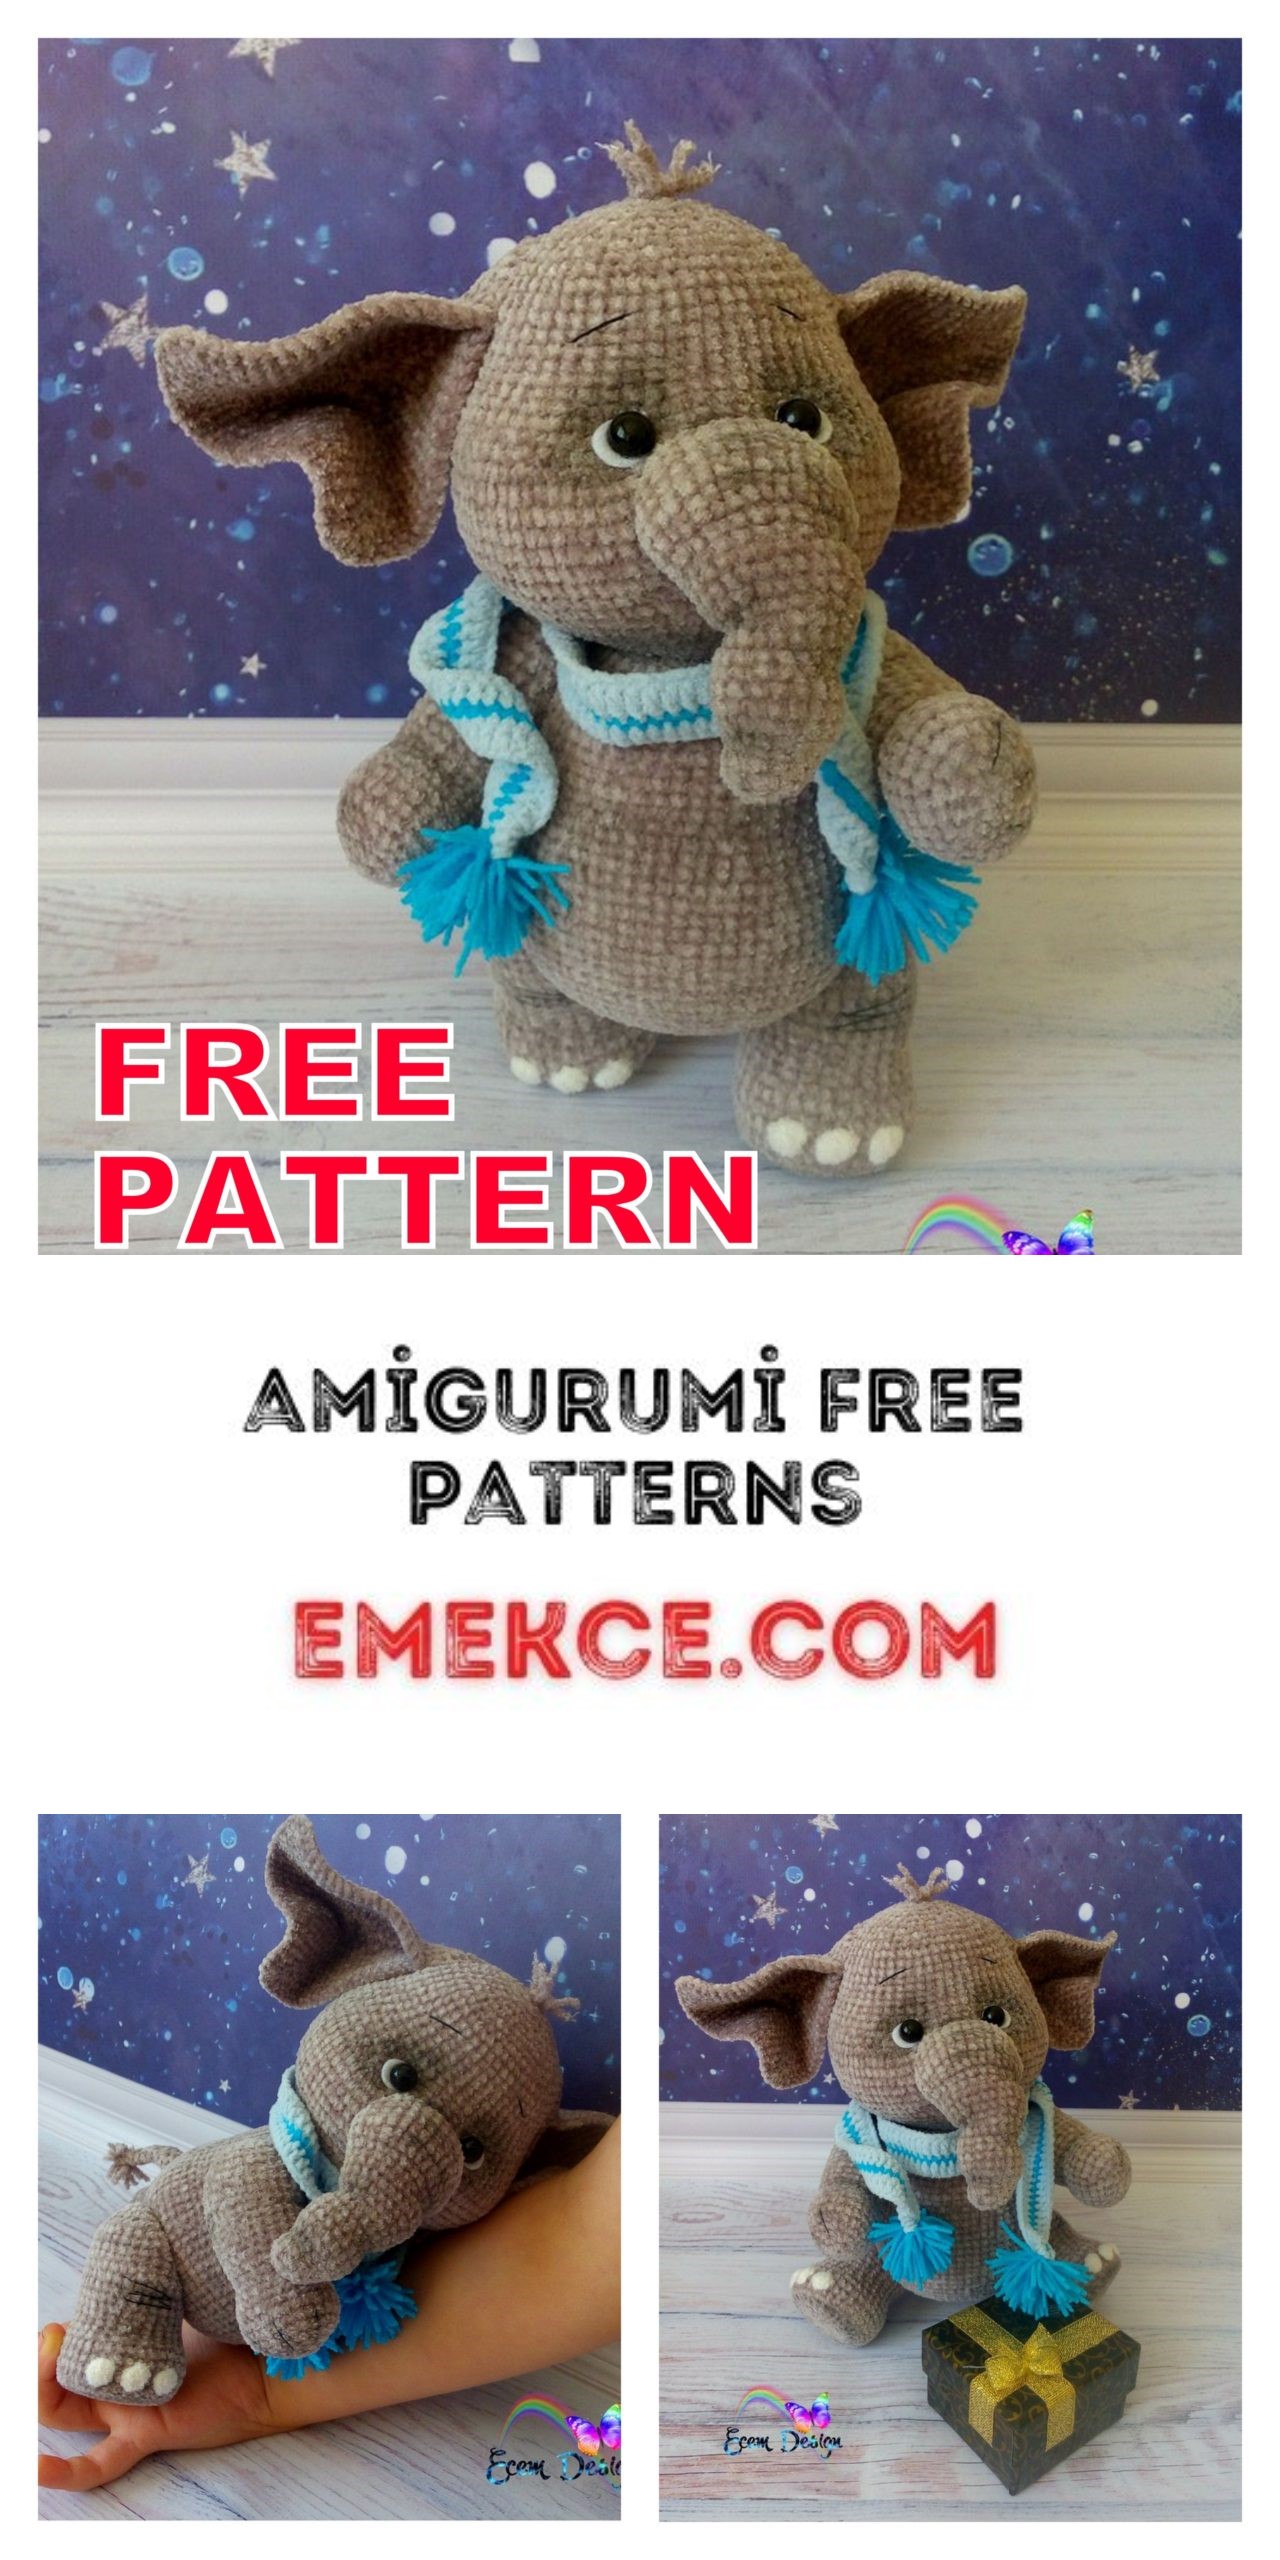
Amigurumi Little Cute Elephant Free Crochet Pattern
In this article I will share with you amigurumi little cute elephant free crochet pattern. We always keep you up-to-date with Amigurumi.
Materials
Yarn İCE Yarn “Thin Chenille” (50g / 250m) light gray (1 skein), 2-3 meters white (for nails).
Yarn Kartopu “Nubuk” (100g / 550m) of light blue and blue colors (for scarf)
Hooks Tulip No. 2mm, Clover 1.75mm (for scarf)
Plastic joints for fastening hands 25 mm (2 pcs.), For fastening legs 30 mm (2 pcs.), For fastening the head 30 mm (1 pc.)
Black eyes with a secure mount with a diameter of 8mm
White felt
Thick plastic for foot insoles
Filler
Scissors
Needle for tightening
Black sewing thread for embroidery
Dry pastel for tinting
The growth of the finished toy using these materials is 18cm.
YARN FOR KNITTING AN ELEPHANT MAY BE PURCHASED HERE!
Abbreviations:
sc – single crochet
sl-st – slip-stitch
DC – double crochet
HDC – half DOUBLE crochet
inc – increase
dec – decrease
PATTERN
HANDLES (2 parts)
The row start marker runs in the center of the outside of the handle (for the left hand) and in the center of the inside of the handle (for the right hand).
1 pp.: 2 CH, in the 2nd loop from the hook: 6 sc (6)
2 pp.: (3 sc in one loop, 2 sc) * 2 (10)
3 pp.: (3 inc, 2 sc) * 2 (16)
4 pp.: ((1 sc, inc) * 3, 2 sc) * 2 (22)
5 pp.: ((2 sc, inc) * 3, 2 sc) * 2 (28)
6-7 pp: 28 sc (28)
8 pp.: (5 sc, dec) * 4 (24)
9 pp.: 24 sc (24)
10 pp.: 2 sc, dec, (4 sc, dec) * 3, 2 sc (20)
11 pp.: 4 sc, dec, 8 sc, dec, 4 sc (18)
12 p.: 1 sc, inc, (2 sc, inc) * 5, 1 sc (24)
13-18rr. (6 rows): 24 sc (24)
19 pp.: 3 sc, 5cc, 6 sc, 7 HDC, 3 sc (24)
20 pp.: 4 sc, (inc, 1 sc) * 2, 16 sc (26)
21-23rr. (3 rows): 26 sc (26)
24 pp.: 7 sc, dec, 8 sc, dec, 7 sc (24)
Insert a cotter pin with a diameter of 25 mm between the 23rd and 24th rows and between the 12th and 13th loops (for the left handle). For the right pen – in the vicinity of the marker. (I didn’t have a joint of the right diameter at hand, so I put the cotter pin. It is better to use one type of fastening).
25 pp.: 24 sc (24)
26 p.: 1 sc, dec, (2 sc, dec) * 5, 1 sc (18)
27 p.: (Dec, 1 sc) * 6 (12)
28 pp.: 6 dec.
Embroider a black thread with the elbows and marigolds:
LEGS (2 parts)
RIGHT LEG
The beginning marker of the row runs through the center of the back of the leg.
1 pp.: 2 CH, in the 2nd loop from the hook: 6 sc (6)
2 pp.: 6 inc (12)
3 pp.: (1 sc, inc) * 6 (18)
4 pp .: (inc, 2 sc) * 6 (24)
5 pp.: (3 sc, inc) * 6 (30)
From hard plastic we cut a circle equal in diameter to the foot (up to the 5th row)
6 pp .: 2 sc, inc, (4 sc, inc) * 5, 2 sc (36)
7 pp .: For the rear walls of the hinges: 36 sc (36)
8 pp.: (Knit the nails): 15 sc, (5 DC in one loop with a common vertex (white), 2 sc) * 2, 5 DC in one loop with a common vertex (white), 14 sc (36)
In order for the transition from color to color to be in place, we knit 14 loops, in the 15th loop we pick up the gray thread, and we knit it already white.
In the next column, we run double crochet with a common top (marigold), and we collect the columns in white, and knit them in gray.
In the next column, we knit 1 sc and again begin to untie the nail in the same way:
Thus, we knit 3 marigolds, and from the inside we pass the strings inside the columns. At the end of the 8th row, cut the white thread.
9-10 pp: 36 sc (36)
11 pp.: 11 sc, (dec, 1 sc) * 4, dec, 11 sc (31)
We put the insole.
12 p.: 2 sc, dec, 23 sc, dec, 1 sc (we do not knit 1 loop of a row, we knit the next row with the next loop. This is to ensure that the decrease with which the next row starts is located clearly in the middle of the back side of the leg)
13 p.: Dec, 27 sc (28)
14 p.: 28 sc (28)
15 pp.: 3 sc, inc, (6 sc, inc) * 3, 3 sc (32)
16-17rr. (2 rows): 32 sc (32)
18 pp.: 13 sc, 6 HDC, 13 sc (32)
19 pp.: 32 sc (32)
20 pp.: 2 sc, inc, 9 sc, dec, 4 sc, dec, 9 sc, inc, 2 sc (32)
21 pp.: 7 sc, dec, 14 sc, dec, 7 sc (30)
22 pp.: Dec, 5 sc, 3CH, 3 loops to skip, 5 sc, dec, 13 sc (28)
23 pp.: 1 sc, dec, 3 sc, 3 sc in a chain, 3 sc, dec, 4 sc, (dec, 3 sc) * 2 (24)
Insert the joint into the hole formed.
24 pp.: 1 sc, dec, (2 sc, dec) * 5, 1 sc (18)
25 pp.: (Dec, 1 sc) * 6 (12)
26 p.: 6 dec (6)
Pull off the remaining hole. Hide the end of the thread inside the legs.
Embroider the knee in black.
LEFT LEG
We knit the left leg similarly to the right one on the 22nd row.
22 pp.: 13 sc, dec, 5 sc, 3CH, 3 min skip, 5 sc, dec (28)
23 pp.: (3 sc, dec) * 2, 4 sc, dec, 3 sc, 3 sc in a chain, 3 sc, dec, 1 sc (24)
Insert the joint into the hole formed.
24 pp.: 1 sc, dec, (2 sc, dec) * 5, 1 sc (18)
25 pp.: (Dec, 1 sc) * 6 (12)
26 p.: 6 dec (6)
Pull off the remaining hole. Hide the end of the thread inside the legs.
2 STAGE.
BODY
A marker at the beginning of the row runs in the middle of the back.
1 pp.: 2 CH, in the 2nd loop from the hook: 6 sc (6)
2 pp.: 6 inc (12)
3 pp.: (1 sc, inc) * 6 (18)
4 pp .: (inc, 2 sc) * 6 (24)
5 pp.: (3 sc, inc) * 6 (30)
6 pp .: 2 sc, inc, (4 sc, inc) * 5, 2 sc (36)
7 pp.: (5 sc, inc) * 6 (42)
8 pp.: 3 sc, inc, (6 sc, inc) * 5, 3 sc (48)
9 pp.: (7 sc, inc) * 6 (54)
10 pp.: 4 sc, inc, (8 sc, inc) * 5, 4 sc (60)
11 pp.: (9 sc, inc) * 6 (66)
12 p .: 5 sc, inc, 6 sc, 3CH, 3 loops to skip, 1 sc, inc, (10 sc, inc) * 3, 1 sc, 3CH, 3 loops to skip, 6 sc, inc, 5 sc (72)
13 pp.: 13 sc, 3 sc in the chain, 40 sc, 3 sc in the chain, 13 sc (72)
14-20rr. (7 rows): 72 sc (72)
21 pp.: 7 sc, dec, 54 sc, dec, 7 sc (70)
22 p.: (12 sc, dec) * 2, 14 sc, (dec, 12 sc) * 2 (66)
23 pp.: (3 sc, dec) * 2, 46 sc, (dec, 3 sc) * 2 (62)
24 pp.: 16 sc, dec, 7 sc, dec, 8 sc, dec, 7 sc, dec, 16 sc (58)
25-26rr. (2 rows): 58 sc (58)
27 pp.: 19 sc, (dec, 4 sc) * 3, dec, 19 sc (54)
28-32rr. (5 rows): 54 sc (54)
We insert the legs into the holes tied in 12-13 rows. Snap joints.
33 p.: (7 sc, dec) * 6 (48)
34 pp .: 48 sc (48)
35 pp.: 3 sc, dec, (6 sc, dec) * 5, 3 sc (42)
36 p.: 42 sc (42)
Stepping back 12 loops to the right and left of the marker, insert the handles in the area between the 31st and 32nd rows. We fix the cotter pins.
37 pp.: (5 sc, dec) * 6 (36)
38 pp.: 36 sc (36)
39 pp .: 2 sc, dec, (4 sc, dec) * 5, 2 sc (30)
40 pp.: (3 sc, dec) * 6 (24)
41 p.: 1 sc, dec, (2 sc, dec) * 5, 1 sc (18)
We insert the joint to connect with the head.
42 p.: (1 sc, dec) * 6 (12)
43 pp.: 6 dec (6)
3 STAGE.
HEAD
The marker passes through the center of the head. This part is knitted from the bottom up.
1 pp.: 12 CH close in a circle (12)
2p.: (1 sc, inc) * 6 (18)
3 pp .: (inc, 2 sc) * 6 (24)
4 pp.: (3 sc, inc) * 6 (30)
5 pp .: 2 sc, inc, (4 sc, inc) * 5, 2 sc (36)
6 pp.: (5 sc, inc) * 6 (42)
7 pp.: 3 sc, inc, (6 sc, inc) * 5, 3 sc (48)
8 pp.: (7 sc, inc) * 6 (54)
9 pp.: 4 sc, inc, (8 sc, inc) * 5, 4 sc (60)
10 pp.: (9 sc, inc) * 6 (66)
11 pp .: 5 sc, inc, (10 sc, inc) * 5, 5 sc (72)
12 p.: (11 sc, inc) * 6 (78)
13 pp.: 6 sc, inc, (12 sc, inc) * 5, 6 sc (84)
14-19rr. (6 rows): 84 sc (84)
20 pp.: 23 sc, (dec, 2 sc) * 3, dec, 10 sc, dec, (2 sc, dec) * 3, 23 sc (76)
21 pp .: 76 sc (76)
22 pp.: 19 sc, (dec, 2 sc) * 3, dec, 10 sc, dec, (2 sc, dec) * 3, 19 sc (68)
23 pp.: 68 sc (68)
24 pp.: 15 sc, (dec, 2 sc) * 3, dec, 10 sc, dec, (2 sc, dec) * 3, 15 sc (60)
25-32rr. (8 rows): 60 sc (60)
33 pp.: 4 sc, dec, (8 sc, dec) * 5, 4 sc (54)
Connect the head to the body by snapping the joint.
34 p.: (7 sc, dec) * 6 (48)
35 pp.: 3 sc, dec, (6 sc, dec) * 5, 3 sc (42)
36 p.: (5 sc, dec) * 6 (36)
37 pp.: 2 sc, dec, (4 sc, dec) * 5, 2 sc (30)
38 pp.: (3 sc, dec) * 6 (24)
39 pp.: 1 sc, dec, (2 sc, dec) * 5, 1 sc (18)
40 p.: (1 sc, dec) * 6 (12)
41 p.: 6 dec (6)
Fasten the thread, cut. Pull the remaining hole, hide the end of the thread inside the head.
4 STAGE.
TRUNK
The marker runs in the center of the right side of the trunk.
1 pp.: 2 CH, in the 2nd loop from the hook: 6 sc (6)
2 pp.: 6 inc (12)
3 pp .: 12 sc (12)
4 pp .: dec, (2 sc, inc) * 2, 2 sc, dec (12)
5 pp .: 1ss, (inc, 2 sc) * 3, inc, 1ss (16)
6 pp .: inc, 14 sc, inc (18)
7-8rr. (2 rows): 18 sc (18)
9 pp.: 5 sc, (dec, 1 sc) * 2, dec, 5 sc (15)
10 pp.: 5 sc, 5inc, 5 sc (20)
11 pp .: 20 sc (20)
12 pp.: 2 dec, 12 sc, 2 dec (16)
13 pp.: 2 inc, 12 sc, 2 inc (20)
14 pp.: 2 sc, inc, (4 sc, inc) * 3, 2 sc (24)
15-16rr. (2 rows): 24 sc (24)
17 pp.: 8 sc, 4 dec, 8 sc (20)
18 pp.: (1 sc, inc) * 10 (30)
19 p.: 17 sc, 11 HDC, 2 sc (30)
20 pp.: 2 sc, 11 sc (behind the rear walls of the loops), 4 sc, 11 HDC, 2 sc (30)
21-22rr. (2 rows): 17 sc, 11 HDC, 2 sc (30)
23 pp .: 2 sc, 11 sc (together with the front walls of the hinges of the 19th row), 4 sc, 11 HDC, 2 sc (30)
24 pp.: (3 sc, dec) * 6 (24)
Fasten the thread, cut.
EARS (2 parts)
1 pp.: 2 CH, in the 2nd loop from the hook: 6 sc (6)
2 pp.: 6 inc (12)
3 pp.: (2 inc, 2 sc) * 3 (18)
4 pp .: 1 sc, (2 inc, 4 sc) * 2, 2inc, 3 sc (24)
5 pp .: 2 sc, (2 inc, 6 sc) * 2, 2inc, 4 sc (30)
6 pp.: 3 sc, (2 inc, 8 sc) * 2, 2inc, 5 sc (36)
7 pp.: 4 sc, (2 inc, 10 sc) * 2, 2inc, 6 sc (42)
8 pp.: 5 sc, (2 inc, 12 sc) * 2, 2inc, 7 sc (48)
9 pp.: 6 sc, (2 inc, 14 sc) * 2, 2inc, 8 sc (54)
10 pp.: 7 sc, (2 inc, 16 sc) * 2, 2inc, 9 sc (60)
11 pp.: 8 sc, (2 inc, 18 sc) * 2, 2inc, 10 sc (66)
12 p.: 9 sc, (2 inc, 20 sc) * 2, 2inc, 11 sc (72)
13 pp.: 10 sc, (2 inc, 22 sc) * 2, 2inc, 12 sc (78)
14 pp.: 6 sc, 6 sc together with loops on the opposite edge of the eye.
Fasten the thread, cut. The second ear is connected in the same way.
TAIL
1 pp.: 2 CH, in the 2nd loop from the hook: 6 sc (6)
2 pp.: 6 sc (6)
3 pp.: Dec, 4 sc (5)
4-5rr. (2 rows): 5 sc (5)
6 pp .: dec, 3 sc (4)
7-8rr. (2 rows): 4 sc
Close the remaining hole, sew a brush at the end of the tail.
5 STAGE.
DECOR
1. Pin the ears and trunk to the head with pins and sew them. The ears should be sewn over 6 sc, with which we connected the 2 sides of the triangle of the eyelet. Sew on the eye both front and back.
The trunk should be stuffed weakly, especially in its upper part! Otherwise, he will stand upright, and we need him to look down.
2. Cut white eye whites out of felt.
3. Glue the eyes on either side of the trunk as shown in the photo.
4. Tint the area around the eyes with any means of tint that is convenient for you.
5. Make a simple eye tightening: for this, enter the needle with the thread for the tightening in the neck area behind the head, bring it to point 1 and re-enter it to point 2, return the needle to point 3. Repeat the thread 2-3 times constantly pulling the thread. Point 3 should be located as close as possible to the joint so as not to spoil the shape of the head! Tighten the second eye in the same way.
6. Pin the tail and sew on.
7. You can optionally lightly tint the knees, elbows, trunk and ears.
8. Thread black eyebrows embroider.
9. From the remains of the main yarn, make your elephant a small forelock.
SCARF
We knit each row from right to left.
1p .: (light blue color) Dial a chain of 150 CH + 2 CH, starting from the 3rd loop from the hook: 150 DC (150)
Fasten the thread, cut.
2p .: (blue color) 150 sc (150)
Fasten the thread, cut.
3 pp .: (light blue) 150 DC (150)
Fasten the thread, cut.
From a blue thread, make 2 pompons and sew to the ends of the scarf.