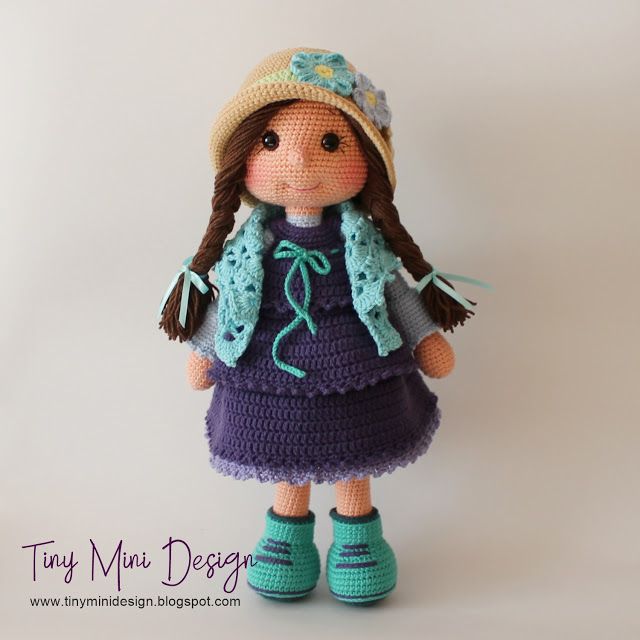
Emma And Jackson Amigurumi Dolls Crochet Free Pattern


LIST OF SUPPLIES:
Supplies Emma (7.5″, 12.7cm) Jackson (7.5″, 12.7cm)
Thread Size 10 cotton – Peach, red, white, black, blue,
yellow, Floss – Red, black, Sewing Thread — to
match buttons
Same
Hook Size 7 (1.65mm) Same
Floss Red, black Same
Eyes Two 4-mm black eyes Two 3-mm black eyes
Needles Darning, sewing, embroidery Same
Buttons • 3 round, white, 6mm (3/8″),
• one 5mm (1/4″), heart, red
8 round, white, 6mm
(3/8″)
Stuffing Polyester Fiberfill Same
Ribbon • Two 9″ (22.5cm) lengths of white, ¼” (5mm)
wide
• Two 10″ (25cm) lengths of yellow, 1/8″
(2.5mm) wide
N/A
Shading Pink pencil or makeup blusher Same
Tools
• Tweezers and/or hemostat for stuffing
• Small, sharp scissors Same
See Page 22 for a list of internet sources for supplies.


GAGE: Gage is not important as long as the same size thread and hook are used for all
the pattern pieces. However, since tension can vary in different circumstances, it is
suggested that when making two pieces that must be the same, such as arms and legs, that
you complete both in one sitting.
SPECIAL INSTRUCTIONS:
ADJUSTABLE RING: The adjustable ring creates a smaller center opening. Grasp the
thread between your thumb and forefinger, leaving a tail at the beginning. Wrap the
thread over and around the index finger clockwise, crossing the thread at the top of the
finger. Press your middle finger on the loose end of the thread to hold it as you insert the
hook underneath the thread that you just crossed, then catch the back thread with the
hook, and pull a loop up from underneath the front thread. Slip the loop off the finger,
grasping the working end in the left hand as if to begin crocheting. Chain 1, work
number of stitches required into the ring. Pull up a long loop, then, grasping the stitches
just made with the right hand and tail with left, pull to tighten ring. Insert hook into long
loop and tighten back against hook. Making sure tail is to the back, skip first chains
worked and continue working pattern, skipping the ch-1.
FRENCH KNOT: Bring the needle up through the fabric. Place the needle flat right up
against the thread where it came out of the fabric. Holding the needle in place with your
left thumb, wrap the thread around the needle twice. Holding the wrapped thread in place
with your left thumb, pull the needle until the knot is against the fabric. Insert the needle a tiny bit to the left of where it came out, and pull through to the back, pulling the knot
firmly against the fabric.
WEAVING/HIDING LOOSE THREAD ENDS: When making the doll, you can hide
the loose ends by pulling them to the inside of the piece with a tapestry needle. Pass the
needle through the piece 2 or 3 times to anchor the thread end (always go in and come out
between stitches, being careful not to catch any fabric), then pull the thread taut, and clip
close to the surface so that it disappears inside.
For other pattern pieces, it’s best to weave all loose ends as you finish each piece. If you
can’t hide the beginning tail by working over it for a few stitches, leave a tail that is long
enough to enable you to thread it onto a needle to weave it. When you fasten off, always
leave a tail that is long enough to thread onto a needle and weave.
TO WEAVE LOOSE ENDS: Thread the tail onto a needle. Working on the WS of the
piece and beginning directly beneath the place where you fastened off, insert the needle
underneath and through the upper loops of fabric for a length of 4 or 5 stitches, and then
turn and repeat through 2 or 3 of the same stitches in the opposite direction.
————————————————————————–
ABBREVIATIONS
alt – alternate
approx – approximately
beg – begin/beginning
bet — between
BL – back loop
ch – chain stitch
ch- – refers to a ch space previously made:
e.g., ch-1 space
cm – centimeter(s)
cont — continue
Dc – double crochet (UK treble cr)
Dc2tog – double crochet 2 stitches together
(decrease)
Dec – decreases(s)
ea – each
FL – front loop(s)
FO – fasten off
hdc – half double crochet
hdc2tog – half double crochet 2 stitches
together
inc – increase
lp(s) – loops
mm – millimeter(s)
oz – ounce(s)
pl – place
prev – previous
rem – remaining
rep – repeat(s)
rnd(s) – round(s)
RS – right side
sc – single crochet (same as UK dc)
sc2tog – single crochet 2 stitches together
sk – skip
Sl st – slip stitch (same as UK sc)
Sp(s) – space(s)
St – stitch
tog — together
WS — wrong side
Yd(s) – yard(s)
YO – yarn over
Yoh – yarn over hook
MAKING THE EMMA AND JACKSON DOLLS IN OTHER SIZES
The patterns for the Jackson and Emma dolls call for size 10 thread, a size 7 (1.65mm)
hook, and 3 and 4mm eyes, respectively. The dolls are 7 to 7.5 inch (17.5 – 19cm) inches
tall.
To make dolls approximately 3″ (7.5cm): Use size 80 tatting thread, a .5mm hook, and
1mm eyes. Use 2mm pearls or beads as buttons.
To make dolls approximately 5″ (12.5cm): Use size 30 crochet thread, size 12 perle
cotton, or punch thread with a size 10 (1.3mm) hook, and 3mm eyes. Use ¼” (6mm)
buttons.
To make dolls approximately 13.5″ (33.5cm): Use sport weight yarn or DK yarn with
a C (2.5 – 2.7mm, UK 12) hook, and 9mm plastic eyes. Use 3/8″ (9mm) buttons.
To make dolls approximately 17″ (42.5cm): Use worsted weight yarn with a G (4-
4.5mm), and 12mm plastic eyes. Use 12″ buttons.
______________________________________________________
COMPARISON BETWEEN PERLE COTTON AND CROCHET COTTON:
Perle Size Crochet Size
3 5
5 10
8 20
12 30
16 40 – 50
Check for Comparison to Perle Cotton: Wrap the thread you want to use around a
ruler, with each thread wrap touching the last wrap. The number of wraps that fit
inside ¼ inch (.6 cm) is the equivalent size to perle cotton. For instance, if your
thread wraps around 12 times, then it is equivalent to size 12 perle cotton.
Check for Comparison to Crochet Cotton: Wrap the thread you want to use
around a ruler, with each thread wrap touching the last wrap. The number of wraps
that fit inside ½ inch (1.3 cm) is the equivalent size to crochet cotton. For instance, if
your thread wraps around 30 times, then it is equivalent to size 30 crochet cotton.
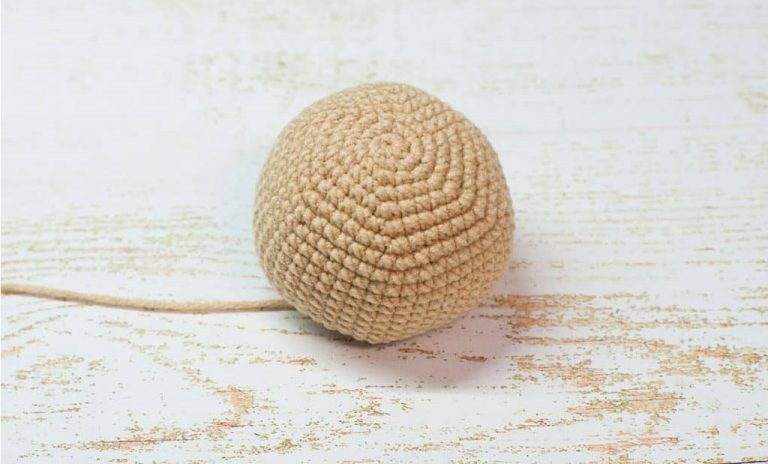
BASIC CROCHETED RAG DOLL
HEAD FRONT:
1. With skin color ch 2; 6 sc in 2nd ch from hook; do not join. Place 3-inch piece of
contrasting thread as marker. (6 sc)
2. 2 sc in ea sc around. (12 sc)
3. (2 sc in next sc, sc in next sc) 6 times. (18 sc)
4. (2 sc in next sc, sc in next 2 sc) 6 times. (24 sc)
5. (2 sc in next sc, sc in next 3 sc) 6 times. (30 sc)
6. (2 sc in next sc, sc in next 4 sc) 6 times. (36 sc)
7. Sc in next 3 sc, (2 sc in next sc, sc in next 5 sc) 5 times; 2 sc in next sc, sc in next 2 sc.
(42 sc)
8. Sc in next 4 sc, (2 sc in next sc, sc in next 6 sc) 5 times; 2 sc in next sc, sc in next 2 sc.
(48 sc)
9. Sc in BL of ea sc around; FO with sl st in next sc. (48 sc)
HEAD BACK:
Repeat rows 1 through 9 of Front, working all stitches in BL. At end of row 9 FO,
leaving long end for sewing.
JOIN HEAD FRONT TO BACK:
Place front and back of head WS together, with 4 sc between the 2 final sl stitches of
each piece. The neck will be created in this space. Stitch the two pieces together, using
the inner lps of rnd 9 of each piece. Be sure to leave the 4 sc on each side open for the
neck. Stuff head just until it looks like a little round throw pillow.
NECK AND BODY:
1. With right side of facing you, join skin color with sc in 1st free sc at neck edge on rnd
9 of front, sc in next 3 sc, sc in end of rnd 9 before seam on head front; sc in end of rnd 9
after seam on head back; sc in next 4 sc on back of head; sc in end of rnd 9 before seam
on head back; sc in end of rnd 9 after seam on head front; do not join, place a piece of
contrasting thread to use as a round marker. Move it each time you finish a round. If you
don’t mark the rounds, you’ll have a lot of trouble keeping the stitch count correct. (12
sc)
2. Sc in next 11 sc; do not work last sc. ( 11 sc)
3. Ch 6, working in RS of ch, sc in 2nd ch from hook and in next 4 ch; sc in next 6 sc of
neck front; ch 6, turn – working in WS of ch, sc in 2nd ch from hook and in next 4 ch; sc
in next 6 sc of back of neck; working in free loops on opposite side of 1st ch-6, sc in next
4 free loops, 2 sc in last free lp; place round marker; 2 sc in next sc, sc in next 10 sc;
working on opposite side in free loops of 2nd ch-6, sc in next 4 free lps, 2 sc in last free
lp; 2 sc in next sc, sc in next 16 sc.
4 – 23. Sc in ea sc around. (36 sc)
24. (Sc in next 16 sc, sc2tog) twice; FO with sl st in next sc, leaving long end for closing
bottom of body. (34 sc)
• Stuff neck, shoulders and top half of torso. Sew bottom of body closed, leaving an
opening to finish stuffing; stuff remainder of body. The doll should be about 3.75″
(9.5 cm) around the middle. Finish closing; hide end inside body.
HAIR:
Note: Wash hands frequently while working, since you’ll be handling the doll’s face
while you make the hair.
• The hair is made by creating a series of chain-10 loops worked in a spiral around the
back of the head, beginning in the center, and worked in the remaining free loops. You
may have more or fewer stitches in each group than shown below, and you may make the
hair less dense by skipping additional stitches and/or rows. The following instructions
are meant to be a guide; the number of loops that you make doesn’t have to match exactly
with what I have written. You’ll basically go around the back of the head following the
head rounds, working in every other stitch once around the head, then skip a round and
work every other stitch around, etc. When you’ve come to the bottom of the “hairline”,
you’ll begin working back and forth around the head in rows.
EMMA’S HAIR:
With top of head facing you, join red with sl st in 1st free lp at ctr; ch 10, sc in
same st, (ch 10, sk next st, sc in next st, ch 10, sc in same st) 5 times. Ch 10, sc in the
next st ONE RND OVER; ch 10, sc in same st; repeat bet ( ) above 10 times; ch 10, sc in
the next st ONE ROW OVER, sc in same st ; repeat bet ( ) above 16 times; sc in the next
st ONE ROW OVER, ch 10, sc in same st; repeat bet ( ) above 15 times; this should bring
you to the top of the right side of the doll’s neck; if not, continue to repeat bet ( ) until
you get there. Continue around the head in the same row of free lps; ch 10, sc in next st,
ch 10, sc in same st; repeat bet ( ) above 20 times, or until you reach the opposite neck
edge; ch 10, turn, sk seam and working in FL of rnd 9 of front of head, sc in 3rd st up
from neck; ch 10, sc in same st; repeat bet ( ) above, around the face to the 3rd st from the
neck on the opposite side of the head; ch 10, turn, . FO red, leaving an end long enough
to thread onto needle and run out back of head to hide; trim close to head. Use the blunt
end of your crochet hook to fluff out the “curls.”
JACKSON’S HAIR:
With top of head facing you, join red with sl st in 1st free loop of round 1 at back
of head; ch 8, sc in same lp, (ch 8, sk next free lp, sc in next free lp, ch 8, sc in same lp) 6
times. Ch 8, sc in the next free lp ONE ROW OVER; ch 8, sc in same lp; (ch 8, sk next
lp, sc in next free lp, ch 8, sc in same lp) 10 times; ch 8, sc in the next free lp ONE ROW
OVER; repeat bet ( ) 16 times; sc in the next free lp ONE ROW OVER, ch 8, sc in same
lp; repeat bet ( ) 14 times; (this will be close to the bottom of the head; if not, continue to
repeat bet ( ) until you get there). Ch 8, turn; skip over one row, sc in the 4th st up from
neck, ch 8, sc in same free lp; repeat bet ( ) 19 times; ch 8, turn; sk seam, sc in 3rd st up
from neck; ch 8, sc in same lp; repeat bet ( ) 18 times; you should be in the 3rd st from the
neck; if not, continue; ch 8, turn; sk seam, sc in 4th free lp up from neck (you will work
this final row around rnd 9 of face); ch 8, sc in same pl; repeat bet ( ) 8 times to same
location on opposite side of head; FO. Thread end onto needle and run out back of head
to hide; trim close to head. Use your crochet hook to pull out the loops into curls.
FACIAL FEATURES
NOSE (Both Dolls):
With 3 strands red embroidery floss, use straight stitches to embroider a triangle in the
center of the face, a little less than ½” long, covering the center row. Hide beginning and
end of thread within hair on back of head. Alternately, you can cut a small triangle from
felt and glue or sew it onto the face.
EYES (Both Dolls):
Using strong black thread, sew an eye to the face on either side of the nose, pulling to
indent the eye slightly into the face. Have the inner edge of the eye about 1 rnd away
from the nose, and slightly lower than the top point of the nose.
EYEBROWS (Both Dolls):
With 2 strands of black embroidery floss, make eyebrows with a straight stitch about 2 or
3 rows from the eyes, beginning at about 1:00 above the left eye, and beginning about
11:00 above the right eye. Make the brows about the length of 3 sc. (See picture.)
EYELASHES (Emma):
With 2 strands of black embroidery floss, make 2 or 3 straight stitches radiating out from
the eyes for eyelashes. (See picture.)
MOUTH (Both Dolls):
• With 3 strands of black embroidery floss, embroider the mouth using straight stitches
as shown in the picture, following the curve of the face, 2 rows below the nose or where
it looks pleasing to you. Make the slanted dimple lines about 2 sc long at the ends of
each mouth line. Leave a gap about 3 sc wide between the 2 mouth lines.
• Using 3 strands of red embroidery thread, make a small horizontal straight stitch
between the 2 mouth lines.
SHADE CHEEKS (Both Dolls):
Use a pink pencil or some blusher on the doll’s cheeks. Apply color more lightly to
Jackson’s cheeks.
I prefer to use makeup blush applied with a cotton swab for crocheted dolls and animals,
because the pencil is harder to blend into the crocheted fabric.
RIGHT ARM:
1. Ch 5 with skin color, sc in 2nd ch from hook and in next 3 sc; moving around to other
side of beginning ch, sc in next 4 ch; do not join. (8 sc)
2. (2 sc in next sc, sc in next sc) 4 times. (12 sc)
3. (2 sc in next sc, sc in next 5 sc) twice. (14 sc)
4. Sc in ea sc around. (14 sc)
5. Sc, move rnd marker to begin rnd here; (2 sc in next sc, sc in next 6 sc) twice. (16 sc)
6. Sc in ea sc around. (16 sc)
7. Sc in ea sc around; remove rnd marker; ch 2, sk next 2 sc, sc in next sc; replace
marker here (thumb opening made).
8. Sc in next 13 sc, sc in BL of next 2 ch, sc in last sc. (16 sc)
9. Sc in next 13 sc, sc2tog; sc in next sc. (15 sc)
10. Sc in next 13 sc, sc2tog. (14 sc)
11. Sc in ea sc around. (14 sc)
• Stuff hand, and continue stuffing arm every few rnds as you work. Stuff medium-firm
through rnd 30, but stuff rnds 31 – 35 lightly or not at all. If the top part of the arm is
stuffed too firmly, the arms will tend to stick out to the sides too much.
12 – 34. Sc in ea sc around. (14 sc)
35. (Sc2tog, sc in next 5 sc) twice; FO with sl st in next sc, leaving long end for closing
end of arm. (12 sc)
THUMB:
1. Beginning with top end of arm facing you, join skin color with sc in 1st free loop of
thumb opening, sc in next free loop, sc in side of next sc (row end bet top and bottom of
thumb opening), sc in next 2 free sc from row 7, sc in side of next sc; do not join. (6 sc)
2 – 3. Sc in ea sc around. (6 sc) FO at end of rnd 3, leaving enough thread to close the
end of the thumb.
• Using the long end, make a row of gathering stitches, going in and out of the FL’s of
round 3; pull firmly to close end of thumb. Hide yarn end inside hand; passing it
back and forth a couple of times to secure. (Make sure you insert the needle and
bring it out between stitches.) Pull thread taut and clip close to arm. Thread should
disappear into arm.
• Flatten arm and sew open end closed using a ladder stitch or oversew stitch. If you
have enough left over, use same thread to sew the arm to the shoulder as follows:
Place flattened end horizontally against side of top edge of shoulder with thumb
facing front; sew in place with an oversew stitch. Secure and hide end of thread by
running into and out of body a couple of times.
LEFT ARM:
1. With skin color ch 5, sc in 2nd ch from hook and in next 3 sc; moving around to other
side of beginning ch, sc in next 4 ch; do not join. (8 sc)
2. (2 sc in next sc, sc in next sc) 4 times. (12 sc)
3. (2 sc in next sc, sc in next 5 sc) twice. (14 sc)
4. Sc in ea sc around. (14 sc)
5. (2 sc in next sc, sc in next 6 sc) twice. (16 sc)
6. Sc in ea sc around. (16 sc)
7. Sc in next 3 sc, ch 2, sk next 2 sc, sc in next 11 sc. (14 sc, 2 ch)
8. Sc in next 2 sc, move rnd marker to begin rnd here (this simply changes the starting
place for the round, and does not change the total stitch count for the round); sc in next
sc, sc in BL of next 2 ch, sc in next 13 sc. (16 sc)
9. Sc in next 14 sc, sc2tog. (15 sc)
10. Sc in next 13 sc, sc2tog. (14 sc)
11. Sc in ea sc around. (14 sc)
• Stuff same as right arm.
12 – 34. Sc in ea sc around. (14 sc)
35. (Sc2tog, sc in next 5 sc) twice; FO with sl st in next sc, leaving long end for sewing.
(12 sc)
THUMB:
1. With top end of arm facing you, attach skin color with sc in 1st free loop at thumb
opening, sc in next free lp, sc in next row end (bet top and bottom of thumb opening), sc
in next 2 free sc from row 7, sc next row end; do not join. (6 sc)
2 – 3. Sc in ea sc around. (6 sc) At end of row 3, FO, leaving long end for closing.
• Finish thumb same as for 1st
arm.
• Finish and attach arm same as for 1st
arm.
• You may need to massage the arms and hands into the desired shape and position.
LEGS: (MAKE 2)
1. With black, ch 13; sc in 2nd ch from hook and in next 10 ch, 2 sc in last ch; moving on
around to other side of beg ch-13, sc in next 11 ch, 2 sc in next ch; do not join. (26 sc)
2. 2 sc in next sc, sc in next 10 sc, 2 sc in ea of next 3 sc, sc in next 10 sc, 2 sc in ea of
next 2 sc. (32 sc)
3 – 7. Sc in ea sc around. (32 sc)
8. Sc, move rnd marker to begin rnd here; sc in next 13 sc, sc2tog 3 times, sc in next 13
sc. (29 sc)
9. Sc in next 8 sc, sc2tog 6 times, sc in next 9 sc. (23 sc)
10. Sc in next 8 sc, sc2tog 3 times, sc in next 9 sc. (20 sc)
11. 8 sc, sc2tog twice, 8 sc; FO with sl st in next sc. (18 sc) Stuff shoe.
Tip: When changing to a new color, work over the end of the new color for 2 or 3
stitches to secure the end. Similarly, when breaking off a color, work over the end for 2
or 3 stitches to secure.
12. With RS of shoe facing you, join white with sc in last sc before the sl st on rnd 11
(This should be at center back of heel. This will be the stocking seam, so make sure it’s
at the center back of the shoe!); sc in ea remaining sc around; join with sl st in 1st sc. (18
sc)
13. Ch 1, do not turn (this applies to all stocking rows); sc in same sc as joining and in ea
sc around; join with sl st in 1st
sc, changing to red (To change colors, at end of round
insert hook into 1st sc as if to join with sl st; instead of bringing through a loop of
white, bring through a loop of red. Reverse when changing to white.). Do not fasten
off white; let it trail as you work the next 2 rounds. (18 sc)
14. With red ch 1, sc in same sc as joining, and in ea sc around; join with sl st in 1st
sc.
(18 sc)
15. Ch 1 with red, sc in same sc as joining, and in ea sc around; join with sl st in 1st sc,
changing to white. (18 sc)
16. With white, ch 1, sc in same sc as joining, and in ea sc around; join with sl st in 1st
sc.
(18 sc)
17. Ch 1 with white, sc in same sc as joining and in ea sc around; join with sl st in 1st sc,
changing to red. (18 sc)
18. With red ch 1, sc in same pl as joining, and in ea sc around; join with sl st in 1st sc.
(18 sc)
19. Ch 1 with red, sc in same pl as joining, and in ea sc around; join with sl st in 1st
sc,
changing to white. (18 sc)
20 – 27. Repeat rows 16 through 19 twice; at end of row 27, fasten off red and white. (18
sc) Continue stuffing leg.
28. Join skin color with sc in BL of same stitch as joining on row 27. Here you will
resume working in continuous rounds. Sc in BL of next 17 sc; do not join. (18 sc)
29. Resume working in both lps; sc in next 18 sc. (18 sc)
30 – 42. Sc in ea sc around. (18 sc)
43. Sc in next 5 sc, sc2tog, sc in next 7 sc, sc2tog, do not work last 2 sc; fasten off,
leaving long end for sewing. (18 sc)
• Stuff rows 28 – 37. Stuff rnds 38 – 43 very lightly or not at all. With toe of foot
facing you, flatten top of leg side to side. This is so that the doll will be able to sit.
Thread long end on needle and sew top opening. Do not trim long end of thread yet;
this will be used to sew leg to body.
• After both legs are completed, sew legs to bottom seam of body.
Note: Weave all loose thread ends as you finish each section. (See special
instructions.)
EMMA’S CLOTHING
BLOOMERS:
(Seam is in the back. Beg ch-2 counts as hdc unless stated.)
1. With white ch 50; sl st in 1st ch to form a ring, being careful not to twist chain; ch 1, sc
in same ch as joining and in ea ch around; join with sl st in 1st sc; ch 2, turn. (50 sc)
2 – 8. Hdc in next sc and in ea sc around; join with sl st in top of beg ch-2; ch 2, turn. (50
sc)
9. Hdc in next hdc and in ea hdc around; join with sl st in top of beg ch-2; ch 3, sk next
24 hdc; join to next hdc with sl st; FO. (50 sc)
FIRST LEG:
10. Working from the WS with the right leg opening facing you, join with sl st in FL of
2nd ch of the ch-3 at crotch; ch 1, hdc in next ch, hdc in next 24 hdc around the right leg
opening, hdc in FL of next ch; join with sl st in beg ch-1; ch 2, turn. (27 hdc)
11 – 13. Hdc in ea hdc around; join with sl st in top of beg ch-2, ch 2, turn. (27 hdc)
14. Hdc in ea hdc around to last hdc, 2 hdc in last hdc; join with sl st in top of beg ch-2,
ch 3, turn. (28 sc)
15. (Sk next hdc, hdc in next hdc, ch 1) 13 times; join with sl st in 2nd ch of beg ch 3; ch
1; do not turn. (14 ch-1 sp)
16. Sc in same place as joining; (sc in next ch-1 sp, sc in next hdc) around; join with sl st
in 1st sc; ch 3; do not turn. (28 sc)
17. Working this row in BL, dc in same sc as joining; (dc in next sc, 2 dc in next sc) 13
times around to last sc, dc in last sc; join with sl st in top of beg ch-3; ch 2; do not turn.
(41 dc)
18. Working this row in BL, ch 2, (sl st in next dc, ch 2) around; join with sl st in joining
sl st from rnd 17; FO. (41 ch-2 lps)
SECOND LEG:
10. Working from the WS with the left leg opening facing you, join with sl st in 2nd free
loop of the opposite side of the ch-3 at crotch; ch 1, hdc in next free lp, hdc in next
24hdc, hdc in free lp of next ch; join with sl st in beg ch-1; ch 2, turn. (27 hdc)
11 – 18. Work same as for 1st leg.
WAIST:
1. With RS facing, attach white with sc in 1st free loop of foundation chain at waist
back; (sc2tog, sc in next free lp) 16 times, sc in last free loop; join with sl st in 1st sc; FO.
(34 sc)
FINISH:
• Thread a 10-inch length of 1/8-inch white ribbon onto a tapestry needle. With
bloomers flat, begin at outer edge of leg and weave ribbon through eyelets on round
16. Repeat for 2nd leg.
• Put the bloomers on the doll. Pull the ribbons at knees to gather snugly around legs.
Tie ribbons into a bow, and trim ends to desired length.
• Waist will be loose around the doll. Thread a needle with a length of the same thread
that the bloomers of made from. Begin at the center back of the waist and leave a 3″
tail at the beginning. Weave in and out around the base of row 1 of waist. Cut the
thread, leaving a 3″ tail at the end. Pull the 2 tails of thread to tighten the bloomers
around the doll’s waist; tie into a knot. Thread the ends onto a needle and push
through to front of body. Cut thread so that it disappears inside the body.
DRESS:
Note: The dress pattern calls for a ch 1, turn, instead of the ch 2, turn, that one usually
finds when working in hdc. You will work in the first stitch (same stitch as turning), and
the turning ch-1 will not be used.
SKIRT:
1. With blue ch 42; hdc in 3rd ch from hook and in ea ch across; mark this row as front;
ch 1, turn. (40 hdc)
2. (2 hdc in next hdc, hdc in next 9 hdc) 4 times; ch 1, turn. (44 hdc)
3. Hdc in ea hdc across; ch 1, turn. (44 hdc)
4. (Hdc in next 10 hdc, 2 hdc in next hdc) 4 times; ch 1, turn. (48 hdc)
5. Hdc in ea hdc across; ch 1, turn. (48 hdc)
6. (2 hdc in next hdc, hdc in next 11 hdc) 4 times; join with sl st in 1st hdc; ch 1, turn.
(52 hdc)
7. Hdc in ea hdc around; join with sl st in 1st hdc; ch 1, turn. (52 hdc)
8. (Hdc in next 12 hdc, 2 hdc in next hdc) 4 times; join with sl st in 1st hdc; ch 1, turn.
(56 hdc)
9. Hdc in ea hdc around; join with sl st in 1st hdc; ch 1, turn. (56 hdc)
10. (2 hdc in next hdc, hdc in next 13 hdc) 4 times; join with sl st in 1st sc; ch 1, turn. (60
hdc)
11. Hdc in ea hdc around; join with sl st in 1st hdc; ch 1, turn. (60 hdc)
12. (Hdc in next 14 hdc, 2 hdc in next hdc) 4 times; join with sl st in 1st hdc; ch 1, turn.
(64 hdc)
13. Hdc in ea hdc round; join with sl st in 1st hdc; ch 1, turn. (64 hdc)
14. (2 hdc in next hdc, hdc in next 15 hdc) 4 times; join with sl st in 1st hdc; ch 1, turn.
(68 hdc)
15. Hdc in ea hdc around; join with sl st in 1st hdc; ch 1, turn. (68 hdc)
16. (Hdc in next 16 hdc, 2 hdc in next hdc) 4 times; join with sl st in 1st hdc; ch 1, turn.
(72 hdc)
17. Hdc in ea hdc around; join with sl st in 1st hdc; FO. (72 hdc)
18. Working this row in BL with RS facing, join white with sl st in 1st st on row 17 at ctr
back; ch 2, sl st in same pl, sl st in next hdc, *(sl st, ch 2, sl st) in next hdc, sl st in next
hdc*; repeat * to * around to last hdc, sl st in last hdc; join with sl st in beg sl st; FO
white. (36 ch-2 lps)
BODICE:
1. With WS facing, join blue with sc in 1st free loop of beg ch-42 at right edge of back of
skirt waist; sc in each free loop across; ch 1, turn. (40 sc)
Left back:
2 – 4. Hdc in next 9 sc; ch 1, turn. (9 hdc)
5. Hdc in next 9 hdc; FO. (9 hdc)
6. With RS facing, sk 5 hdc on row 5, join with sl st in next hdc; ch 1, hdc in same pl,
hdc in next 3 hdc, ch 1, turn. (4 hdc)
7. Hdc in next 4 hdc; FO blue, leaving length of thread for sewing shoulder seam. (4
hdc)
Front:
2. With RS facing, skip 3 sc after left back; join blue with sl st in next sc; ch 1, hdc in
same pl, hdc in next 15 hdc; ch 1, turn. (16 hdc)
3 – 5. Hdc in ea hdc across; ch 1, turn. (16 hdc)
Left Shoulder:
6. Hdc in next 4 hdc, ch 1, turn. (4 hdc)
7. Hdc in next 4 hdc; FO. (4 hdc)
Right Shoulder:
6. With RS facing, sk 8 hdc after left shoulder; reattach blue with sl st in next hdc; ch 1,
hdc in same pl, hdc in next 3 hdc; ch 1, turn. (4 hdc)
7. Hdc in next 4 hdc; FO blue. (4 hdc)
Right back:
2. With RS facing, sk 3 sc after front; join blue with sl st in next sc, ch 1, hdc in same
place, hdc in next 8 sc; ch 1, turn. (9 sc)
3 – 4. Hdc in next 9 hdc; ch 1, turn. ( 9 hdc)
5. Hdc in next 9 hdc; ch 1, turn. (9 hdc)
6. Hdc in next 4 hdc; ch 1, turn. (4 hdc)
7. Hdc in next 4 hdc; FO blue, leaving long end for sewing shoulder seam. (4 hdc)
• Turn dress inside out and sew shoulder seams.
BACK BUTTON PLACKET:
1. Working in ends of rows down the right side with RS facing, attach blue with sc at top
edge of right side of back; make 14 more sc spaced evenly down the right side, sl st in
center bottom bet right and left sides; then make 15 sc evenly spaced up the left side of
the back, with last stitch at top left edge; ch 1, turn. (30 sc, 1 sl st)
2. Sc in next 14 sc; sl st in next sc; do not ch 1; turn. (14 sc, sl st)
3. Sk sl st, sc in next 14 sc; FO. (14 sc)
4. With RS facing you, join blue with sc in 1st sc at top edge of right side of back, (ch 2,
sk next sc, sc in next 3 sc) 3 times; sl st in next sc; FO. (10 sc, 3 ch-2 sp, sl st)
NECK TRIM:
1. With RS facing you, join white with sc in top end of last button placket row, sc in end
of next 2 button placket rows, sc in next 5 sc across left back, working in row ends, make
8 sc across left shoulder, sc in corner bet left shoulder and dress front, sc in next 8 hdc
across front, sc in corner between dress front and right shoulder, working in row ends,
make 8 sc across right shoulder, sc in next 5 sc across right back, sc in top of next
buttonhole placket row, sl st in top end of button hole row; FO. (40 sc, sl st)
2. With RS facing and working this row in BL, rejoin white with sl st in 1st sc, ch 1, sl st
in same pl, (sl st in next 2 sc, ch 1, sl st in same pl as last sl st) around to last sc; sl st in
last sc; FO. (20 ch-1 lps)
SLEEVES (BOTH SLEEVES ARE WORKED THE SAME.):
1. Attach blue with sc in 2nd (ctr) sc under arm, sc in next sc, sc in corner; working up
side of armhole in row ends, make 10 sc evenly spaced to shoulder seam; sc in seam;
working down side of arm, make 10 sc evenly spaced to underarm; sc in corner, sc in
next sc under arm; join with sl st in 1st sc; ch 1, do not turn. (26 sc)
2. Sc in same pl as joining, sc in next 3 sc; hdc in next sc, 2 dc in ea of next 17 sc, hdc in
next sc, sc in next 3 sc; join with sl st in 1st sc, ch 1, do not turn. (sc, 2 hdc, 34 dc)
3 – 4. Sc in same place as joining and in next 3 sc, hdc in next hdc, dc in next 34 dc, hdc
in next hdc, sc in next 3 sc; join with sl st in 1st sc; ch 1, do not turn. (6 sc, 2 hdc, 34 dc)
5. Sc in same pl as joining, sc2tog, sc2tog over next sc and hdc, dc2tog 17 times, sc2tog
over next hdc and sc, sc2tog; join with sl st in 1st sc, ch 1, do not turn. (5 sc, 17 dc)
6. Sc in same pl as joining, sc in next sc, (sc2tog, sc in next 2 st) 4 times, sc2tog, sc in
last 2 sc; join with sl st in 1st sc; ch 1, do not turn. (17 sc)
7. Working this row in BL, sc in ea sc around; join with sl st in 1st sc; FO. (17 sc)
8. With RS facing and working in BL, join white with sl st in 1st sc at underarm; (ch 1, sl
st in same pl as last sl st, sl st in next 2 sc) around, ch 1, sl st in last sc made; join in same
pl as 1st sl st; FO. (9 ch-1 lps)
FINISH DRESS:
• Sew a heart button to the center front of the bodice.
• Sew 3 buttons to left back opposite the button holes.
• (Optional) Using red floss, embroider a row of cross stitches around the 2nd row from
the bottom of the skirt. (See photo.)
• (Optional) Using red floss, embroider a row of cross stitches around the sleeve cuff
just above the white trim. (See photo.)


PINAFORE:
WAIST BAND:
1. With yellow ch 36; sc in 2nd ch from hook and in ea ch across; ch 1, turn. (35 sc)
2. Sc in ea sc across; ch 3, turn. (35 sc)
SKIRT: (Turning ch-3 counts as dc.)
3. (Mark this row as right side.) Dc in same pl as turning, (3 dc in next sc, 2 dc in next
sc) 17 times; ch 1, turn. (87 dc)
4. (Sc in next 2 dc, sk next dc, 3 dc in next dc, sk next dc) 17 times, sc in last 2 dc ch 3,
turn. (17 3-dc shells)
5. Dc in next sc, ch 1, sk next dc, sc in next dc, ch 1, sk next dc, (dc in next 2 sc, ch 1, sk
next dc, sc in next dc, ch 1, sk next dc); repeat within ( ) across, dc in last 2 sc; ch 1, turn.
(18 2-dc groups)
6. (Sc in next 2 dc, sk next ch-1 sp, 3 dc in next sc, sk next ch-1 sp); repeat within
( ) across; sc in last 2 dc; ch 3, turn. (17 3-dc shells)
7. Dc in next sc, ch 1, sk next dc, sc in next dc, ch 1, sk next dc, (dc in next 2 sc, ch 1, sk
next dc, sc in next dc, ch 1, sk next dc); repeat within ( ) across; dc in last 2 sc; ch 1, turn.
(18 2-dc groups)
8 – 14. Repeat row 6 and row 7 alternately, 3 times; then repeat row 6 once more; FO
yellow.
15. With RS facing you and working in BL, join white with sl st in 1st sc of row 14; *(sc,
ch 2, sc) in next st, sc in next 2 st, *; repeat * to * across, ending with sl st in last sc; FO.
(29 picots)
BIB:
1. With RS facing you, join yellow with sc in 1st free loop of beg ch at top edge of waist;
sc in ea free lp across; FO. (35 sc)
2. With RS facing you, sk 12 sc from end of waist band; join yellow with sc in next sc,
sk next sc, 3 dc in next sc, sk next sc, sc in next 3 sc, sk next sc, 3 dc in next sc, sk next
sc, sc in next sc; do not work remaining 12 sc; ch 4, turn. (5 sc, 2 3-dc shells)
3. (Ch 4 counts as 1st dc and ch-1), sk next dc, sc in next dc, ch 1, sk next dc, dc in next 3
sc, ch 1, sk next dc, sc in next dc, ch 1, sk next dc, dc in last sc; ch 1, turn. (5 dc, 2 sc)
4. Sc in same pl as turning, sk next ch-1 sp, 3 dc in next sc, sk next ch-1 sp, sc in next 3
dc, sk next ch-1 sp, 3 dc in next sc, sk next ch, sc in next ch (3rd ch of beg ch-4); ch 4,
turn. (5 sc, 2 3-dc shells)
5. Repeat row 3.
6. Repeat row 4; FO.
7. Trim bib: With RS facing, join white with sl st in 13th sc on row 1 (corner between
waist and bib); working in row ends up left side of bib, make 7 sc evenly spaced; ch 1, (sl
st, ch 2, sl st) in BL of 1st st at top edge, *sl st in BL of next st, (sl st, ch 2, sl st) in BL of
next st; * repeat * to * 4 more times, ch 1; working in row ends down right side of bib,
make 7 sc evenly spaced; FO with sl st in next sc on band (corner between bib and waist).
(14 sc, 6 picots)
LEFT STRAP:
1. With RS facing join yellow with sc in 1st sc at end of waist band, sc in next 2 sc; ch 1,
turn. (3 sc)
2 – 19. Sc in next 3 sc; ch 1, turn. (3 sc)
20. Sc in next 3 sc; FO, leaving long end for sewing strap to bib.
RIGHT STRAP:
1. With RS facing, sk 9 sc after bib; join yellow with sc in next sc, sc in next 2 sc; ch 1,
turn. (3 sc)
2 – 20. Same as Left Strap.
• Sew the front ends of straps to row 6 of the bib, placing them at either end of the top
of the bib.
RIBBON TIES: Cut two 9-inch pieces of ¼-inch ribbon (white, or color to coordinate
with the pinafore color). Cut one end of each ribbon on the diagonal and one end
straight. Fold the straight end under about ¼”, and sew one securely to the inside of
each end of waist band.
HAIR BOW:
1. Ch 3 with bow color; sc in 2nd ch from hook and in next sc; ch 1, turn. (2 sc)
2. 2 sc in ea of next 2 sc; ch 1, turn. (4 sc)
3. 2 sc in next sc, sc in next 2 sc, 2 sc in next sc; ch 1, turn. (6 sc)
4. 2 sc in next sc, sc in next 4 sc, 2 sc in next sc; ch 1, turn. (8 sc)
5 – 7. Sc in ea sc across, ch 1, turn. (8 sc)
8. Sc2tog, sc in next 4 sc, sc2tog; ch 1, turn. (6 sc)
9. Sc2tog, sc in next 2 sc, sc2tog; ch 1, turn. (4 sc)
10. Sc2tog twice; ch 1, turn. (2 sc)
11. Fold the piece so that rows 1 and 10 are together; sc in the 1st free loop of the
foundation ch-3 from row 1, and the next sc on row 10 and at the same time, so that the
beginning and ending rows are joined; sc in the next sc and free loop at the same time; ch
1, turn. (2 sc)
12. Sc in next 2 sc; ch 1, turn. (2 sc)
13 – 20. Repeat rows 2 – 9.
21. Sc2tog twice; FO, leaving long end.
• Fold the piece so that rows 12 and 21 are together; use the long end to sew in place.
Center:
1. With bow color ch 3, sc in 2nd ch from hook and in next ch; ch 1, turn. (2 sc)
2 – 5. Sc in next 2 sc; ch 1, turn. At the end of row 5 do not ch 1, FO, leaving long end.
• Wrap the center piece around the middle part of the bow; sew ends together at the
back of the bow; make one stitch through to the front, then back out the back, to
secure center to bow.
• Sew bow to doll’s head.
JACKSON’S CLOTHING
SWEATER:
The sweater is designed to button in the back. You can make it so that it buttons in the
front by reversing the side that the buttonhole and button plackets are on (for the boy
doll).
1. With white ch 45; sc in 2nd ch from hook and in next 43 ch; ch 1, turn. (44 sc)
2. Sc in ea sc across to last sc; join yellow as follows: insert hook into last sc, yo and
pull up a lp of yellow, yo and pull through both lps on hook; ch 1, turn (do not fasten off
white). (44 sc)
3. With yellow, sc in ea sc across; ch 1, turn. (44 sc)
4. With yellow, sc across to last sc; insert hook into last sc and pull up a loop of yellow;
pull the yellow thread toward you so that it will be on the back side of your work, then
pick up and finish the sc with white; ch 1 with white, turn. (Do not fasten off yellow.)
(44 sc)
5. With white, sc across; ch 1, turn. (44 sc)
6. Sc across to last sc; insert hook into last crochet and pull up a loop with white; pull
the white thread toward you so that it will be on the back side of your work, and finish
the sc with yellow (always use this method when changing colors at end of rows); ch 1
with yellow, turn. (Do not fasten off white.) (44 sc)
7. With yellow, sc in ea across; ch 1, turn. (44 sc)
8. Repeat row 4. (44 sc)
9. Repeat row 5. (44 sc)
10. Repeat row 6. (44 sc)
11. Repeat row 7. (44 sc)
12. Repeat row 4. (44 sc)
13. Repeat row 5. (44 sc)
14. Repeat row 6. (44 sc)
LEFT BACK:
15. With yellow, sc in next 10 sc; ch 1, turn. (10 sc)
16. With yellow, sc across to last sc; change to white; ch 1 with white, turn. (Do not
fasten off yellow.) (10 sc)
17. With white, sc in ea sc across; ch 1, turn. (10 sc)
18. Sc across to last sc; change to yellow; ch 1 with yellow, turn. (Do not fasten off
white.) (10 sc)
19 – 22. Repeat row 15 through 18 once more. (10 sc)
23. Sl st in next 4 sc; sc in next 6 sc; ch 1, turn. (4 sl st; 6 sc)
24. Sc in next 6 sc; FO yellow with sl st in next sl st; cut white also. (6 sc)
FRONT:
15. Sk next 3 sc after left back; join yellow with sc in next sc (this is the RS); sc in next
17 sc; ch 1, turn. (18 sc)
16. With yellow, sc in ea sc across to last sc; change to white; ch 1 with white, turn.
(Do not fasten off yellow.) (18 sc)
17. With white, sc in ea sc across; ch 1, turn. (18 sc)
18. With white, sc across to last sc; change to yellow; ch 1 with yellow, turn. (Do not
fasten off white.) (18 sc)
19. With yellow, sc in ea sc across; ch 1, turn. (18 sc)
20. Repeat row 16. (18 sc)
21. Repeat row 17. (18 sc)
22. Repeat row 18. (18 sc)
23. Repeat row 19. (18 sc)
24. Sc in next 6 sc; FO, leaving long end for sewing; sk 6 sc; rejoin yellow with sc in
next sc, sc in next 5 sc; FO yellow, leaving long end for sewing; FO white. (12 sc)
RIGHT BACK:
15. Sk next 3 sc after front; join yellow with sc in next sc; sc in next 9 sc; ch 1, turn. (10
sc)
16. With yellow, sc in ea sc across to last sc; change to white; ch 1 with white, turn.
(Do not fasten off red.) (10 sc)
17. With white, sc in ea sc across; ch 1, turn. (10 sc)
18. With white, sc in ea sc across to last sc; change to yellow; ch 1 with yellow, turn.
(Do not fasten off white.) (10 sc)
19. With yellow, sc in ea sc across; ch1, turn. (10 sc)
20. Repeat row 16. (10 sc)
21. Repeat row 17. (10 sc)
22. Repeat row 18. (10 sc)
23. With yellow, sc in next 6 sc, sl st in next sc; leave remaining 3 sc unworked; ch 1,
turn. (6 sc)
24. Sk sl st, sc in next 6 sc; FO white and yellow,. (6 sc)
• With RS together, sew shoulder seams (corresponding 6 sc on ea side).
BUTTONHOLE PLACKET:
1. With RS facing, join white with sc in end of row 1 at bottom left back of shirt; sc in
end of next 21 rows up the left side of the sweater back; ch 2, turn. (22 sc)
2. (Sk 2 sc, sc in next 3 sc, ch 2) 4 times, ch 2, sc in bottom end of last sc (that is, the
bottom end of row 1); ch 1, turn. (5 ch-2 sp, 13 sc)
3. Sk 1st sc, sl st in FL of ea ch and sc across; FO. (22 sl st)
BUTTON PLACKET:
1. With RS facing and working in row ends, join white at top right edge of sweater back;
sc in ends of next 21 rows down the right back; ch 1, turn. (22 sc)
2 – 3. Sc in next 22 sc; ch 1, turn. At end of row 3 do not ch 1, FO. (22 sc)
COLLAR:
1. With RS of sweater facing, join yellow with sl st at top of left edge of buttonhole
placket in end of row 3, sc in end of next 2 rows, sc in ea of next 4 sl st, sc in next row
end, sc in shoulder seam, sc in next row end, sc in next 8 sc (including corner sc’s), sc in
next row end, sc in shoulder seam, sc in next row end, sc in next 3 sc, sc in end of next 2
rows, sl st in end of last row; FO yellow. (25 sc, 2 sl st)
2. With RS facing, join white with sl st in 1st sl st, ch 2; working in BL, hdc in next 5 sc,
hdc2tog twice, hdc in next 7 sc, hdc2tog twice, hdc in next 5 sc, hdc in last sl st; FO. (23
hdc, including beg ch-2)
SLEEVES (same on each side):
1. Join yellow with sc in center (2nd) sc at underarm; sc in next sc; working up side of
armhole, sc in ends of next 10 row ends to shoulder seam; sk shoulder seam, working
down side of armhole, sc in next 10 row ends; sc in next sc under arm; join with sl st in
1st sc; ch 1, do not turn. (23 sc)
2. Sl st in 1st sc (1st stitch will always be in the same stitch as joining), sl st in next sc, sc
in next 20 sc, sl st in next sc, insert hook into 1st sl st as if to join; pull up a lp of white
and complete joining sl st; do not fasten off yellow; ch 1, turn. (20 sc, 3 sl st)
3. Sl st in 1st sl st, sl st in next sl st, sc in next 20 sc, sl st in next sl st, join with sl in 1st
sl st; ch 1, turn. (20 sc, 3 sl st)
4. Sl st in same pl as turning, sl st in next sl st, sc in next 20 sc, sl st in last sl st; insert
hook into 1st sl st as if to join; pull up a lp of yellow, and complete joining sl st; do not
fasten off white; ch 1 with yellow; turn. (20 sc, 3 sl st)
5. With yellow, sc in ea st around; join with sl st in 1st sc; ch 1, turn. (23 sc)
6. Sc2tog, sc in next 21 sc; join with sl st in 1st sc, changing to white; ch 1 with white,
turn. (22 sc)
7. With white, sc in ea sc around; join with sl st in 1st sc; ch 1, turn. (22 sc)
8. With white, sc2tog, sc in next 20 sc; join with sl st in 1st sc, changing to yellow; ch 1,
turn. (21 sc)
9. With yellow, sc in next 21 sc; join with sl st in 1st sc; ch 1, turn. (21 sc)
10. With yellow, sc in next 21 sc; join with sl st in 1st sc, changing to white; ch 1 with
white, turn. (21 sc)
11. With white, sc in next 21 sc; join with sl st in 1st sc; ch 1, turn. (21 sc)
12. With white, sc in next 21 sc; join with sl st in 1st sc, changing to yellow; ch 1 with
yellow, turn. (21 sc)
13 – 16. Repeat rows 9 – 12.
17 – 19. Repeat row 9 – 11.
20. With white, sc2tog, sc in next 19 sc; join with sl st in 1st sc, changing to yellow; ch 1,
turn. (21 sc)
21. With yellow, sc in next 20 sc; join with sl st in 1st sc; ch 1, turn. (20 sc)
22. With yellow, sc in next 20 sc; join with sl st in 1st sc, changing to white; ch 1 with
white, turn. (20 sc)
23. With white, sc in next 20 sc; join with sl st in 1st sc; ch 1, turn. (20 sc)
24. With white, sc2tog, sc in next 18 sc; join with sl st in 1st sc, changing to yellow; ch 1
with yellow, turn. (19 sc)
25. With yellow, sc in next 19 sc; join with sl st in 1st sc; ch 1, turn. (19 sc)
26. With yellow sc2tog, sc in next 17 sc; join with sl st in 1st sc, changing to white, ch 1;
do not turn; FO yellow. (18 sc)
27. Working in BL, hdc in same pl as joining and in ea sc around; join with sl st in 1st
hdc; ch 1, do not turn. (18 hdc)
28. FP-hdc (See special stitches) around ea of the 18 hdc; join with sl st in 1st st; ch 1, do
not turn. (18 FP-hdc)
29. FP-hdc in ea stitch around; join with sl st in 1st st; FO. (18 FP-hdc)
• The sleeves fit snugly around the arms, and since the arms are not rigid, you may
need to pull gently on the doll’s hand with your hemostat or tweezers to get the hand
through the sleeve.
BOTTOM BAND (optional):
1. With RS facing, join white with sl st in bottom end of 1st button placket row, ch 2
(counts as 1st hdc), hdc in next 2 row ends, hdc in next 44 free loops across the bottom
of the sweater, hdc in next 2 row ends of buttonhole placket; ch 2, turn. (49 hdc)
2. BP-hdc (see special instructions) in next hdc and in ea hdc across, ch 1, turn. (49 BPhdc)
3. FP-hdc in next hdc and in ea hdc across, FO. (49 FP-hdc)
• Sew five 6-mm buttons to right button placket opposite buttonholes. Check to make
sure that the stripes match up when the sweater is buttoned.
OVERALLS:
Pants open in the front.
1. Mark as RS. With blue ch 48; hdc in 3rd ch from hook and in ea ch across; ch 1, turn.
(46 hdc) Note: Ignore the turning ch-1’s; you won’t be working in them.
2 – 5. Hdc in 1st hdc and in ea hdc across; ch 1, turn. (46 sc)
6 – 7. Hdc in 1st hdc and in ea hdc across; join with sl st in 1st hdc; ch 1, turn. (46 sc)
8. Hdc in same pl as joining and in ea hdc across; join with sl st in 1st hdc; ch 8; sk next
22 hdc, sl st in next hdc to join; FO. (46 hdc, 8 ch)
FIRST PANTS LEG: For the leg rows, beginning with row 9, you will end the row
with ch 2, turn; the ch-2 will count as the 1st hdc of the next row.
9. This row is worked on the WS of the pants leg. With right leg opening facing you
(remember the pants open in the front), join blue with sl st in FL of 4th ch of the ch-8 at
crotch; ch 2, hdc in next 4 ch, hdc in next 22 hdc of the right leg opening, hdc in next 3
ch; join with sl st in top of beg ch-2; ch 2, turn. (30 hdc)
10 – 15. Hdc in ea hdc around; join with sl st in top of beg ch-2, ch 2, turn. (30 hdc)
16. Hdc in ea hdc around; ch 1; do not turn. (30 hdc)
17. Sc in same pl as joining, and in ea hdc around; join with sl st in 1st sc; ch 1; do not
turn. (30 sc)
18. Sc in same pl as joining, and in ea sc around; join with sl st in 1st sc; FO. (30 sc)
SECOND LEG:
9. This row is worked on the WS. With left leg opening facing you, and waist down,
join blue with sl st in 4th free loop of the opposite side of the ch-8 at crotch; ch 2, hdc in
next 4 ch, hdc in next 22 hdc around the left leg opening, hdc in next 3 ch; join with sl st
in top of beg ch-2; ch 2, turn. (30 hdc)
10 – 18. Same as 10 – 18 of first leg.
LEFT FRONT PLACKET:
1. With RS facing and working down left side of front opening, join blue with sc in end
of foundation row at waist, sc in ends of next 7 rows, sl st in bottom center of front
opening; turn. (8 sc, 1 sl st)
2. Sk sl st; sl st in next sc; sc in next 7 sc; ch 1, turn. (1 sl st, 7 sc)
3. Sc in next 7 sc, sl st in next sl st; FO. (7 sc, 1 sl st)
WAISTBAND:
1. With RS facing, join blue with sc in 1st free loop of foundation ch at waist; sc in next
45 free lps, sc in next 3 row ends of front placket; ch 3, turn. (49 sc)
2. Sk next 2 sc (front buttonhole), sc in next 6 sc, ch 2, sk next 2 sc (buttonhole for
suspender), sc in next 29 sc, ch 2, sk next 2 sc (buttonhole for suspender), sc in next 8 sc; ch 1, turn the corner to right side of front opening, sc in ends of next 10 rows, sl st in
center bottom of front opening; turn. (43 sc, 3 ch-2 sp across waist; 10 sc and one sl st
down right opening)
3. Sl st in next sc, sc in next 9 sc; ch 1, turning corner to top of waist, (sc in end of next
row) twice, sc in next 8 sc, sc in next 2 ch, sc in next 29 sc, sc in next 2 ch, sc in next 6
sc, sc in next 2 ch; FO. (1 sl st, 9 sc up right opening; 51 sc across waist)
• Sew a white button to right side of front opening opposite buttonhole.
RIGHT SUSPENDER:
1. With RS facing, skip 18 sc on row 3 of waistband; join blue with sc in next sc; sc in
next 2 sc; ch 1, turn. (3 sc)
2 – 28. Sc in next 3 sc; ch 1, turn. FO after row 28. (3 sc)
LEFT SUSPENDER:
1. With RS facing, sk 9 sc on back of waist after right suspender; join blue with sc in
next sc; sc in next 2 sc; ch 1, turn. (3 sc)
2 – 28. Sc in next 3 sc; ch 1, turn. FO after row 28. (3 sc)
• Sew a white button to the front of each suspender on row 28.
SAILOR HAT:
1. Using white, begin with an adjustable ring (see special instructions), make 8 sc in the
ring; OR, ch 2, 8 sc in 2nd ch from hook; do not join. (8 sc)
2. 2 sc in ea sc around. (16 sc)
3. (2 sc in ea of next 4 sc, sc in next 4 sc) twice. (24 sc)
4. Sc in ea sc around. (24 sc)
5. Sc in next 2 sc, 2 sc in ea of next 4 sc, sc in next 8 sc, 2 sc in ea of next 4 sc, sc in next
6 sc. (32 sc)
6. Sc in ea sc around. (32 sc)
7. (2 sc in next sc, sc in next 3 sc) 8 times. (40 sc)
8 – 11. Sc in ea sc around. (40 sc)
12. Working in FL, (2 sc in next sc, sc in next 9 sc) 4 times, sl st in next sc; ch 1, turn.
(44 sc)
13. Sc in next 44 sc; do not join or turn. (44 sc)
14. (2 sc in next sc, sc in next 10 sc) 4 times. (48 sc)
15. Sc in ea sc around, sl st in next sc; ch 1. (48 sc)
16. Rev-sc in sl st just made, (see special instructions), rev-sc in next sc to the right, and
in ea sc around; join in 1st rev-sc; FO. (48 Rev-sc)
• Turn brim of hat up at rnd 12.
• Tack hat to head in 3 or 4 places, using the same thread used for hat