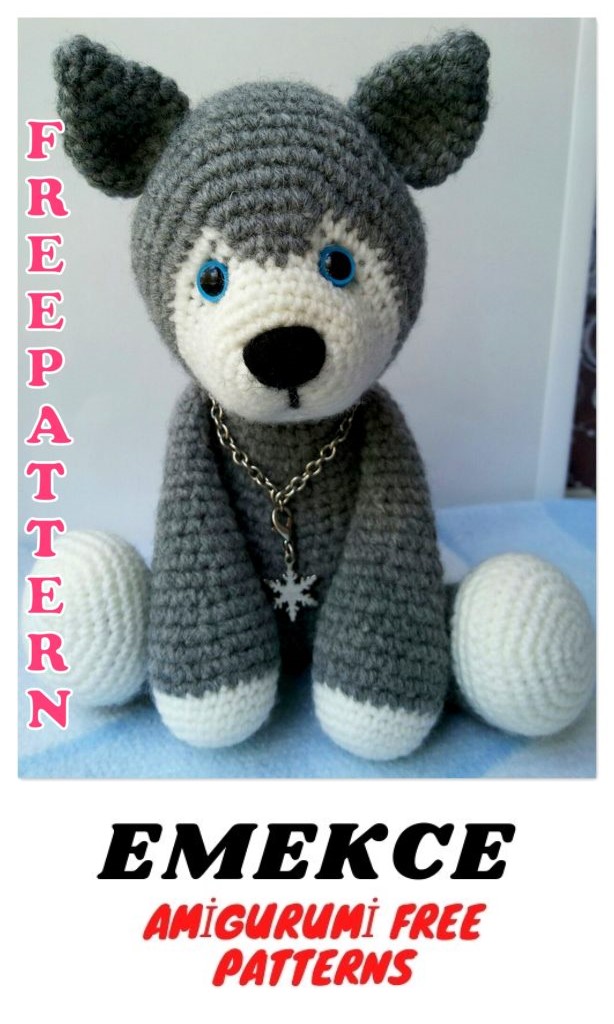
Henry The Amigurumi Hound Dog Crochet Free Pattern

NOTE: Dog A is made from one color and has plastic safety eyes and traditional
features. Dog B is made from two colors, and has crocheted eyes and exaggerated
features. Mix and match colors and features as desired. Use any size thread or yarn
with crochet hook of appropriate size for thread, and adjust size of eyes of Dog A
for size.
GAGE: Gage is not important for this pattern; however, because tension can vary in
different circumstances, it is suggested that when making two pieces that must be the
same, such as ears or legs, that you complete both in one sitting.


SPECIAL INSTRUCTIONS:
ADJUSTABLE RING: Grasp the yarn between your thumb and forefinger, leaving a
tail at the beginning. Wrap the thread over and around the index finger clockwise,
crossing the thread at the top of the finger. Insert the hook underneath the front thread
that you just crossed, then catch the back thread with the hook, and pull a loop of the
back thread from underneath. Slip the loop off the finger, grasping the working end in
the left hand as if to begin crocheting. Chain 1, work number of stitches required into the
ring. Pull up a long loop, then, grasping the stitches just made with the right hand and
tail with left (or vice versa), pull to tighten ring. Insert hook into long loop and tighten
back against hook. Making sure tail is to the back, skip first chain worked and continue
working pattern.
IMPORTANT NOTE ON STUFFING: The way that you stuff your dog can greatly
affect the quality of the finished product, especially if you are thread-jointing. You’ll be
amazed at the quantity of stuffing that each piece requires. The bear should be stuffed
firmly so that it won’t lose its shape, but not so firmly that the stitches are pulled apart to
the extent that the stuffing shows through in a distracting manner.
WEAVING/HIDING LOOSE THREAD ENDS: You can hide the loose ends of
yarn/thread by pulling them to the inside of the piece with a needle. Pass the needle
through the piece 2 or 3 times to anchor the thread end (always go in and come out
between stitches, being careful not to catch any fabric), then pull the thread taut, and clip
close to the surface so that it disappears inside.

ABBREVIATIONS
AC – alternate color
alt – alternate
approx – approximately
beg – begin/beginning
bet — between
BL – back loop
ch – chain stitch
ch- – refers to a ch space previously made:
e.g., ch-1 space
cm – centimeter(s)
cont — continue
Dc – double crochet (UK treble cr)
Dc2tog – double crochet 2 stitches together
(decrease)
Dec – decreases(s)
ea – each
FL – front loop(s)
FO – fasten off
hdc – half double crochet
hdc2tog – half double crochet 2 stitches
together
inc – increase
lp(s) – loops
MC – main color
mm – millimeter(s)
oz – ounce(s)
pl – place
prev – previous
rem – remaining
rep – repeat(s)
rnd(s) – round(s)
RS – right side
sc – single crochet (same as UK dc)
sc2tog – single crochet 2 stitches together
sk – skip
Sl st – slip stitch (same as UK sc)
Sp(s) – space(s)
St – stitch
tog — together
WS — wrong side
Yd(s) – yard(s)
YO – yarn over
Yoh – yarn over hook

HEAD:
1. With dark beige for Dog A or MC for Dog B, begin with an adjustable ring, make 6 sc
in ring; do not join, pl rnd marker. (6 sc)
2. 2 sc in ea sc around. (12 sc)
3. 2 sc in ea sc around. (24 sc)
4. (2 sc in next sc, sc in next sc) 12 times. (36 sc)
5. (2 sc in next sc, sc in next 5 sc) 6 times. (42 sc)
6. Sc in next 5 sc, pl rnd marker here to move beginning point (does NOT change stitch
count), sc in ea sc around. (42 sc)
7 – 14. Sc in ea sc around. (42 sc)
15. 2 sc in ea of next 16 sc, sc in next sc in next 26 sc. (58 sc)
16 – 25. Sc in ea sc around. (58 sc)
26. Sc in next 4 sc, (sc2tog, sc in next 3 sc) 6 times, sc2tog, sc in next 4 sc, (2 sc in next
sc, sc in next 3 sc) 4 times, 2 sc in next sc, sc in next sc. (56 sc)
27. Sc in ea sc around. (56 sc)
28. (Sc2tog, sc in next 2 sc) 8 times, (2 sc in next sc, sc in next 3 sc) 6 times. (54 sc)
29. Sc in ea sc around. (54 sc)
30. Sc in next 27 sc, (2 sc in next sc, sc in next 2 sc) 9 times. (63 sc)
31. (Sc2tog, sc in next sc) 9 times, sc in next 36 sc. (54 sc)
32. (Sc2tog, sc in next sc) 5 times, sc2tog, sc in next 37 sc. (48 sc)
33 – 34. Sc in ea sc around. (48 sc)
35. Sc2tog 5 times, sc in next 38 sc. (43 sc)
• Attach the eyes if using plastic eyes with snap-on backs. Stuff the muzzle in order to
make it easier to place the eyes. Find the center point of the top of the muzzle. Insert
the eye stem through the fabric of the face, above the muzzle, between stitches. Insert
the other eye stem, having about 8 sc between the inside edges of the two eyes. Check
placement; remove and relocate until they look right to you. When the eyes are
pleasingly placed, reach inside the head and push a plastic backing firmly onto each
eye stem, as far as it will go.
• Finish stuffing head.
36 – 38. Sc in ea sc around. (43 sc)
39. Sc in next 18 sc, (sc2tog, sc in next sc) 5 times, sc2tog, sc in next 8 sc. (37 sc)
40 – 51. Sc in ea sc around. (37 sc)
52. Sc in next 22 sc, 2 sc in next sc, sc in next 2 sc, 2 sc in next sc, sc in next 11 sc. (39
sc)
53 – 56. Sc in ea sc around. (39 sc)
57. (Sc2tog, sc in next sc) 13 times around. (26 sc)
58. Sc in ea sc around. (26 sc)
59. (Sc2tog, sc in next 4 sc) twice, sc2tog, sc in next 5 sc, sc2tog, sc in next 5 sc. (22 sc)
• Stuff body.
60. Sc in ea sc around. (22 sc)
61. (Sc2tog, sc in next sc, sc2tog, sc in next 2 sc) 3 times, sc in next sc. (16 sc)
• Continue stuffing.
62. (Sc2tog, sc in next 2 sc) 4 times. (12 sc)
63. (Sc2tog, sc in next 2 sc) 3 times; sl st in next sc, FO with sl st in next sc, leaving long
end for closing. (9 sc)
• Add more stuffing to firm up the last few rnds, if necessary.
• Thread the long end onto a tapestry needle. Sew a gathering stitch, going in and out
of the outer lps of rnd 63 around. Pull gently but firmly to gather and close. Secure
and pass the thread through the body 2 or 3 times to anchor. Cut thread close to
surface so that the end disappears inside the body.
FRONT LEGS (Make 2):
1. Using dark beige for Dog A or MC for Dog B, begin with an adjustable ring and make
6 sc in ring, OR ch 2, 6 sc in 2nd ch from hook; do not join, pl rnd marker. (6 sc)
2. 2 sc in ea sc around. (12 sc)
3. Sc in next 4 sc, 2 sc in ea of next 8 sc. (20 sc)
4. Sc in next 5 sc, (2 sc in next sc, sc in next 2 sc) 5 times. (25 sc)
5. (2 sc in next sc, sc in next 4 sc) 5 times, sl st in same pl with last sc. (30 sc, sl st)
6. Working in BL, sc in ea sc around, sk sl st. (30 sc)
7 – 9. Sc in ea sc around. (30 sc)
10. Sc in next 8 sc, (sc2tog, sc in next sc) 7 times, sc in next sc. (23 sc)
11. Sc in next 8 sc, (sc in next sc, sc2tog) 4 times, sc in next 3 sc. (19 sc)
12. Sc in ea sc around. (19 sc)
• Stuff paw.
13 – 15. Sc in ea sc around. (19 sc)
16. Sc in next 11 sc, 2 sc in ea of next 4 sc, sc in next 4 sc. (23 sc)
17 – 18. Sc in ea sc around. (23 sc)
19. Sc in next 12 sc, sc2tog 4 times, sc in next 3 sc. (19 sc)
20 – 22. Sc in ea sc around. (19 sc)
23. Sc in next 3 sc, sc2tog, sc in next 8 sc, sc2tog, sc in next 4 sc. (17 sc)
24. Sc2tog, sc in next 3 sc, (sc2tog, sc in next 2 sc) 3 times. (13 sc)
• Stuff leg.
25. (Sc2tog, sc in next 2 sc) 3 times, sc in next sc; FO with sl st in next sc, leaving long
end for closing. (10 sc)
• Add more stuffing to firm up top of leg, if needed.
• Thread end onto tapestry needle. Finish off same as for body
REAR LEGS (Make 2):
1. Using dark beige for Dog A or MC for Dog B, begin with an adjustable ring and make
6 sc in ring, OR ch 2, 6 sc in 2nd ch from hook; do not join, pl rnd marker. (6 sc)
2. 2 sc in ea sc around. (12 sc)
3. Sc in next 4 sc, 2 sc in ea of next 8 sc. (20 sc)
4. Sc in next 5 sc, (2 sc in next sc, sc in next 2 sc) 5 times. (25 sc)
5. (2 sc in next sc, sc in next 4 sc) 5 times, sl st in same pl with last sc. (30 sc, sl st)
6. Working in BL, sc in ea sc around, sk sl st. (30 sc)
7 – 9. Sc in ea sc around. (30 sc)
10. Sc in next 8 sc, (sc2tog, sc in next sc) 7 times, sc in next sc. (23 sc)
11. Sc in next 8 sc, (sc in next sc, sc2tog) 4 times, sc in next 3 sc. (19 sc)
12. Sc in next 2 sc, 2 sc in ea of next 3 sc, sc in next 14 sc. (22 sc)
• Stuff paw.
13 – 14. Sc in ea sc around. (22 sc)
15. Sc in next 3 sc, sc2tog 3 times, sc in next 13 sc. (19 sc)
16. Sc in ea sc around. (19 sc)
17. Sc in next 12 sc, 2 sc in ea of next 4 sc, sc in next 3 sc. (23 sc)
18 – 19. Sc in ea sc around. (23 sc)
20. Sc in next 13 sc, sc2tog 4 times, sc in next 2 sc. (19 sc)
21 – 22. Sc in ea sc around. (19 sc)
23. Sc in next 4 sc, sc2tog, sc in next 8 sc, sc2tog, sc in next 3 sc. (17 sc)
24. Sc2tog, sc in next 3 sc, (sc2tog, sc in next 2 sc) 3 times. (13 sc)
• Stuff leg.
25. (Sc2tog, sc in next 2 sc) 3 times, sc in next sc; FO with sl st in next sc, leaving long
end for sewing. (10 sc)
• Add more stuffing to firm up top of leg, if needed.
• Thread end onto tapestry needle. Finish off same as for body.
ATTACH LEGS (Use these instructions for both pairs of legs): Insert a long straight
pin through each leg at the place where the joint will be, in order to experiment and find
the correct placement. After you’ve decided where the legs will be placed, mark the entry
point for the joint on each side. Thread a 5-inch doll needle with a 40″ length of
upholstery or other strong thread in a color to match the dog; double to 20″, but do not
knot the end.
Insert needle into 1st shoulder/hip; push needle through body and bring out at 2nd
shoulder/hip. Pull thread through, leaving a 3-inch tail protruding from the 1st
shoulder/hip. Insert the needle back into the dog one stitch below the exit point, push
through the dog, and bring it back out one stitch below the spot where the tail is
protruding; pull thread through. Insert the needle back into the exact place from which
the tail protrudes, then push it through the body and back out the top of the stitch on the opposite side; pull thread through. *Insert needle into the leg from the inside and push
through to outside of leg (Make sure that you are sewing in the same place, both on the
inside and outside of arm, where the placement pin was.); pull thread through until the
length from leg to body is about 3 inches. Insert needle back into leg in same place
where it came out, dipping the tip of the needle downward and then back up to catch
some stuffing as the needle passes through the leg; bring it out the inside of the leg in the
exact spot where it went in; do not pull thread through yet. Next, insert the needle back
into the body in the same place where the thread is protruding, push it back through the
body**, and out the same place where the tail protrudes on the opposite side. Now pull
the thread firmly but carefully until the leg is pulled into place against the body.
Repeat from * to ** for the other leg, this time bringing the needle out just in front of the
top of the 1st leg. Pull the needle to tighten the leg thread and pull the legs firmly against
the body. Ideally, you have not caught any fabric or thread with your needle while
sewing, so thread joint will allow the legs to slip easily into place. If not, start again. If
the dog will be played with or otherwise handled more than occasionally, I strongly
suggest that instead of bringing the needle out in front of the 1st leg on the last pass
through, you carefully make another pass through leg, body, leg, and then all the way
back once more. Practice makes perfect in the case of thread-jointing! Now, making
sure the legs don’t loosen as you work, pass the needle and thread
through the body 2 or 3 times to get it anchored well. Again, make sure
you don’t catch any fabric, or you’ll have unsightly dents on the bears
body. Bring the final pass out on the back of the body. Clip the thread,
leaving a 3-inch tail. Tie off the two ends of the tail using a surgeon’s
knot (see illustration at right), then thread the tail back onto the needle
and pull it through the body, thus hiding the ends inside the body. Clip
the ends close to the surface so that they disappear into the body. Tie
off the first tail in the same way.
SCULPT FACE (Optional):
Thread a doll needle with upholstery or other strong thread similar in color to the dog;
double the thread and knot the end. Insert the needle into the side of the neck (ALWAYS
go in and out BETWEEN stitches, being careful not to catch any fabric.) and out the
opposite side; pull the knot inside. Pass the threaded needle through the neck from side
to side 2 or 3 times to anchor the thread. Now insert the needle back into the same place
where it last came out, push up through head, and bring out slightly to the outside bottom
edge of the first eye. Insert the needle back into the face, skipping one sc toward the eye.
Push back through head and out the lower side of the neck underneath the head (where
the chest and head meet; this is to add some definition to the neck). Pull to indent the
first eye. Insert back into the neck one sc over and pass the needle through the neck,
coming out at the same place on the opposite side of the neck. Pull to indent the neck
slightly; insert needle back into the neck one sc over, push up through head and out
slightly to the outside of the bottom edge of the second eye. Pull to indent neck slightly.
Insert back into face the length of one sc toward the eye, and push back down through
head and out same place as first neck indentation. Pull to indent the second eye. Keep
the thread taut so that the eye remains indented, and pass the needle through the neck a couple of times to anchor the thread. Cut the thread, and tie off with a surgeon’s knot.
Insert the ends back into the needle and pull inside the head to hide.
EARS:
1. Ch 5 with dark beige for Dog A or AC for Dog B, sc in 2nd ch from hook, sc in next 3
sc, sc in side of last sc made, move on around to opposite side of ch and sc in next 4 free
lps, sc in side of last sc made; do not join, pl rnd marker. (10 sc)
2. (Sc in next 4 sc, 2 sc in next sc) twice. (12 sc)
3. (Sc in next 4 sc, 2 sc in ea of next 2 sc) twice. ( 16 sc)
4. Sc in next 5 sc, 2 sc in next sc, move rnd marker here (this changes the beginning
point for the rnds, it DOES NOT change the stitch count), 2 sc in next sc, sc in next 6 sc,
2 sc in ea of next 2 sc, sc in next 7 sc, 2 sc in next sc. (21 sc showing)
5. 2 sc in next sc, sc in next 8 sc, 2 sc in ea of next 2 sc, sc in next 9 sc, 2 sc in next sc.
(25 sc)
6. 2 sc in next sc, sc in next 10 sc, 2 sc in ea of next 2 sc, sc in next 11 sc, 2 sc in next sc.
(29 sc)
7. 2 sc in next sc, sc in next 12 sc, 2 sc in ea of next 2 sc, sc in next 13 sc, 2 sc in next sc.
(33 sc)
8. 2 sc in next sc, sc in next 14 sc, 2 sc in ea of next 2 sc, sc in next 15 sc, 2 sc in next sc.
(37 sc)
9. 2 sc in next sc, sc in next 16 sc, 2 sc in ea of next 2 sc, sc in next 17 sc, 2 sc in next sc.
(41 sc)
10 – 16. Sc in ea sc around. (41 sc)
17. Sc in next 19 sc, sc2tog, sc in next 19 sc. (39 sc)
18. Sc2tog, sc in next 37 sc. (38 sc)
19. (Sc2tog, sc in next 17 sc) twice. (36 sc)
20. (Sc2tog, sc in next 16 sc) twice. (34 sc)
21. (Sc2tog, sc in next 15 sc) twice. (32 sc)
22. (Sc2tog, sc in next 14 sc) twice. (30 sc)
23. (Sc2tog, sc in next 13 sc) twice. (28 sc)
24. (Sc2tog, sc in next 12 sc) twice. (26 sc)
25. (Sc2tog, sc in next 11 sc) twice. (24 sc)
26. (Sc2tog, sc in next 10 sc) twice. (22 sc)
27. (Sc2tog, sc in next 9 sc) twice. (20 sc)
28. (Sc2tog, sc in next 8 sc) twice. (18 sc)
29. (Sc2tog, sc in next 7 sc) twice. (16 sc)
30. Sc in next 7 sc, sk next sc; (sc in next sc on upper side of ear and the corresponding
sc on lower side of ear at the same time) 7 times, sk last sc; FO, leaving a long end for
sewing ear to head.
• Pin ears to head in the desired position (see photos for suggestion). Thread the long
end onto a tapestry needle and sew the ears to the head.


TAIL:
1. Leaving a 10″ tail at the beginning, ch 10 with dark beige for Dog A or AC for Dog B,
join with sl st in 1st ch to form a ring; ch 1, sc in same pl as joining, sc in ea ch around;
join with sl st in 1st sc. (10 sc)
2. Sc in same pl as joining and in ea sc around; do not join, pl rnd marker. (10 sc)
3 – 7. Sc in ea sc around. (10 sc)
8. Sc2tog twice, sc in next 2 sc, 2 sc in next sc, sc in next 3 sc. (9 sc)
9. Sc in ea sc around. (9 sc)
10. Sc2tog twice, sc in next sc, 2 sc in next sc, sc in next 3 sc. (8 sc)
11. Sc in ea sc around. (8 sc)
12. Sc2tog twice, 2 sc in next sc, sc in next 3 sc. (7 sc)
13. Sc in ea sc around. (7 sc)
14. Sc2tog, sc in next sc, sl st in next 3 sc, sc in next sc. (3 sc, 3 sl st)
15. Sc in ea st around. (6 sc)
16. Sc in next sc, sc2tog, sc in next 3 sc. (5 sc)
17. Sc2tog, sc in next 3 sc. (4 sc)
18. Working in FL, sc in next 4 sc, sl st in FL of next sc; FO, leaving an end long enough
to close the end of the tail. (4 sc)
• Stuff the tail lightly. Thread the long end onto a tapestry needle, and sew a row of
gathering stitches going in and out of the outer lps of rnd 18; pull to gather and close.
Secure, and insert into tip of tail, pulling out several rnds down, to hide the loose end.
• Pin the tail to the dog’s back, where it begins to round off at the back end. Make sure
that the tail is centered. The end of the tail should curve inward toward the head.
Sew in place using the beginning tail threaded onto the tapestry needle.
NOSE:
1. With black, begin with an adjustable ring, make 6 sc in ring; do not join, pl rnd
marker. (6 sc)
2. 2 sc in ea sc around. (12 sc)
3. Sc in ea sc around. (12 sc)
4. (2 sc in next sc, sc in next sc) 6 times; FO with sl st in next sc, leaving long end for
sewing nose to muzzle. (18 sc)
• Center the nose on the end of the muzzle in the desired position. For a Dog A, attach
the nose having the bottom edge placed 2 sc above the beginning rnd. For Dog B,
center the nose over the beginning rnd at the front end of the muzzle. Thread the long
end onto a tapestry needle and sew the nose in place. When there is about ½-inch to
go, put a little stuffing inside the nose.
• For Dog A only: Using the same black yarn that the nose was made from, sew a
straight stitch beginning from the bottom center edge of the nose and going straight
downward the length of 6 or 7 rows. Again, change the look and expression of the
dog by making the line longer or shorter. Leave as is, or add a curved smile line
below and touching the straight line. Anchor the smile line in place with several tiny
stitches.
EYELIDS FOR PLASTIC EYES (Make 2) (Optional):
1. Ch 6 with dark beige, sc in 2nd ch from hook and in next 4 ch; turn. (5 sc)
2. Sk 1st sc, sc in next 2 sc, sc2tog; turn. (3 sc)
3. Sk 1st sc, sc in next sc, sl st in next sc; FO. (1 sc, 1 sl st)
• Adding or omitting eyelids is another way to change the look and character of your
dog. Have the top edge of the eyelid placed about the width of 2 rows, and the bottom
edge, slanted downward along the line of the furrows between the rows, covering
about the top half of the eye. Sew in place.
• Use a black pen to shade in a line all along the bottom edge of the eyelid.
• Use a pink pencil to shade the cheeks (optional).
EYES FOR DOG B (Crocheted Eyes – make 2):
1. Using black, begin with an adjustable ring, making 6 sc in ring, close ring tightly; join
with sl st in 1st sc, FO. (6 sc)
2. Join dark brown with sc in 1st sc, sc in same pl, 2 sc in ea rem sc around, sl st in same
pl with 1st sc. (12 sc)
3. (2 sc in next sc, sc in next 2 sc) 4 times, sk sl st; join with sl st in 1st sc, FO. (16 sc)
4. Join white with sc in 1st sc, sc in ea sc around, sl st in same pl with 1st sc. (16 sc, sl st)
5. Sc in ea sc around, sk sl st, join with sl st in 1st sc. (16 sc, sl st)
6. Working in BL, join dark brown with sc in 1st sc, sc in same pl, sc in next 3 sc, 2 sc in
next sc, sc in next 3 sc, ch 2, sl st in FL and left side bar of last sc made, (2 sc in next sc,
sc in next 3 sc) two times, ch 2, sl st in FL and left side bar of last sc made; join with sl st
in 1st sc; FO, leaving long end for sewing to head. (20 sc, 2 picot)
Add Eyelid:
1. With top edge and WS of eye facing you, join MC with sl st in 1st picot. Working in
FL, sc in next 3 sc, 2 sc in ea of next 3 sc, sc in next 3 sc, sl st in 2nd picot; turn. (12 sc, 2
sl st)
2. Sk sl st, sc in next 5 sc, sc2tog, sc in next 5 sc, sl st in next sl st; turn. (11 sc, sl st)
3. Sk sl st, sc in next 3 sc, sc2tog, sc in next sc, sc2tog, sc in next 3 sc, sl st in next sl st;
turn. (9 sc, sl st)
4. Sk sl st, sc in next 2 sc, sc2tog, sc in next sc, sc2tog, sc in next 2 sc, sl st in next sl st;
turn. (7 sc, sl st)
5. Sk sl st, sc in next 2 sc, sc2tog, sc in next 2 sc, sk next sc, sl st in next sl st; turn. (5 sc,
sl st)
6. Sk sl st, sc2tog, sc in next sc, sc2tog, sl st in next sl st; turn. (3 sc, sl st)
7. Sk sl st, sc2tog, sk next sc, sl st in next sl st; FO. (1 sc, 1 sl st)
8. Fold eyelid down over the front of the eyeball; with RS facing, join dog color with sl
st in 1st row end that is attached to 1st picot, sc in next 4 row ends, sc in next 2 st, sc in
next 4 row ends, sl st in last row that is attached to 2nd picot; FO, leaving at 4″ tail. (10
sc, 2 sl st)
• With white, sew a small straight stitch onto the eyeball from the center of the black
pupil to the top edge of the pupil.
• Roll a small amount of stuffing into a ball just large enough to fit into the orb of the
eyeball. With the stuffing in place, pin the eye to the face in the desired position. Sew
the eye to the face:
a. With white, sew the bottom half of the eye to the face just inside the row of white
stitches that is closest to the bottom of the eye.
b. Using same yarn/thread used for dog, sew the top half of the eye to the face
working around the top edge of the eyelid.
c. Using dark brown, sew the brown outer edge of the bottom half of the eye in
place.
d. Pull all loose ends inside the head to hide them.
• Using a dark brown pencil or marker, shade along the bottom edge of the eyelid.


MOUTH FOR DOG B:
1. Ch 20 with black; FO, leaving a long end for sewing to face.
• With RS of ch facing out, pin the ch to the face in the shape of a big smile, having
about 4 rows between the edge of the nose and the mouth.
• If desired, shade dog’s cheeks with pink pencil.
COLLAR:
1. Ch 4 with red, sc in 2nd ch from hook and in next 2 ch; ch 1, turn. (3 sc)
2 – 54. Sc in next 3 sc; ch 1, turn. (3 sc)
55. Row 55 is RS. Sc in next sc, hdc in next sc, sc in next sc; FO. (2 hdc, 1 sc)
BUCKLE:
1. With RS of collar facing, join yellow or gray with sl st in 1st free lp of row 1, ch 1, sc
in same pl, sc in next free lp, 2 sc in next free lp, ch 8, join with sl st to beg sl st. Be
careful not to twist the ch; FO. (2 sl st, 4 sc, ch-8)
FINISH COLLAR:
• Ch 8 with red; FO. Sew one end of ch-8 to WS of row 4 of collar, wrap it across
the RS of the collar, and sew the opposite end of the ch-8 to the WS of row 5 on
this side (be careful not to twist the ch). Weave loose ends.
• Weave loose ends of buckle.
• With RS out, wrap the collar around the dog’s neck. Insert the end through the
buckle, and through the ch-8 retaining strap. Tack the overlapping part of the
collar in place in several locations.
• If desired, tack the buckle with a tiny stitch to keep it in place. Using the same
color as the buckle, make a small straight stitch in the center of the collar just
inside the buckle, to represent the buckle prong.