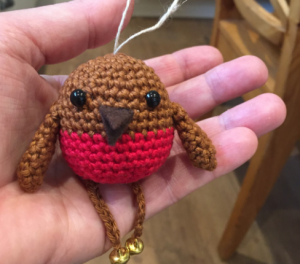
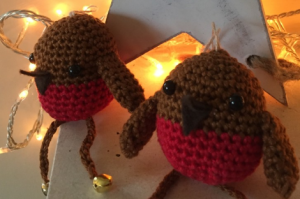
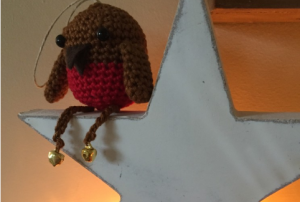
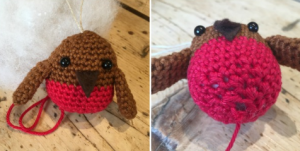
Amigurumi Crochet With Kate: Christmas Robins Free Pattern
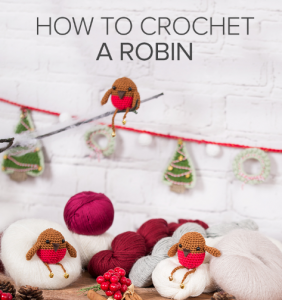
There can be nothing more Christmassy than a little Robin Redbreast and with this quick and easy pattern you can have a whole choir of them to sing you through Christmas!
They are light enough to hang on the Christmas tree or small enough to be the perfect stocking filler.
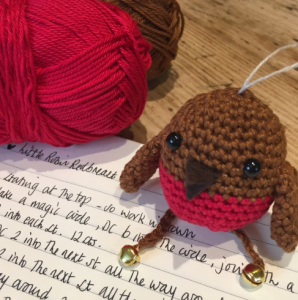
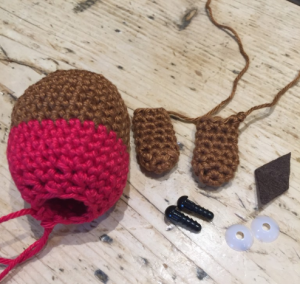
For my robins I used Lana Grossa Cotone in Rot (18) and Braun (37) and a 3.5mm hook.
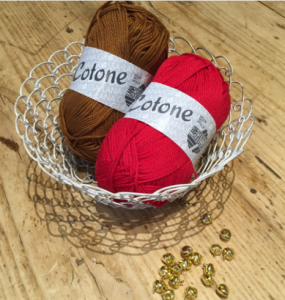
You will also need:
some string to make a hanging loop,
a small amount of toy stuffing,
a small amount of brown felt for the beak,
a couple of bells for his feet
and two toy safety eyes. I used size 6mm eyes. Alternatively you could use black thread to sew the eyes instead.

The body: As we are starting at the top of the robins head you will be beginning with the brown yarn.
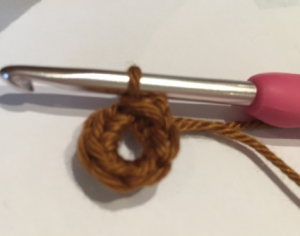
Round 1: Start by making a magic ring and double crochet 6 in to the circle. Join with a Slip Stitch.
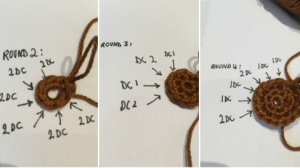
Round 2: double crochet 2 into each stitch from the first round. 12 sts.
Round 3: double crochet1 and then double crochet 2 in to the next st. Continue this all the way around. 18 sts.
Round 4: double crochet2 , then double crochet 2 in to the next st. 24 sts.
Round 5: Work a straight round of double crochet. 24 sts.
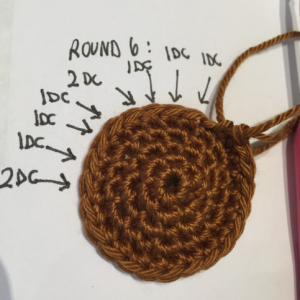
Round 6: double crochet 3, double crochet2 in to the next st, all the way around. 30 sts.
Rounds 7 to 10: Work straight rounds of double crochet. 30 sts.
Now join in the red yarn.
Rounds 11 to 14: Work a further 4 rounds of double crochet. 30 sts
You are now ready to start the decreasing that will finish off the robins body.
Round 15: double crochet 3 , then double crochet 2 together all the way around.24 sts.
Round 16: double crochet 2, then double crochet 2 together all the way around. 18 sts
There are now just 2 further rounds before you finish the body, but I find this is a good time to add the features and begin the stuffing
Start off by sewing a short hanging loop at the top of the body and then sew on the two wings.
To make the wings:
Make a magic ring and double crochet 4 in to the circle.
Join with a Slip Stitch. Work 2 double crochet in to each st, 8 sts.
Work 6 rounds of double crochet. 8 sts. Finish off.
To make the beak I cut a diamond shape from brown felt, folded it in half to make a beak shape and stitched it on to the brown part of the body.
Place the eyes in position and secure with the plastic backs.
Then carefully stuff your robin,
And once he is plump enough work your final two rounds as follows:
Round 17: double crochet 1, double crochet 2 together all the way around. 12 sts.
Round 18: double crochet 2 together all the way around. 6 sts. Finish off and using the yarn end run a few gathering stitches around the bottom of the robin and pull up to close. If you need to add a final bit of stuffing do this before the you close the body up.
The final step is to add the robin’s legs.
Using the brown yarn make a chain of 25, finish off.
Using a needle thread this chain strip in to the base of the robins body.
Once this is in the correct position use the yarn at each end of the chain strip to sew your bells on to each end. Finish off your yarn by threading the rest of the yarn end back up through the chain and attach it in the main body.
And there he is ……
your little Christmas robin!